Container Tomcat Graph - part 2
Note: I wrote this post 3 years ago, and somehow forgot to publish it. It may contain incomplete sentences, and may be complete nonsense, I am not going to re-read it. Proceed at your own risk.
Last time, we covered creating a new Tomcat project, and running it locally with Docker. This blog post is going to take us through deploying our docker image to Google Cloud’s Container Engine. In future posts, I’ll cover using AngularJS as a frontend, and adding in the Titan graph.
Here are the technologies that I’m going to use to build this app:
- Google Container Engine
- Gradle
- Docker
- Kubernetes
- Tomcat
- Titan DB (graph database)
- AngularJS 1.x (frontend)
As a prerequisite, to this, you’ll need to have Docker and Google Cloud tools set up locally, and run through part 1 of this series.
Google Container Engine
Now that we’ve got something building, we want to push it off to Google and run this in the Google Cloud, to do that we will use Container Engine. Container Engine is a product that allows you to run Docker containers on Google Cloud Platform. There’s another tool that we’ll need, called Kubernetes, in order to get this done. Check out the Getting Started docs to enable the API, and install the necessary tools.
Creating a Cluster
When you click the button in the ‘Getting Started’ page, it will prompt you to define a cluster. I’d suggest specifying a size of 1, and a smaller instance type. We can always go back later and change the definition if we need to.
Once you’ve built your cluster in the Cloud Console, you’re going to want to set that as your default cluster in the command line tool (where NAME is the name of the cluster you created):
$ gcloud config set container/cluster NAME
Then authenticate yourself:
$ gcloud container clusters get-credentials NAME
Google Container Registry
Great, now we’ve got a cluster, but how do we get our Docker image to our cluster? Kubernetes pulls images from a registry, so we need to get our image into a registry. However, we don’t want to push it to the public Docker image registry, because this is our app, not a general purpose image that should be reused by other people. There’s a solution for this, called Google Container Registry, which is a private Docker registry that you can use with Kubernetes. In your Container Engine console, there’s a section for ‘Container Registry’.
Check out the Google Container Registry docs, where it talks about endpoints. There are some global region specific endpoints, and for this post, I’m going to use the us.gcr.io endpoint, since I want my image hosted in the US. Here are the list of endpoints:
- us.gcr.io - United States
- eu.gcr.io - European Union
- asia.gcr.io - Asia
- gcr.io - default, try to pick one of the others
- b.gcr.io - existing Google Storage buckets
Secure Tomcat
Before I get to uploading our container, I need to revisit something from the previous post, which was the tomcat-users.xml file.
See if you can spot the huge security flaw in that file. Hint, take a look at the user section. Obviously, setting both the username and password to ‘admin’ is very bad, and will result in your container being compromised quite quickly (as was mine). I suggest generating random values for both name and password. A better solution would be able to disable this altogether. One way that you can do for that is to rename the ‘war’ file that you upload to ROOT.war.
That said, I would not take my advice as the final word, and go research a bit on how to secure Tomcat. Either that, or don’t run the service publicly.
If your service gets compromised, you’ll get a friendly note from Google Cloud Compliance, informing you that your project will be shut off if you don’t fix it. (The tag in GitHub for the sample code for this post is not terribly secure, you may want to modify it yourself.)
Upload Container
Here’s the script that I’m using to tag and push containers:
There’s a lot going on in this script. I would suggest running it line by line manually, to make sure that everything works correctly.
The first couple of lines should be familiar, we’re basically just building the project, then building a Docker image. Next, we create a tag and endpoint with the Google Cloud tool, which will allow us to then push the built container image to Google Cloud’s private Container Registry.
It may take a couple of minutes for each of the next commands to complete. Run the Kubernetes tool to create a pod, referencing the image that we just uploaded, and giving it a name. Note, that you are limited to a 24 character, alpha-numeric name. It may allow you to create a pod and replication controller with an invalid name, but that will cause problems later. Finally, we can add the pod to a load balancer to get public traffic pointing to it.
Testing it out
Here’s what it looks like when you run ‘describe’ shortly after creating.
Note that it says “Creating load balancer”, then “Created load balancer”. This threw me initially, but it looks like it logs recent events, as opposed to giving the current status. The important bit is the LoadBalancer Ingress IP, which you can hit with your web browser, using the port you defined in Docker, and exposed in Kubernetes, and the path that you used when you ran this locally.
It works!
Monitoring resources
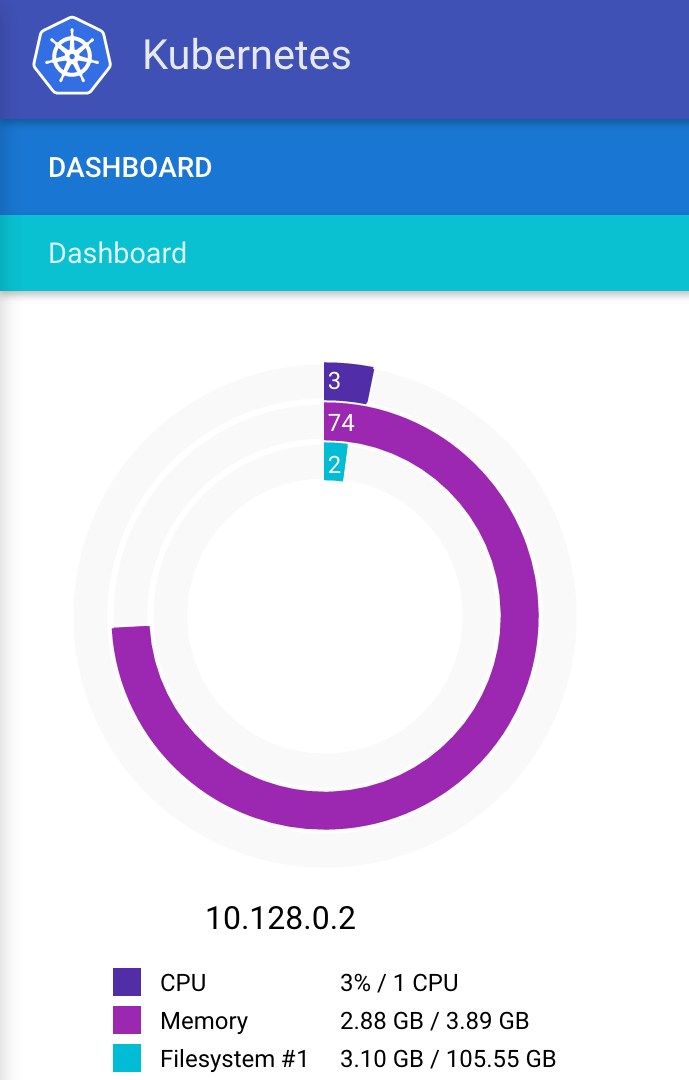
Guess what! Kubernetes for Google Cloud ships with this great set of monitoring utilities built in! This is really helpful to show you what resources are being used, and what exactly is running on the box. It’s not perfect, and there are still some holes in the knowledge, but it gives you a lot of information that isn’t in the Google Cloud Console, and you don’t need to do anything yourself to set this up.
(Hint, you may need to refresh the KubeUI page to get it to load after logging in.)
Conclusion
This was a very simple ‘Hello World’ example, but it does demonstrate how to build a Docker container image, deploy it to Google Cloud, build a Kubernetes cluster, deploy the Docker image to the cluster, and then access it. Wow, looking back, we got a lot done!
Next time, we’ll take a look at defining a simple Graph Database, and adding it to our Tomcat application. Keep an eye out for part 3 in this series!
Container Tomcat Graph - part 3
Note: I wrote this post 3 years ago, and somehow forgot to publish it. It may contain incomplete sentences, and may be complete nonsense, I am not going to re-read it. Proceed at your own risk.
So far in this series, we have created a new Tomcat app, added it to a Docker container, and run that container in Google Cloud with Kubernetes. This blog post is going to cover adding in a Titan graph as data store. And we’ll wrap up with using AngularJS as a frontend in the next post.
Here are the technologies that I’m going to use to build this app:
- Google Container Engine
- Gradle
- Docker
- Kubernetes
- Tomcat
- Titan DB (graph database)
- AngularJS 1.x (frontend)
As a prerequisite, to this, you’ll need to have Docker set up locally, and run through part 1 and part 2 of this series.
The Graph
We’re looking at building a graph today, so we should probably first talk a little about what the graph will be modeling. I figured that it would be best to keep it simple.
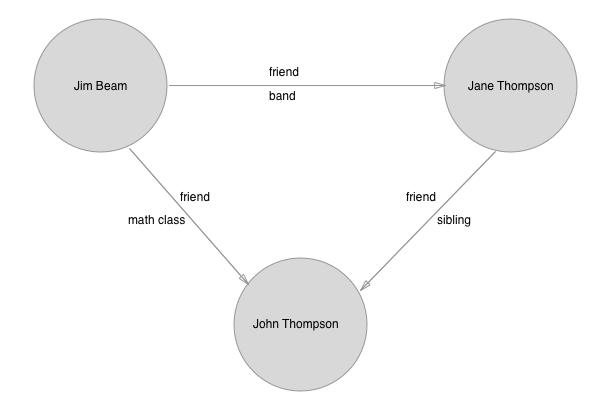
As you can see, there are a couple of parts here to pay attention to. In the above image, the circles represent nodes in the graph, also called vertices. The arrows represent edges, which are in this graph directional.
We also have properties on both the vertices (nodes) and edges. The vertices hold a first and last name, and the edges have two labels, one is ‘friend’ for all of them, and the other is a property that describes how the two people know each other.
Now, one thing to note right away is that it’s a bit strange in this case to have a directional edge.
Titan DB
For this post, we’re going to use Titan DB as our Graph Database. Titan is an open-source graph database, and implements the Apache TinkerPop 3 stack. Most of what you’re going to care about is a part of TinkerPop called Gremlin. Gremlin is the domain-specific language (DSL) that you’ll be using to traverse the graph. There’s a very helpful Getting Started guide on the TinkerPop site.
I know that this is a fairly poor explanation so far, but honestly, your best bet is to go research this a bit, because it is kind of complicated. Once you wrap your head around the model, things will start to make sense.
There’s only a little bit of Titan-specific code that we’ll be using to get the ball rolling. From there, it’ll be pretty much just Gremlin GraphTraversals.
The first thing that we’ll do is add Titan to our build.gradle file.
init Titan
Next up, we need to initialize the graph. We’re going to be running this one in-memory within our application. It may not be how you want to run in production, but it is the quickest way for us to get something up and running to poke around with.
The above is pretty much taken straight from the Titan docs, and molded from several open source examples.
Nodes and Edges
Now that we’ve got that, let’s talk a little about our data model. If you take a look at the image at the top of the post, that’s what I was thinking, people and relationships. People have names, and know other people, along with how they know each other. In this sample, we’re going to be using directional edges, and only one edge between two nodes. Titan is flexible on this, but one of my queries would go into a recursive loop if we were to have bi-directional edges.
The Person class is going to represent the nodes in our graph. We’ve got some basic properties, and want to be able to build the object from a vertex (Titan’s name for nodes).
There’s an important method call in the Person constructor, which is buildFriends(). That method does a traversal to find all of the other people that this person knows, and also captures the knowsFrom information stored on those edges. If you’re interested in breaking down this traversal, I would suggest taking a look at the Gremlin docs.
The Friend class is going to represent the edges in our graph. Here we have a basic traversal, and a method to create edges.
Servlet
All right, we’ve got our graph initialized, and have thought a little bit about data models. Now we want to query for things. What I’ve included as properties, should allow us to run some basic queries, and find relationships.
We’re building on Tomcat, so I think it makes sense to use a Servlet as our interface for making queries, and returning results.
There are two main parts to this servlet, init(), and doGet(). The init method initializes our graph with some nodes (vertices) and edges. Since we are running in-memory, none of this stuff is persisted between server runs.
The doGet method is our typical Tomcat servlet method, and it is what we are using to accept requests and build responses. As you can see, we accept queries on relationships and names. The supported names are full names.
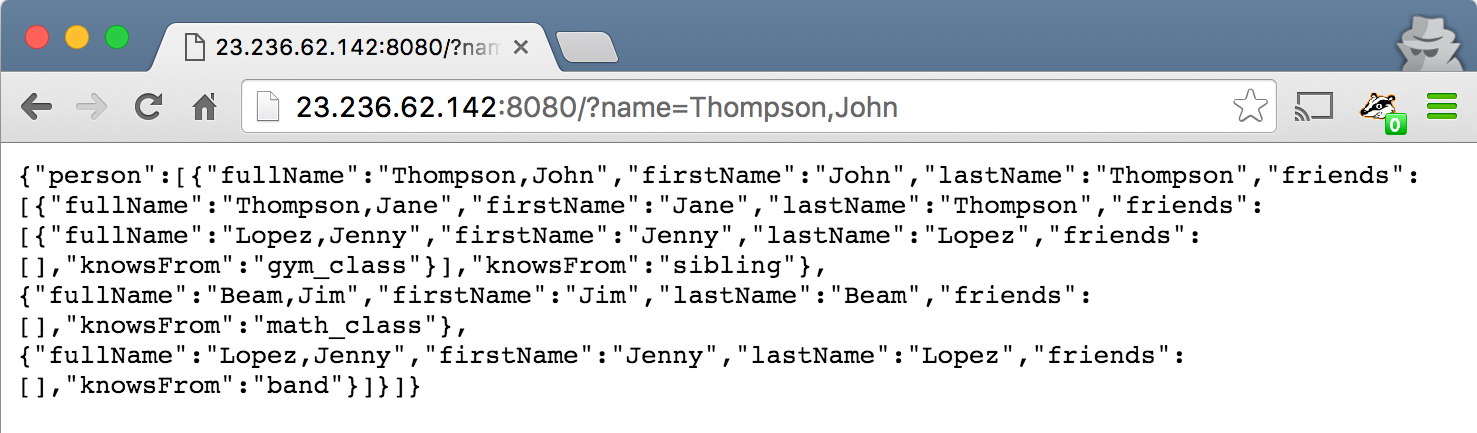
We can issue a request like this:
GET http://example.com:8080/?name=Thompson,John
And you should receive a response that looks like:
{"person":[{"fullName":"Thompson,John","firstName":"John","lastName":"Thompson","friends":[{"fullName":"Beam,Jim","firstName":"Jim","lastName":"Beam","friends":[],"knowsFrom":"math_class"},{"fullName":"Lopez,Jenny","firstName":"Jenny","lastName":"Lopez","friends":[],"knowsFrom":"band"},{"fullName":"Thompson,Jane","firstName":"Jane","lastName":"Thompson","friends":[{"fullName":"Lopez,Jenny","firstName":"Jenny","lastName":"Lopez","friends":[],"knowsFrom":"gym_class"}],"knowsFrom":"sibling"}]}]}
Or, formatted nicely:
As a note, you’ll also want to add gson to the build.gradle, again you can checkout the full source of the project for that.
Conclusion
We went super fast through this material, but I’m hoping that you were able to get something out of it.
MOD-t Tips

I’m writing a couple of notes to my future self about this printer.
This morning, I was trying to to swap out the pink filament with new white filament that I picked up on Amazon. The filament was completely stuck, I couldn’t unload or load or do much of anything with it. I found great GitHub repo for MOD-t utilities, and tried running the clean nozzle tool. (There’s a config file for Slic3r, a popular modeling tool for 3D printing. There are some calibration files, old firmware, and a clean nozzle utility.) That bought me a bit of pink filament dripping out of the nozzle. However, after some additional searching, I found this Google Group for the MOD-t, and on it, there was a really helpful post entitled “Clearing Filament Jam Without Opening MOD-t”. Basically, it said that the jam may be living above the nozzle, and if that’s the case, then what you can do is remove the hot end (nozzle), heat up the nut (with a soldering iron or something), and pull the jammed filament out.
I used tweezers to hold the filament inside the nut, and needle nose pliers to hold the tweezers. Then I heated up both the tweezers and the nut, and was able to pull the jammed bit of filament out. After that, I replaced the hot end, loaded the new filament, and was back in business.
Future self - if this happens again, try the above solution!
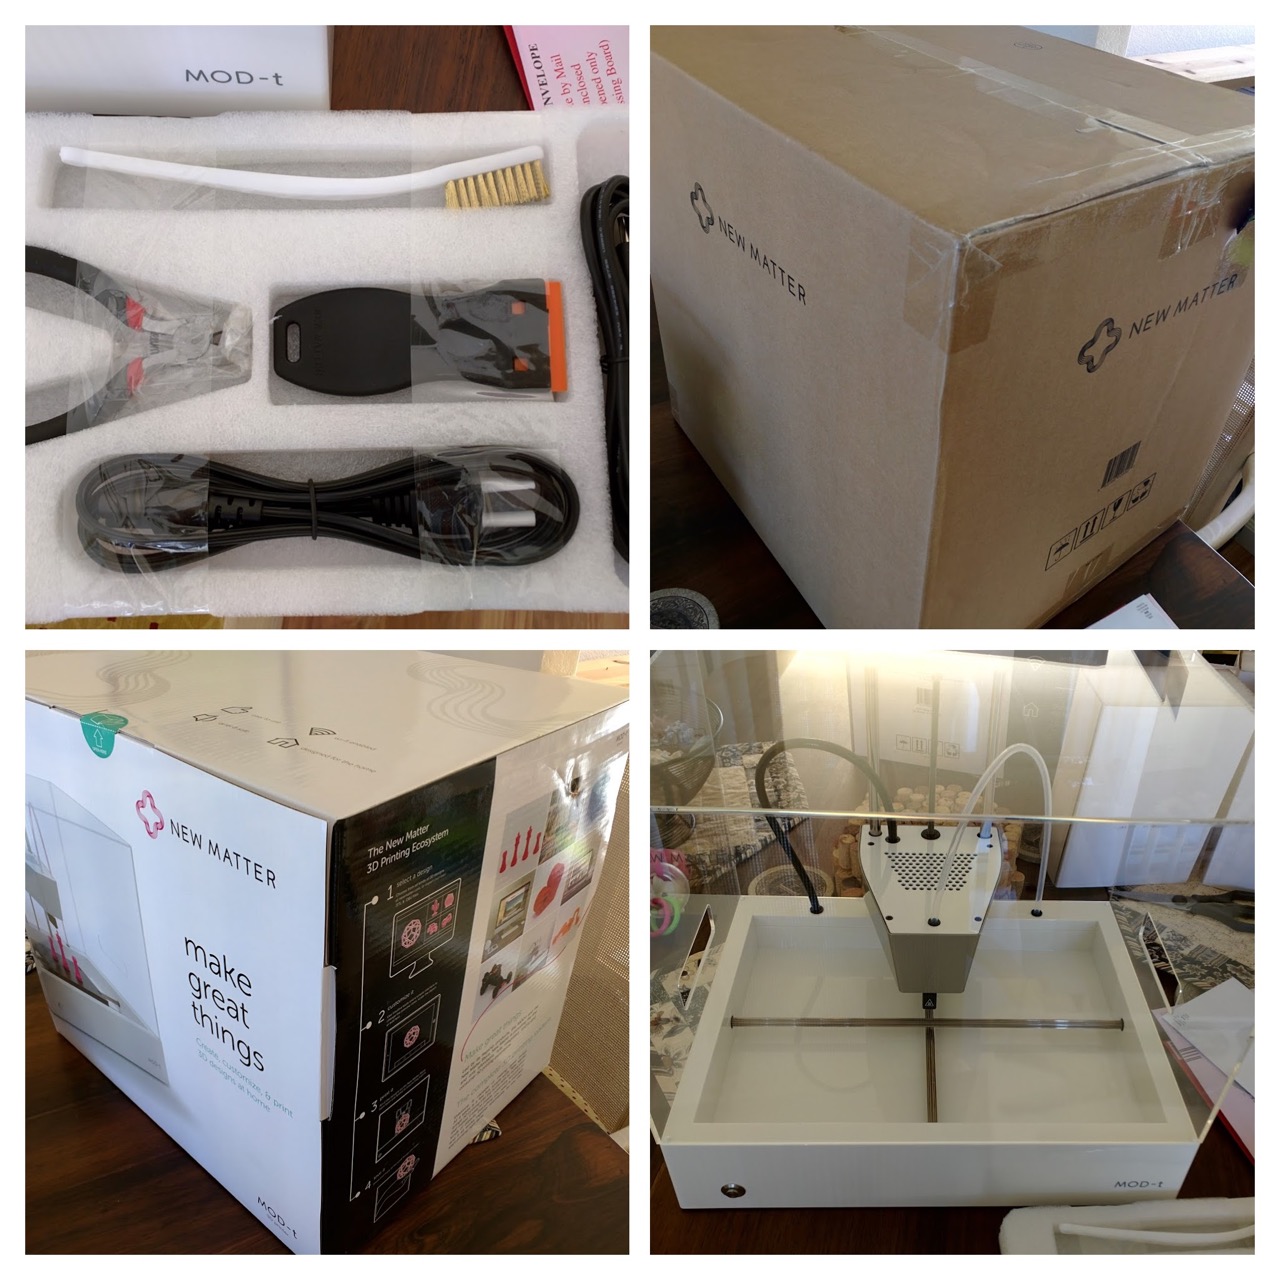
New Matter MOD-t Review - a 3D printer
Back in the beginning of November, I received a giant box on my doorstep. It was a 3D printer that I had backed on Indiegogo a year and a half earlier. The printer is a New Matter MOD-t. They were a bit late shipping, but that was not exactly unexpected, generally, I’m happy when crowdfunded projects ship at all. Either way, it was here, arriving just in time for me to be super busy with other things. We were on our way out to do something, so all I had time to do was pull it out of the box, and stick it on a shelf.
This past weekend, I finally got around to getting the thing actually set up, and running. While the setup was rocky, and the desktop app poor, the overall experience is actually better than expected. I’m very excited to see where New Matter takes this product.
The setup was not easy, the software tools that they provide for Mac don’t work well. I was able to get the firmware updated on the machine, but spent about two hours trying to get it to connect to WiFi. There was a bug in their installer and desktop app that shows an error and a ‘disconnected’ status, even when the WiFi is connected properly. Took me a while to realize that it had actually been connected. One of the problems with this is that it means that it’s impossible to complete the setup installation, including calibrating the thing and loading the filament. You can install the desktop app without completing the setup, so I did that.
After getting the desktop app installed, I tried getting on WiFi again (still didn’t realize that I was connected), and ran into the same bug described above. I decided to skip that, and try to get the test print going. Looking in the desktop app, they have a button called ‘Load Filament’, I tried that, and it asked me if I wanted to unload or load the filament. I needed to load filament, and it then gave instructions for first unloading filament, and then a button to press for loading filament. I pressed the button and nothing happened. It took me quite some time to figure out that you needed to restart the printer while on that screen in the app before that button would become active. (Restarting the printer is part of the unload filament process.) Figuring that bit out, I was able to get the filament loaded and the test print going.
This is about the time that I figured out that the printer was really connected, and showing up in the New Matter web app. Excellent! I loaded up some STL files from Thingiverse into my New Matter library, and sent them to the printer from the web. I was able to disconnect the printer from my MacBook, and let it run on its own. From here, I was able to basically get what I needed done with little to no issue.
For me, this is where the MOD-t really shines, and I think that New Matter has done a brilliant job. There’s no figuring out printer settings, or doing a deep dive into deeply understanding how FDM 3D printers work, you just go to the website, and hit ‘print’, then press a button on the printer. Simple. The problems that I experienced were all, 100%, on the desktop app side, which are easily fixable with updates.
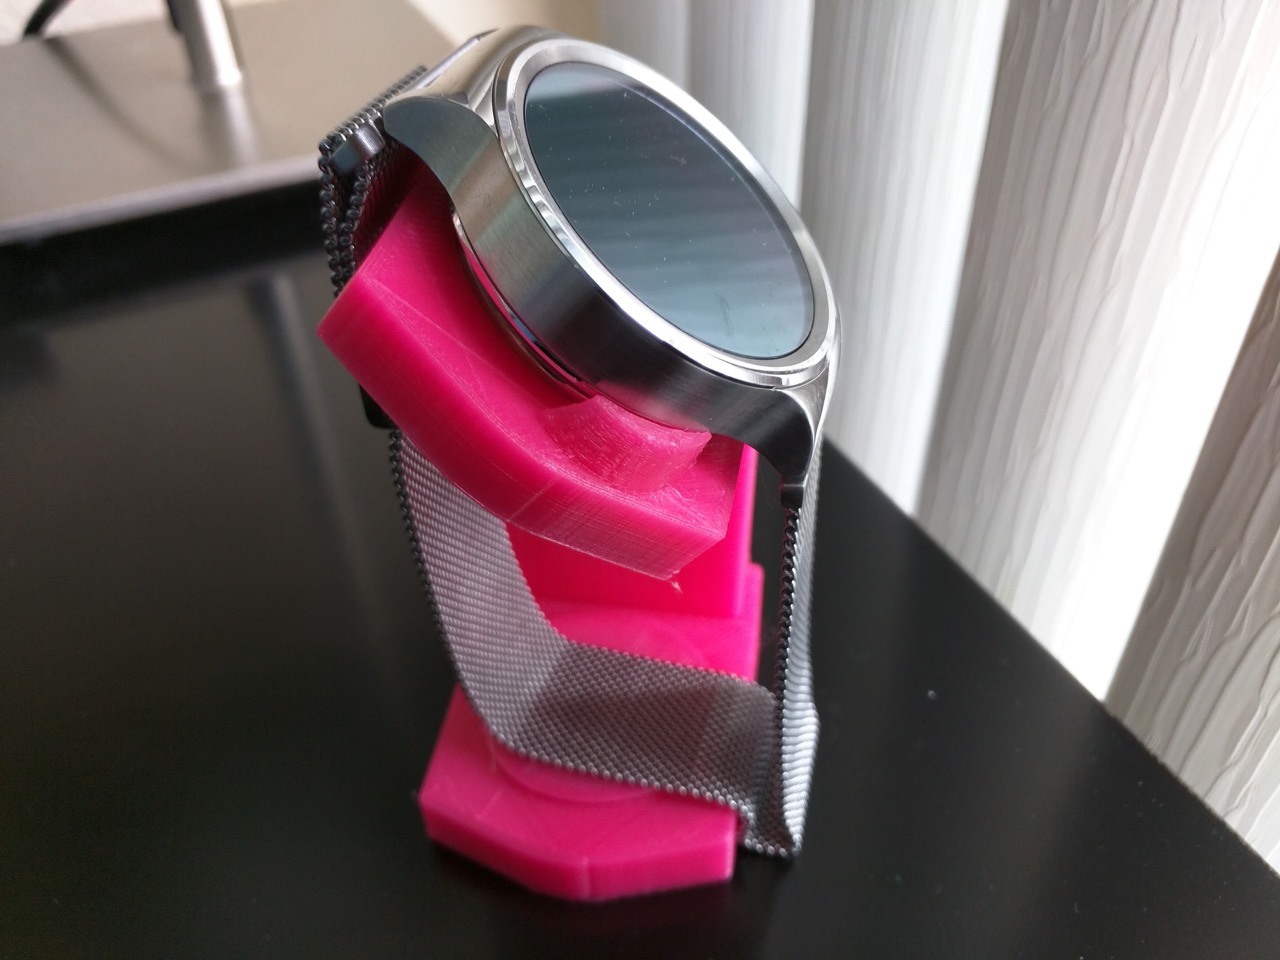
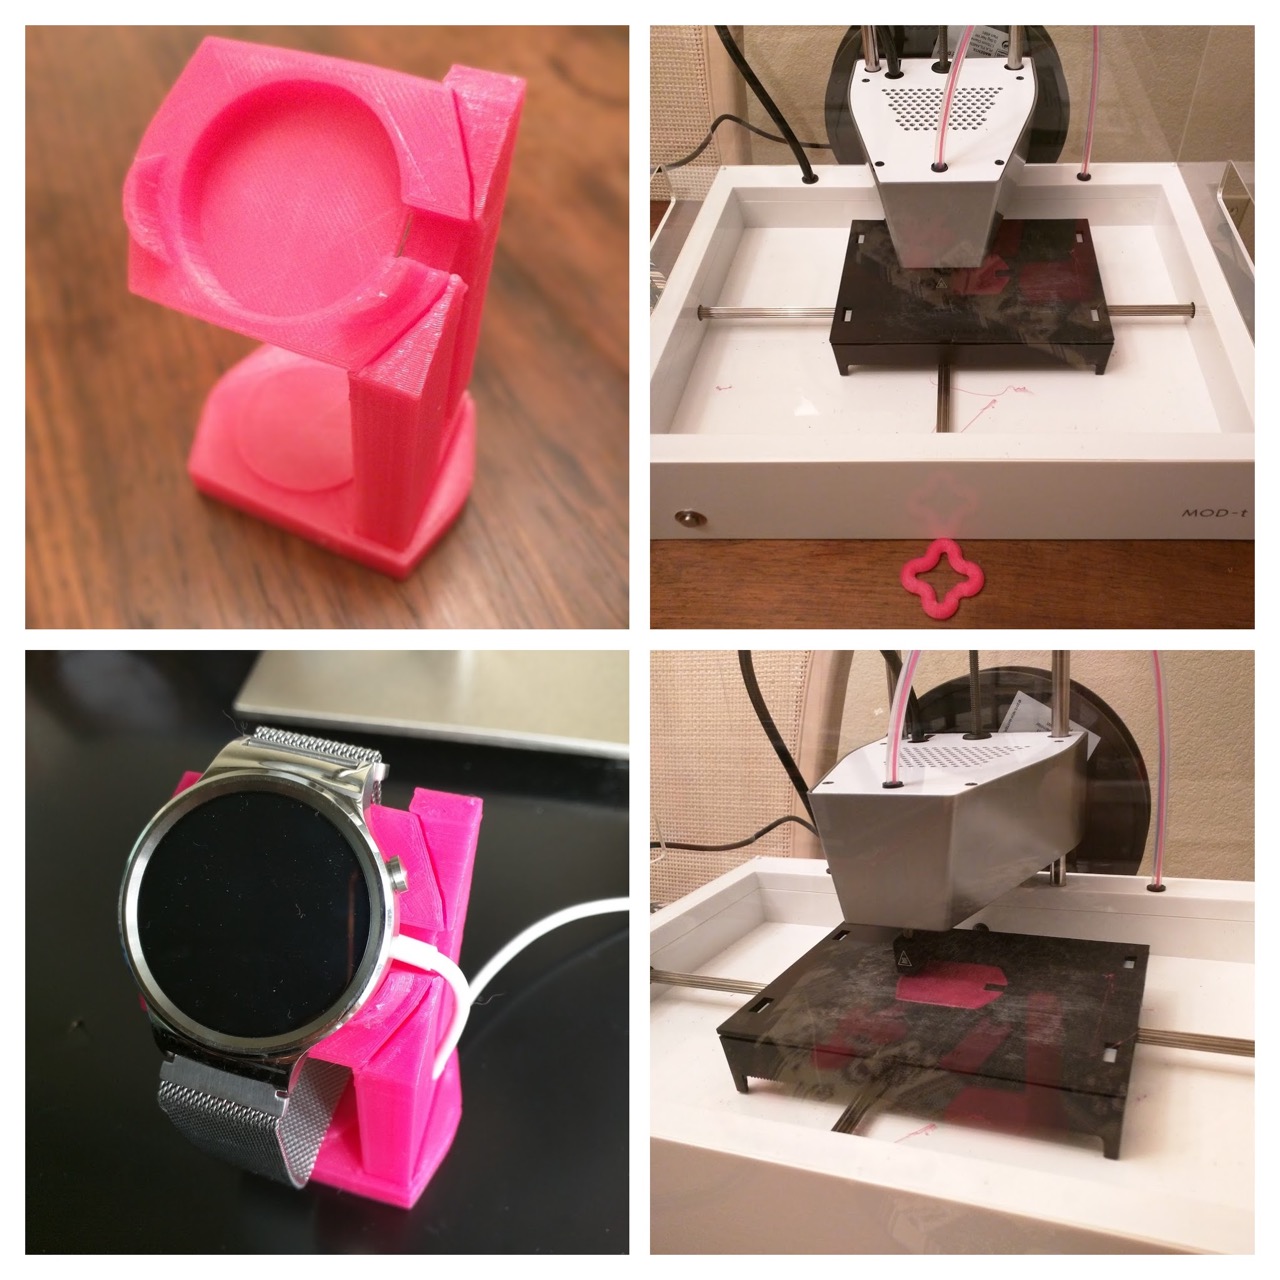
There were two little hiccups. First, the top part of the watch stand that I was printing kept failing. I needed to edit the STL file to fix it, but it wasn’t really New Matter’s fault. The file was set up to print with only a single edge on the print bed. I grabbed the Meshmixer app, rotated the part, re-uploaded, and it printed just fine. The other issue was that the New Matter web app doesn’t seem to handle printing multiple parts too well (or at all). You can add multiple parts to a thing in your library, but it will only print one of them, without giving you a way to select which one. The workaround is just to upload each part separately, and that’s not really an issue.
All in all, I’m very excited about doing more with this thing. I’ve already started printing a case for the PiGrrl 2 project that I’m working on, just waiting for some white filament to arrive for printing certain parts. The watch stand that I printed is great, and I saved myself $15 which is what they go for on Amazon. If you’re in the market for a 3D printer, and want something simple and relatively inexpensive, this is a good choice.
Roasting with Roastmaster and a BlueTherm Duo
I’ve been roasting coffee for 7 or 8 years. In that time, I’ve learned how to roast a great batch of beans that will make excellent, and easy to drink espresso. This tends to live somewhere between City+ and Full City+, usually right at Full City. Now, this is great, and I love the coffee that I roast, but I have realized that I haven’t really nailed the lighter roasts yet, specifically, roasting an excellent batch to City, where the bean is fully developed and has a rounded flavor.
The other thing that’s going on right now, is that I’m waiting for a new roaster setup, which is currently being built. The new setup is a BBQ top 5lb roaster from Coffee Roasters Club. The new roaster is going to be entirely manual, where I’ll completely control both the heat and time. Additionally, controlling the heat exactly is going to be tricky, since it’ll be done on the grill.
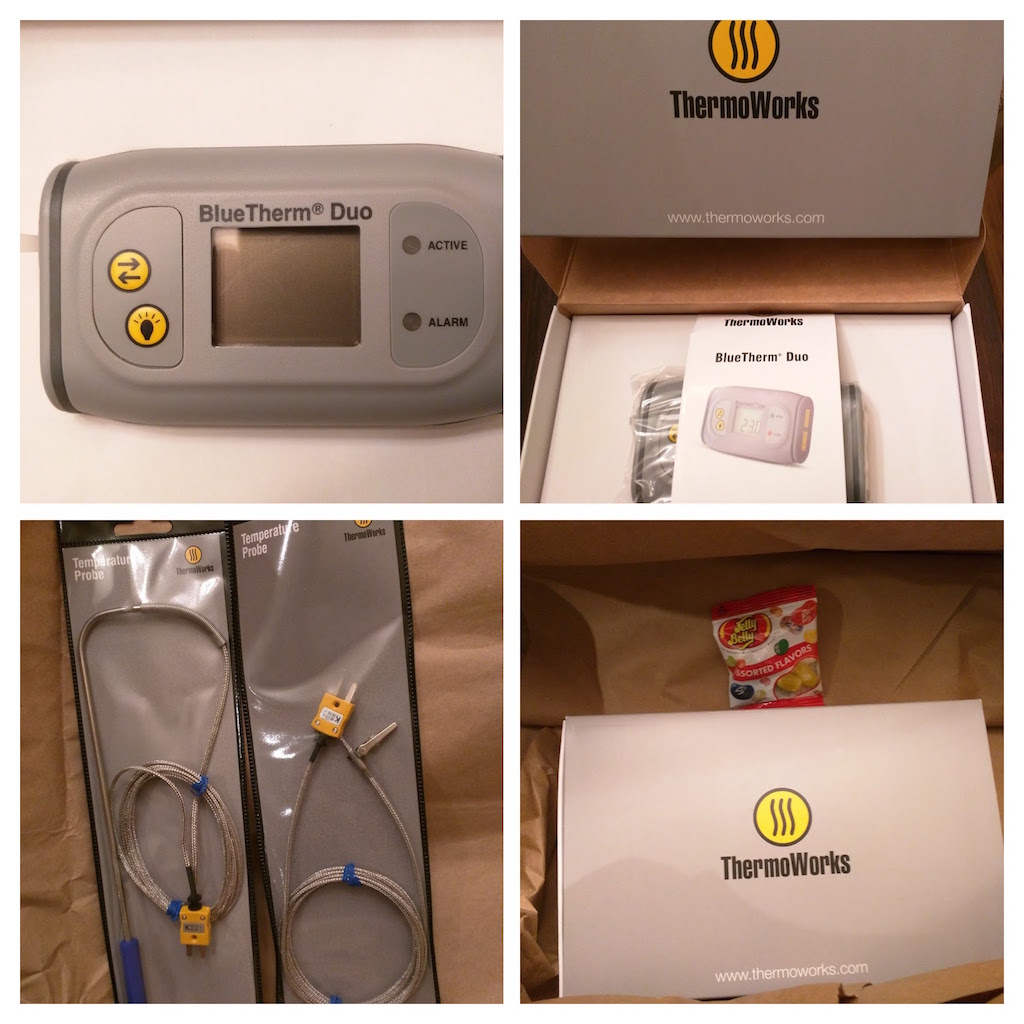
With the new setup, I needed some new tools. First, I knew that I would need some way to grab temperature data, and preferably to log it. There’s an app that a friend told me about called “Roastmaster”, which helps you manage just about everything involved with coffee roasting, and has an option to do data logging. I checked out which data loggers were supported, and found that the BlueTherm Duo looked like what I wanted. (I was looking for something bluetooth, with two probes, that could handle the heat.)
My BlueTherm came in the other day, and last night was time to roast some coffee.
Getting the BlueTherm set up was as easy as turning it on and plugging one of the thermocouples in. I opened the Settings on my iPad, and paired it with Bluetooth quickly enough. Getting it connected in the Roastmaster app was a little unintuitive, but it worked. Luckily, Roastmaster has excellent documentation, which I would suggest having a look at.
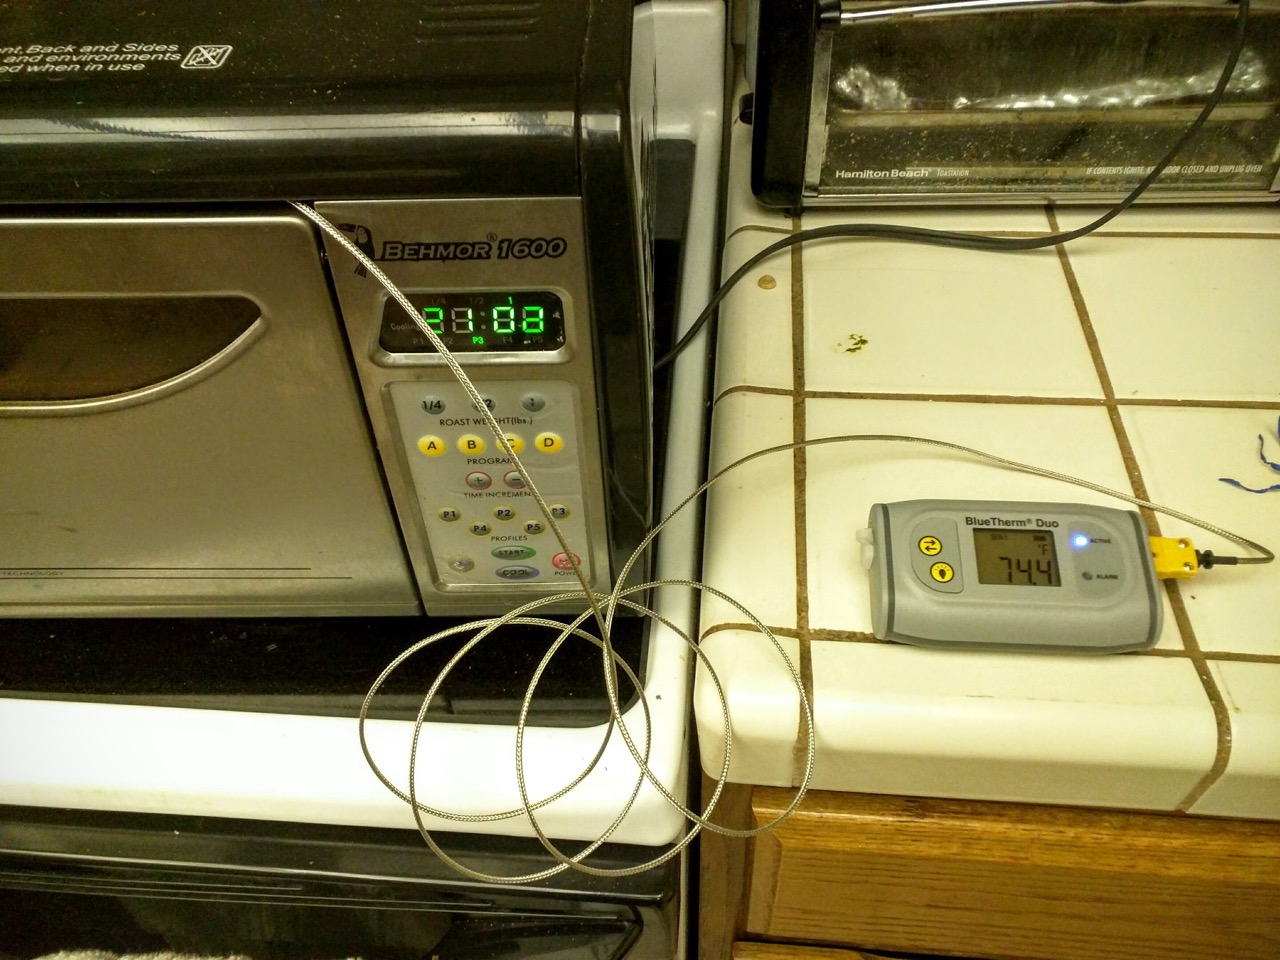
Now it was time to place the thermocouple. If you see the the two thermocouple leads in the BlueTherm photo you’ll notice that one has an alligator clip, and the other is a probe that you’d stick into something like a steak. The alligator clip one is the more useful one here. I clipped the clip onto the downward facing vertical part of the chaff tray, next to the drum. I maybe could’ve gotten it underneath the drum, I’ll look up ideal placement next time around. The lead wire is fairly thick, but I was able to let it out in the upper right corner of the roaster door, which allowed me to still close the door. All good.
I plugged things in, and got a roast ready to go, both with my roaster, and in the Roastmaster app. After the thermocouple was all set, and everything ready to go, I fired things up, and let it run.
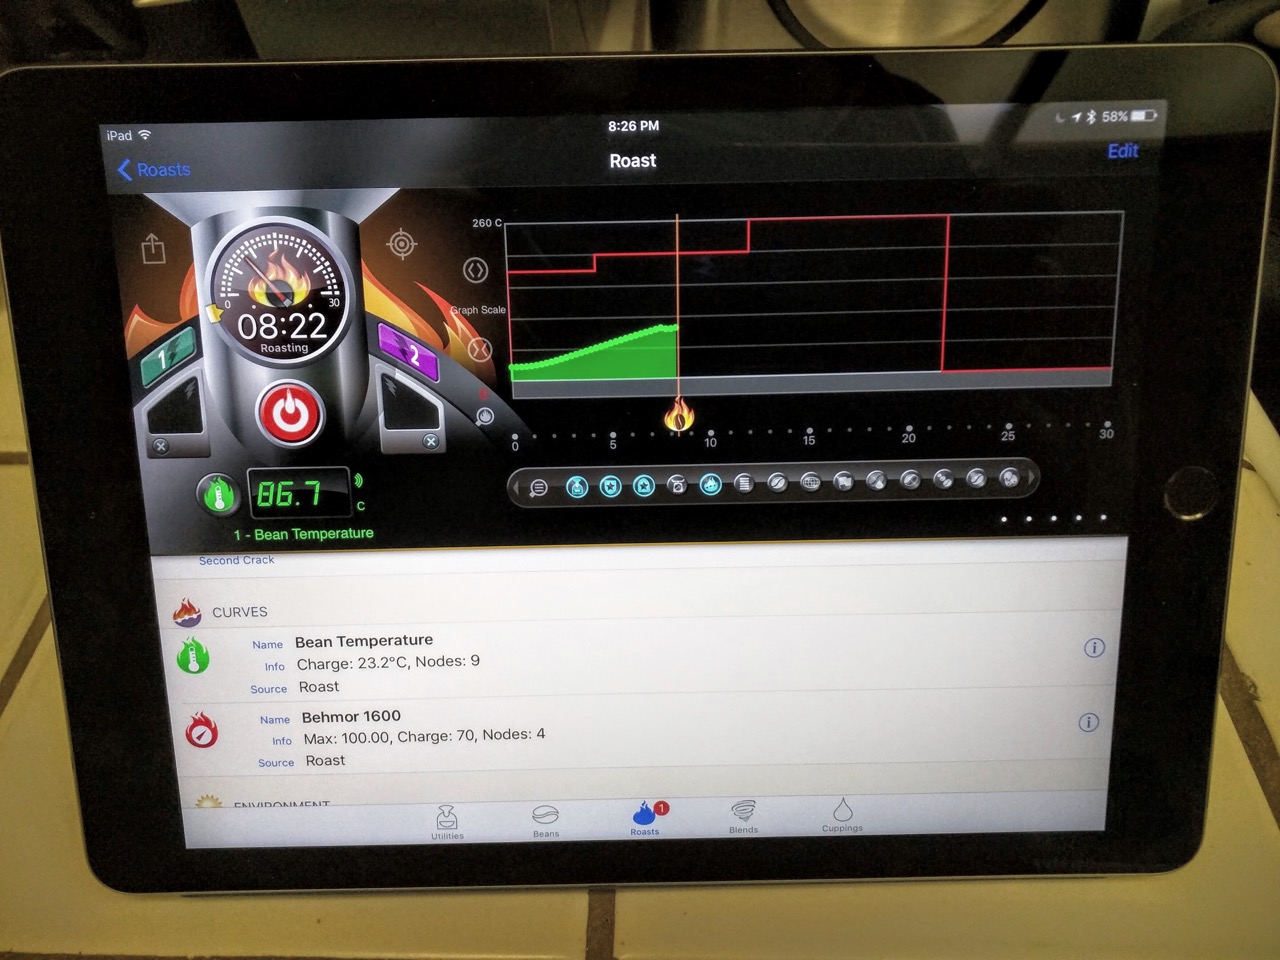
Getting good readings, and things are logging correctly. Yay!
In the app, there are buttons to record the first and second cracks. The app itself is fairly complicated, and there’s definitely a learning curve involved. That said, it’s an extremely useful tool, and I think that it will be indispensable to me going forward.
Something that I thought was interesting while I was roasting was that I could see how much heat was lost whenever I opened up the door to check on the progress. It’s funny, but it had never really occurred to me before that opening the door for a couple of seconds would have that much of an impact on the roast, but when I was logging the temperature data, it was clear that it dropped significantly, and took a bit of time to climb back up.
Another interesting finding was that opening the door during the Behmor’s cooling cycle does not cool it down faster than leaving the door closed (though it does make more of a mess). This seems counterintuitive, but I think that it was designed to get a lot of airflow, assuming the door was closed. It’s similar to a PC case that has been designed to maximize airflow through the components, opening up the case door does not make it cooler, it just screws up the airflow.
Here’s the finished product, something right around City+.
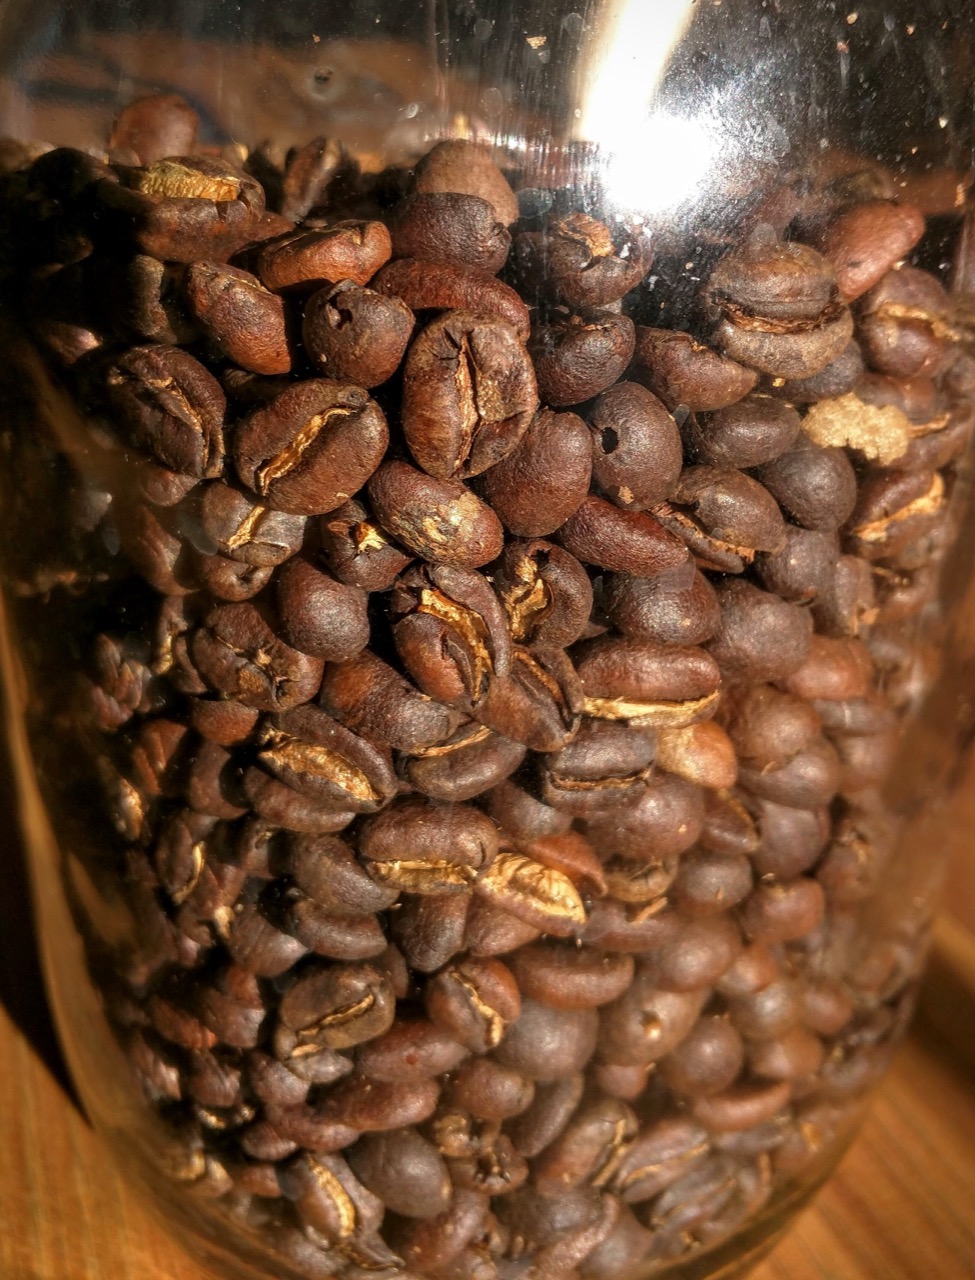
I pulled a couple shots of espresso this morning with it, and it was OK. I reviewed it with the Angel’s Cup app.
For me, working with the Behmor is still pretty tricky, but I would really like to learn how to improve on that machine before my new equipment comes next month. Going to a fully manual setup is a little daunting, and I’d like to use this last month to really push the Behmor and see what I can get out of it.
Free Coffee!
I drink some of the best coffee in the Bay Area, every day, for free. Here’s how I do it.
Step 1
This may sound like cheating, but the easiest way to drink amazing coffee all the time is to learn to make amazing coffee yourself. I’ve spent years working on this skill, learning a bunch of different methods of brewing and extracting coffee, learning what works and what doesn’t. For me, that’s more than just knowing how to make a good pot of coffee.
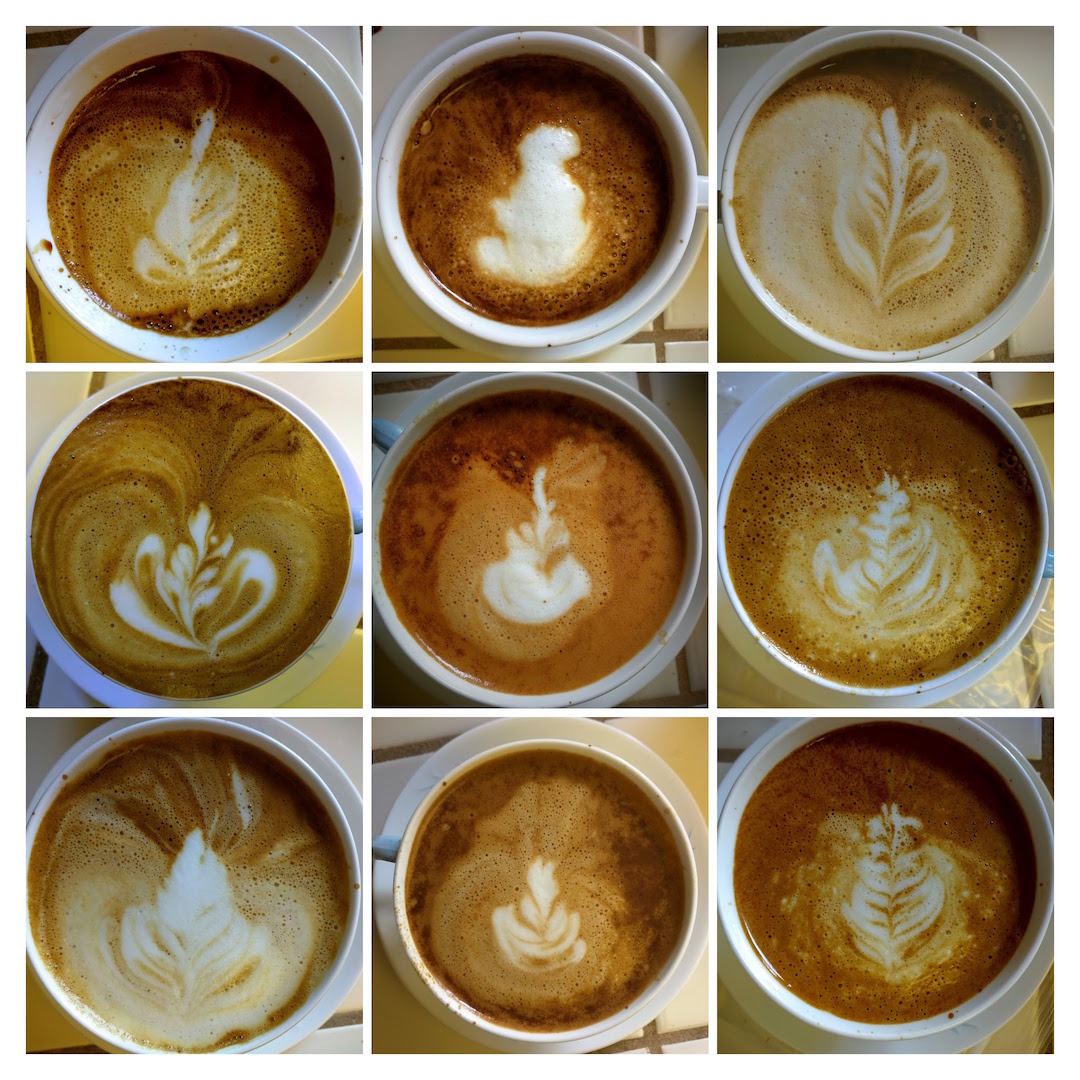
I worked at a couple of coffee shops when I was in high school and college. I’ve had an espresso machine at home for around 14 years now, and this past year is when I finally started getting the extractions that I wanted consistently. It doesn’t need to take 15 years to do, having good equipment helps a lot, and that was somewhat of a barrier for me until now. Even with a great espresso machine and knowing how to pull an excellent espresso, I’m still learning how to really nail the latte. I’ve been making progress:
Over the years, I’ve also learned pour-over, cold brew, siphon, and french press. I’ve done cowboy coffee on a few occasions. All this to say, that at home, I’m capable of making coffee that rivals most coffee shops around. No, I’m not better than Blue Bottle, or Chromatic, but most of the time, I don’t have a reason to buy coffee out.
Step 2
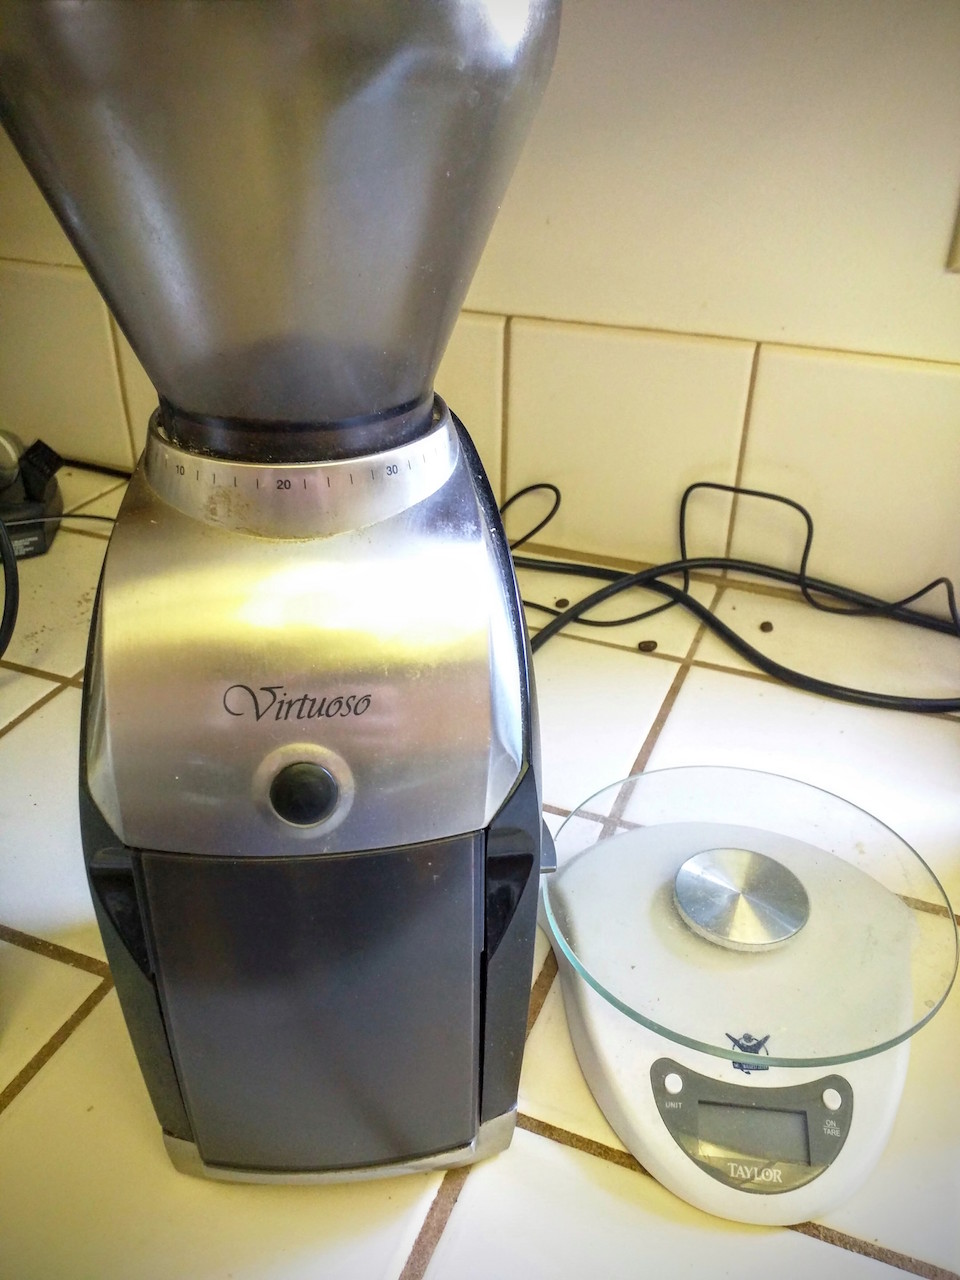
Get some good equipment. The first thing is a burr grinder. You’ll want to grind your coffee just before you brew it. It starts oxidizing very quickly once ground, as that happens the flavor disappears.
 <img alt=“grinder 2"width=“47%” src=“https://storage.googleapis.com/ejf-io/grinder_2.jpg">
I would also recommend a cheap kitchen scale, so that you can use a consistent amount of coffee, to make your coffee more consistent. A good rule of thumb is 7g of coffee per serving (6oz for drip, 4oz for french press).
If you’re into drip coffee, I’d suggest finding a drip machine that uses a stainless steel insulated carafe, instead of a glass carafe with a heating element. I would also try to find one that heats the water to between 190-200ºF, which is a typical suggested extraction temperature.
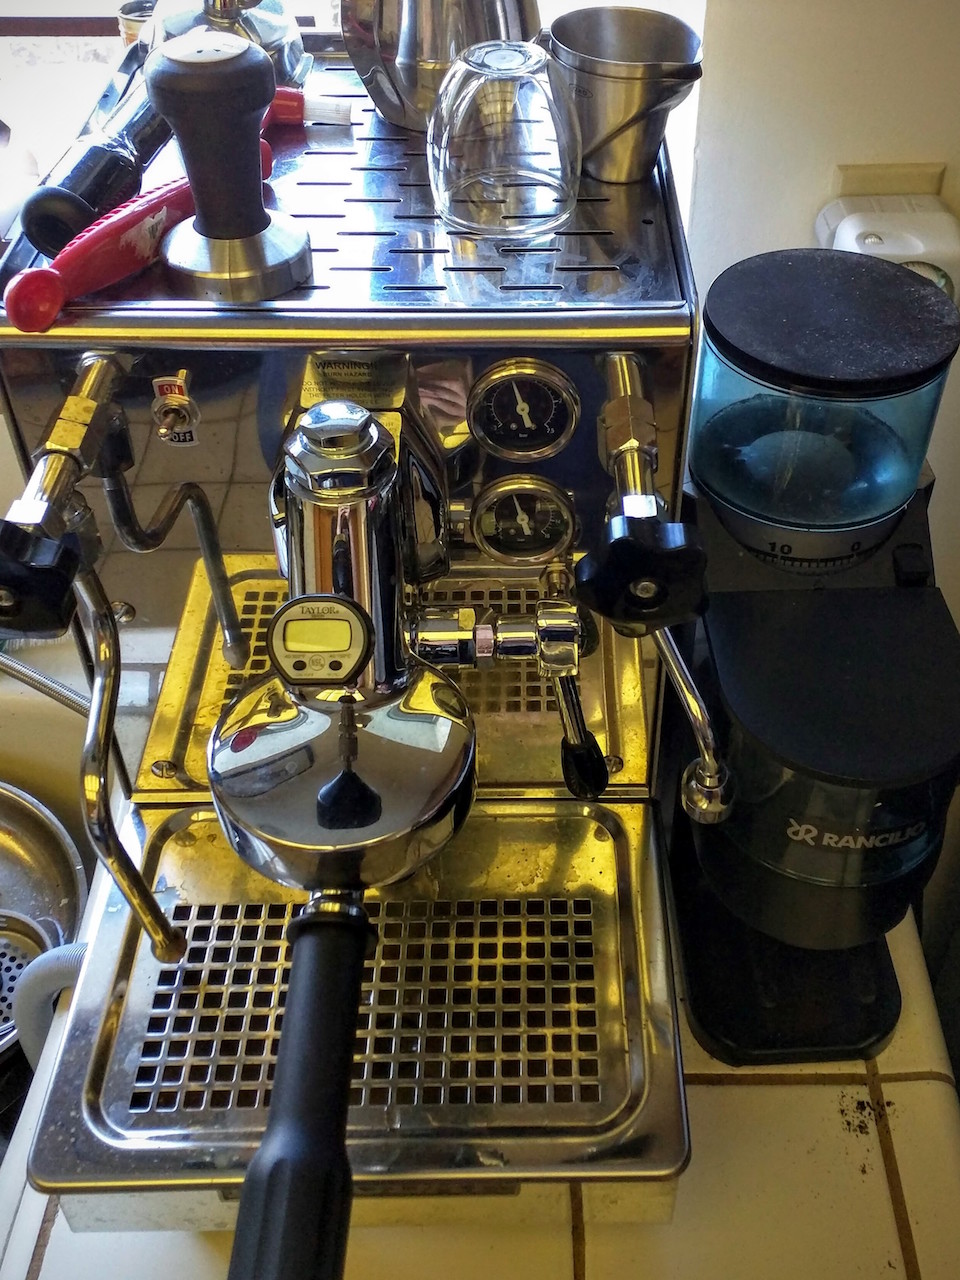
For espresso, you’ll probably want to start with a less expensive machine like a Gaggia and work your way up. I love my Expobar, it has delivered results that I have not seen on the lower end machines that I’ve used. Espresso is a bit of an expensive hobby.
Step 3
Roast coffee at home. This is where you start saving money. Roasting at home means that you get the freshest possible beans, for cheaper than the grocery store brand (probably). Can you buy 1lb of beans that were roasted yesterday for $6.50? If you can, then maybe you don’t need a roaster.
Roasting is a skill itself, and will take some time to get the hang of, but it’s totally worth it. If you are into espresso, the difference in flavor will be obvious, and you’ll start to wonder why you should pay for espresso out. You’ll be drinking the freshest coffee possible, and freshness is what brings you flavor.

Roasting is a bit of a hassle, but once you get into it, it’s really not that bad. I know the timing of my machine for the batches that I roast, so I know the 3-4 minute window where I need to be watching my machine, and paying close attention. (Warning, beans can catch fire while roasting, you’re going to need to know what to look out for in that case - primarily fire in your roaster.)
Step 4
Sell half of your roasted beans for twice what you bought them for raw. E.g., buy 1lb of raw beans for $6.50, roast it, sell half of that for $6.50. I tend to roast about 340g of raw beans, which comes out to around 290g roasted, and then sell 145g of that for $5. I tend to sell around 3 batches of the 145g beans per week, and drink about the same amount at home. Quick note here, I make sure to buy larger quantities of beans (12-16lbs) using Sweet Maria’s fixed shipping option to keep shipping costs low.
What’s great is that this is a good deal for your friend who’s buying it too. It’s cheaper for your friend than buying a higher end brand that is fresh. I sell mine by the gram, so 290g (~10oz) is $10, or $11.75 for 12oz. According to Instacart, buying coffee from Whole Foods would be expensive: Philz is $14.50 for 12oz, Blue Bottle is $12-14 for 8oz, Stumptown is $17 for 12oz, same as Ritual, SightGlass is $16 for 12oz, FourBarrel is $18 for 12oz.
Conclusion
Has it all been worth it? For me it has been. Since I started this whole process years ago, it’s difficult to calculate the savings. However, let me give it a try. Let’s say that 5 times a week, you go out for coffee, either for espresso, or a latte, or just a regular coffee. I’m going to assume that each trip is going to average $3.50. That’s $17.50 per week, or $910 per year. Let’s add to that making coffee at home, with some reasonable quality grocery store beans at $12/lb, where you go through 0.5lbs per week, that’s another $312 per year brewing coffee at home, and adds up to a total of $1,222 annually.
Cutting the investment above down to the bare essentials, you could pick up a 1lb roaster for $370 (Behmor 1600 Plus), a nice grinder for $130 (Baratza Encore), a Gaggia Classic for $300, and a pour-over v60 for $20. That’s an initial one-time investment of $820. If you get up and running roasting and selling your beans quickly, you could save money the first year, and even afford to get a nice espresso machine like mine by the second year, and still come out ahead.
Even if you ended up not selling beans, you’d likely use around 1lbs per week (making a bit more at home, and not going out), so you would spend around $338 annually.
It’s a bit of work roasting so frequently, but I really enjoy my time with my coffee.
Quitting Junk Food

I recently wrote about my New Year’s resolution of not quitting things, and it has taken me a while to figure out what to start. I could get into this circular logic loop and try to explain why I haven’t picked something yet, but that seems like a waste of pixels. Whatever, here goes.
For the next 30 days, I’m going to be eating healthier. I’m going to try this for one month, evaluate, and iterate. From today until Feb 26, each day, I am going to do the following:
- Track my eating on MyFitnessPal (MFP)
- Try to hit the following general numbers:
- Calories - 1800
- Carbs - 180
- Fat - 60
- Protein - 135
- Cholesterol - 300
- Sugar - 70
- For any day where I’m within 10% of every number, I will count that day as a success
- I will use a habit tracking app to track successful days
- Success of this goal will be 23 successful days of the 30
If you’d like to connect on MFP, my username there is emil10001.
Now for some questions to help me set exepctations. Doing something like this actually becomes harder when you write publicly about it, because you get feedback that your brain interprets the same way as it does if you’d actually accomplished the thing.
Why don’t I do this already, what are the barriers? Logging food in MFP every day is time consuming and cumbersome. I’m going ot try to cut down on how much effort it takes to do this, by creating recipes and standard meals that I can reuse and quickly enter. I also occasionally enjoy baking and eating sweets. I’m not saying that I’m going to cut this out completely, but I’ll at least be more consious of its impact, by logging those foods and cutting back as needed.
Alcohol is another one that could do with another round of cuts. I typically drink Old Rasputin Russian Imperial Stout, which is by far my favorite beer, but also around 300 calories per bottle. While I have significantly cut down my alcohol intake since the summer, I could afford to cut it further, even without cutting it out completely. Again, every time I drink it, I’m going to log it, and cut back as needed.
Why do I feel the need to do this now? What is the goal? What’s my motivation? This is something that I’ve been doing something off and on for years. It’s not new. My goals are basically two-fold, first to lose some excess weight, and second to feel better overall and be healthier. I feel like this is one of those little things that can really have a big impact on my daily mood, and how I feel about myself.
I have noticed in the past, that eating well tends to improve my mood, and how I feel about myself. Successfully doing this helps to motivate me to do other things that I want to do. I think that it is one of the most basic, simple things that I can do that will have a large impact.
It is going to be difficult to cut down on the junk, especially cutting down enough to get within 10% of my daily goals. But, I think that if I can allow myself to fail a little, and keep going, then I think that I will be able to complete this goal.
Blogging tools - creating Hugo blog posts from Android
I am starting this post on my phone. I realized that one of the roadblocks that I have is that the workflow for creating new blog posts from my phone was nonexistent. I had a git client, and a Markdown editor, but Hugo uses special headers, and I also needed to be able to publish on my server.
Here’s what I did:
- Built an Android app to generate the header, and add it to my clipboard. Source
- Add a script to my server for easy publishing.
- Set up JuiceSSH, so that I can log into my server from my phone.
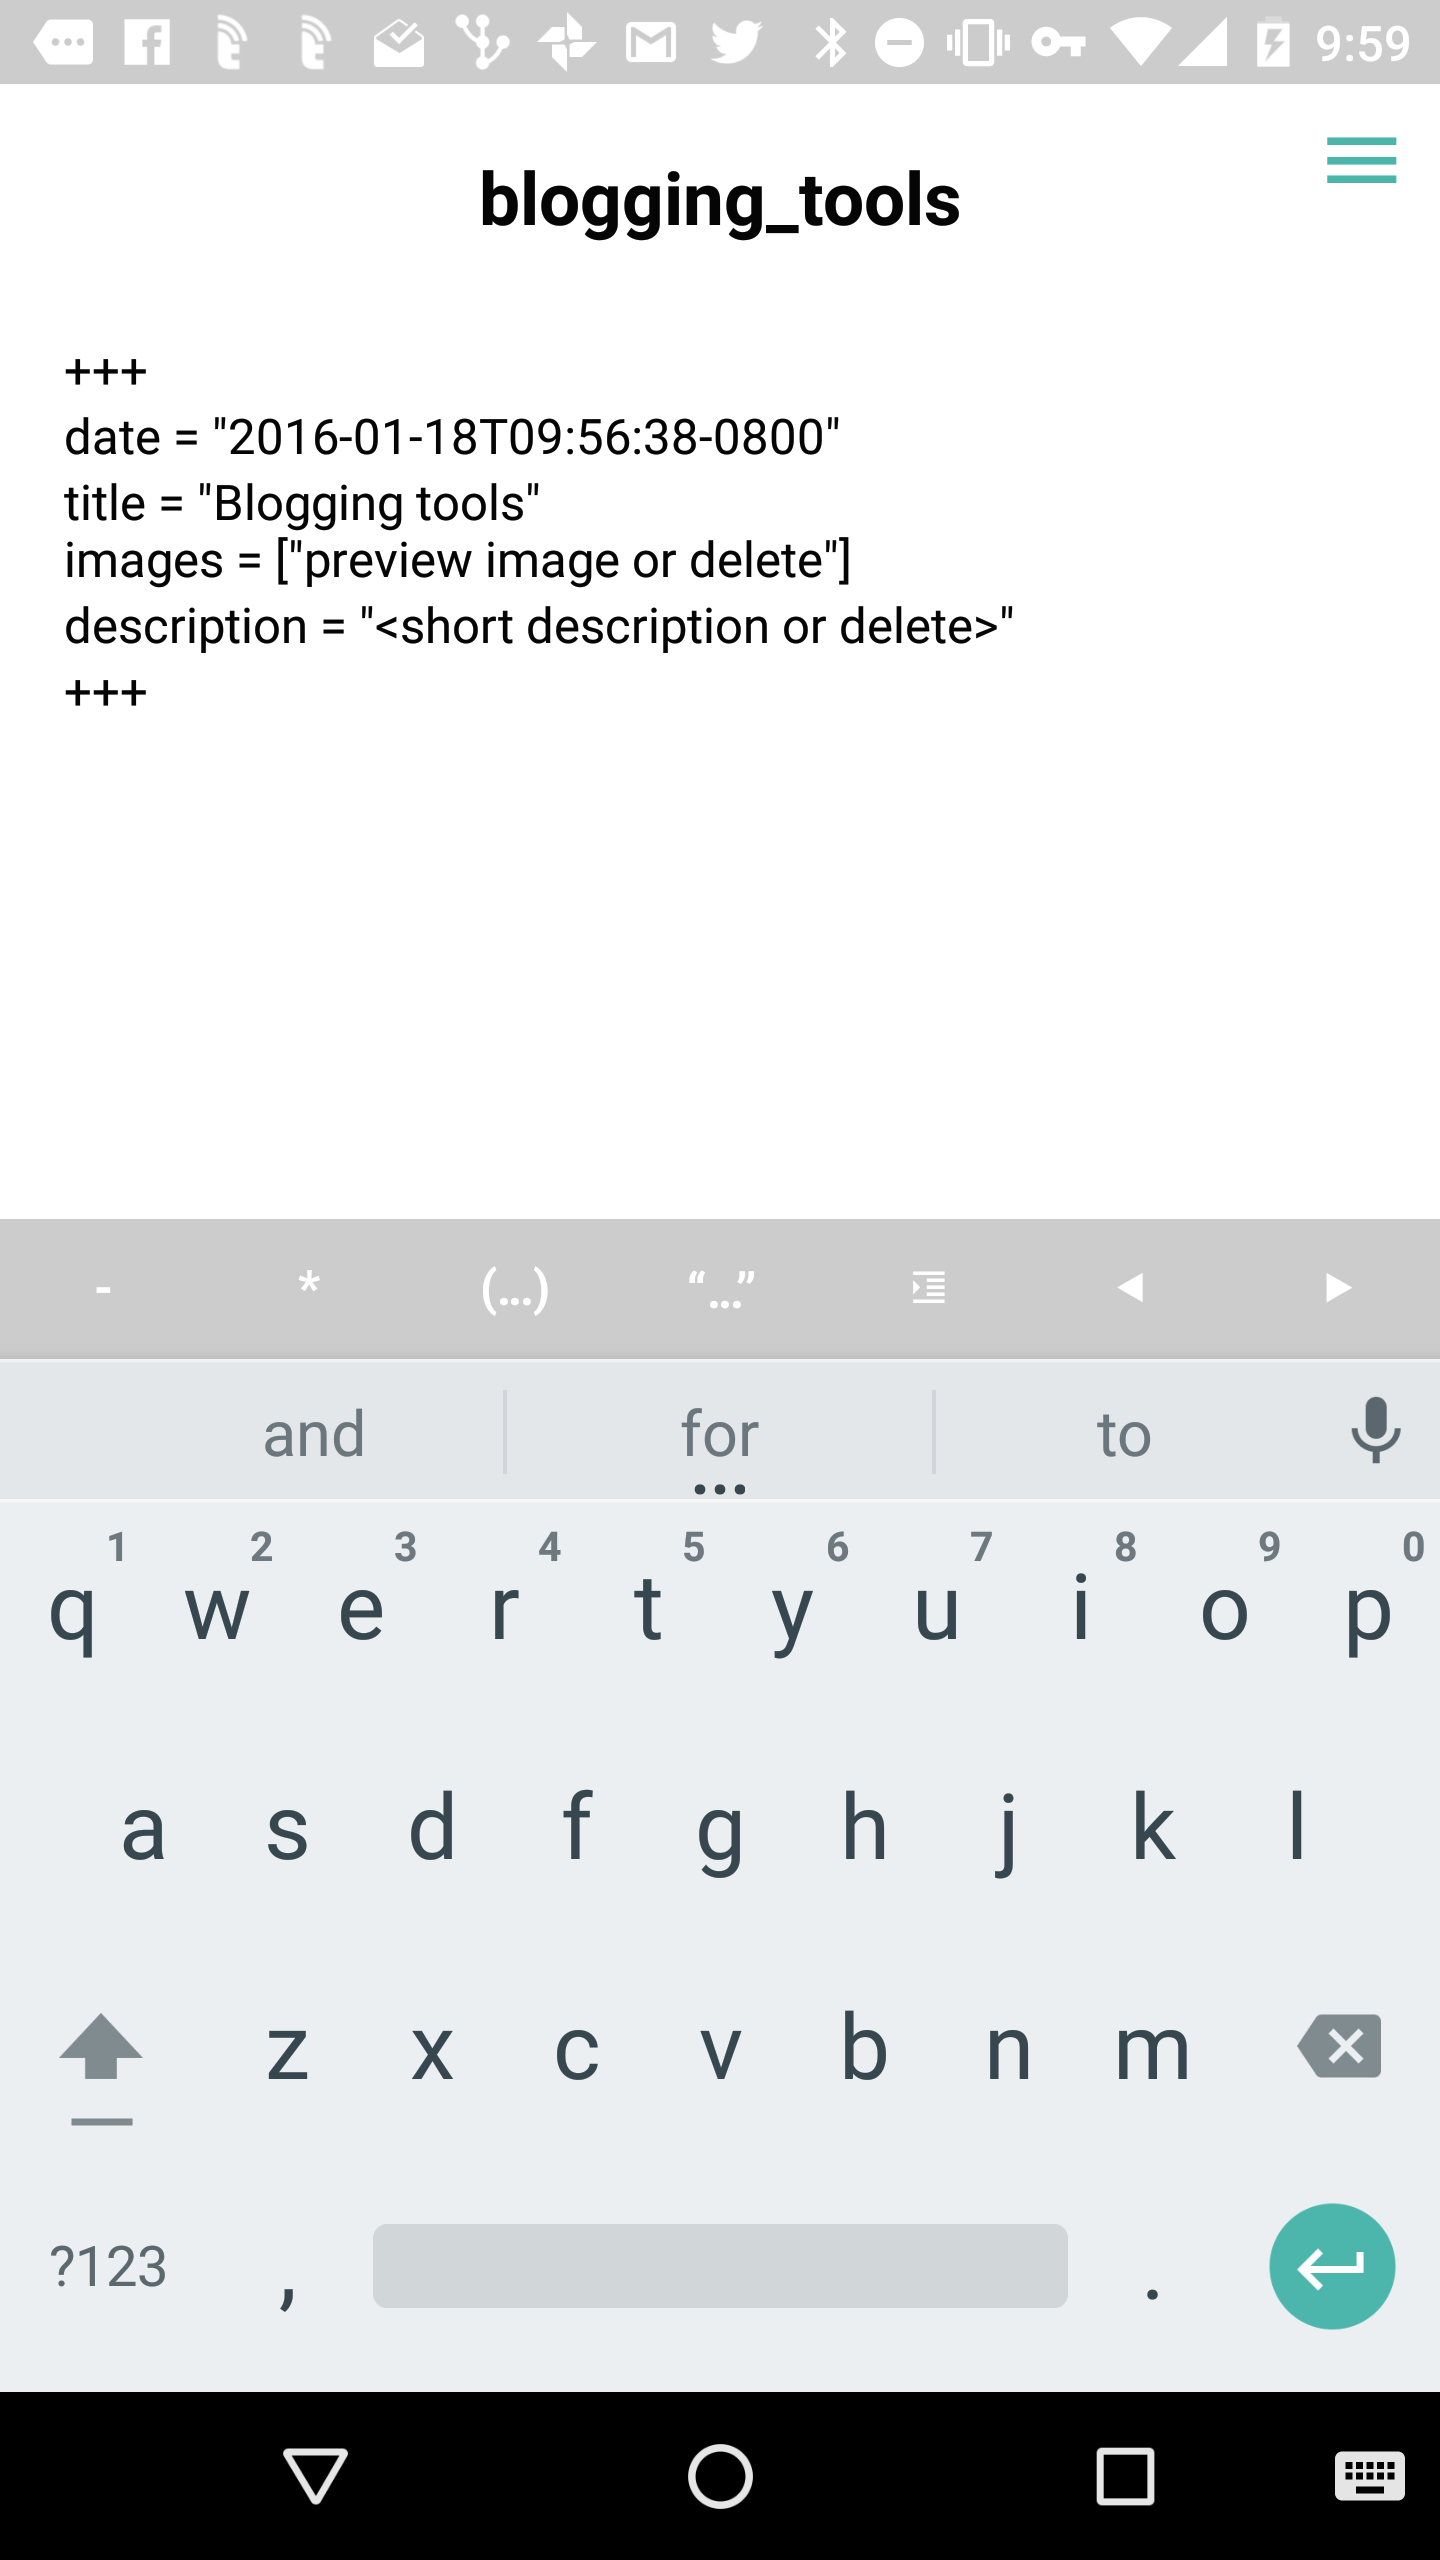
New header
With those couple things, I can now do the end-to-end process of creating and publishing blog posts from my phone. Here’s how that goes:
- In git client, pull from remote
- Create new file in repo
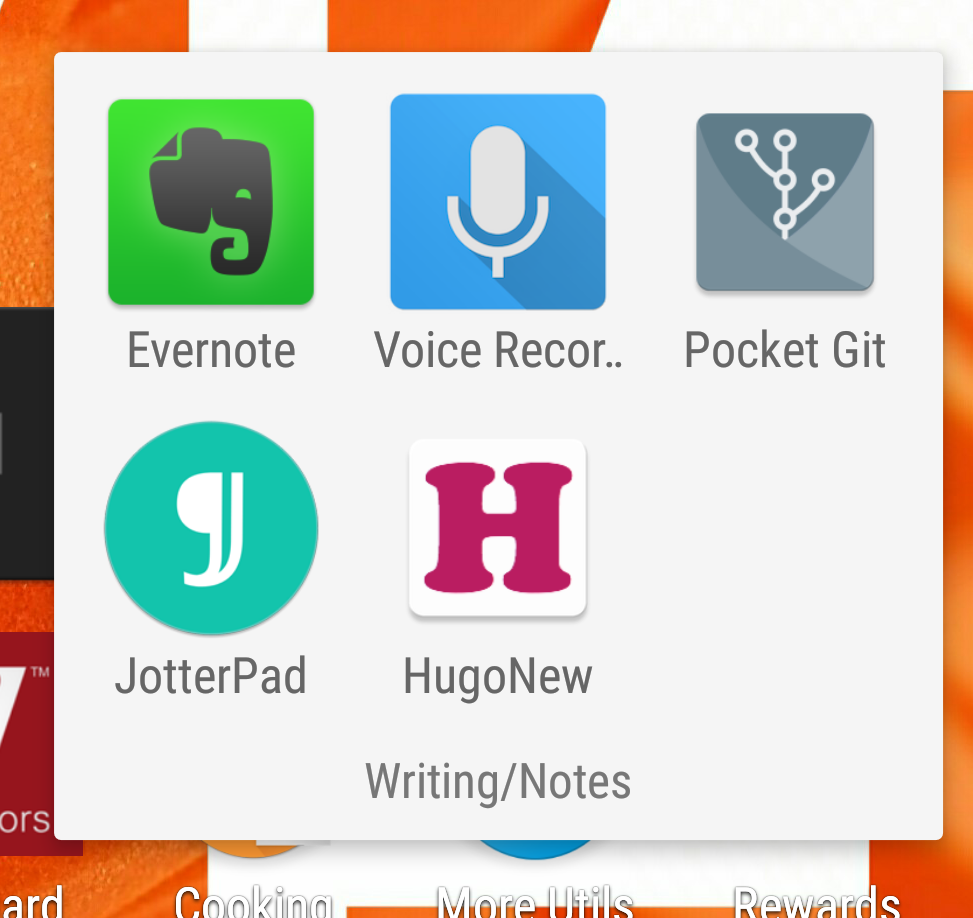
- Open file in JotterPad
- Run my HugoNew app
- Paste header into new post file
- Save file, and push to get repo
- Log into my server and run publish script
It still needs work (no image support yet), since it is a lot of steps, but it is a start.
Note - I added the images from my laptop. Here’s the source code for my Android app.
Quitting
Ever since New Year’s day, I’ve been thinking about what this year’s resolution should be. I have reflected a bit on the last year, and overall, I’m very happy with my 2015. My biggest accomplishment, was entering fatherhood, and not feeling like I have been faking it. Second to that, was that I finally am starting to feel like I have some effective tools to combat depression. (But, that’s a whole other topic.) The two of those things together really made 2015 a great year for me.
However, for 2016, I’d like to approach the year with a little more focus, and clarity, with a small goal for something that I’d like to make a habit of. I figure that if I can do something small as a habit for a whole year, it can snowball something small into something much larger.
Last night, I was watching one of Casey Neistat’s latest vlogs, called “Losers and Closers”. It got me thinking a lot about quitting, or rather, about not quitting. Neistat takes the view that quitting is never OK, and you should always try to finish everything. Here’s the video:
I don’t think that I’m going to be that strict with myself, however, what it got me thinking about was a lot of little projects that I’ve started that could have been more interesting than they were, if I’d bothered to finish them. Or, if I had stuck with some really good habits that I had tried to keep, that the results would have been really great.
The problem that I have with projects is that I’ve constantly got new ideas, and after I’m about half-way into building one thing, lots of times, I drop it and move on to another thing. For example, a couple of years ago I started building this website about things that I built on a weekly basis. I put a couple of weeks into it, but never finished it, and haven’t updated the project list in forever. Last summer, I built an Android app that I can use for Cognitive Behavioral Therapy, but never cleaned it up for release. More recently, I started writing about building public APIs on the phone with Android, and while I haven’t given up on that yet, I also haven’t added to that collection in over a month. This isn’t true of everything that I start,
As far as habits, it’s probably the same story as everyone else. Here’s another Casey Neistat’s videos that talks about that:
2016 Resolution
Getting to the point, for 2016, I’m not going to quit either projects or habits. What this means for habits is that I’m going to have to be very careful about what I try to start, because I’ll be committing to doing it for a whole year. For projects, it means that I can’t drop off whatever I’m currently working on for something new and exciting. Or, that I’ll have to interleave projects to keep up progress on everything. While I do have a couple of projects ongoing right now, as soon as I finish them, my plan is to try to only do one at a time.
I am also going to do something very different this year to try to work towards this goal, which is to publicly post at the start of a project, that I’m starting something. I hate talking about things until they’re done, but I think that this is going to be important.
Finally, I know that I’m going to fail at this from time to time. That’s OK. I am not looking for perfection, I am looking for improvement.
AirPair is obfuscating their otherwise useful blog posts
This morning, I was poking around looking for an article on using AngularJS with EJS. They use some similar syntax, and I wanted to make sure that I wouldn’t be running over myself too much by using them together. (I still don’t have an answer, but if I find a good one, I’ll link it on this post.) In my search, I stumbled on this article:
Great! This looks like exactly what I’m looking for. I scroll down to check out the code.

The code on AirPair’s blog posts is obfuscated. They want me to sign in with my GitHub account, just to see their code examples, and to make their blog post not worthless? WTF?
I did a quick search to see if others were complaining about this. This was about how I felt:
Such a douche move from @airpair - using obfuscation to get email address & spam the hell out of ya! pic.twitter.com/QF0uzNybtj
— Paul Ardeleanu (@pardel) November 5, 2015It gets better:
Oh @airpair .. write access to our personal data on GitHub just to read a blog post properly? :-D pic.twitter.com/4HMzJ2ANA5
— Peter Cooper (@peterc) October 31, 2015Write access, they want write access to my GitHub account so that I can read their dumb blog post?!? To be fair, they may have changed that, but still, seriously?
Look, I get it, you’re a company trying to sell your product, and you think that this would be a great way to get leads. Right? That’s fine, I guess, but this seems like an unnecessarily crappy way of going about it.
Here’s why, first, from my perspective, the developer community is quite unique in its culture of sharing information. We figure stuff out, and then tell our peers how we did it to make their lives easier (or as notes to our future selves). We typically do this for free. Now, if you’re going to go and write a book, by all means charge for it. That represents a significant amount of work and knowledge. However, for a little blog post or article, just about everybody in our community has converged on the idea that this stuff should be free.
Second, when you write most of an article in clear-text, and then start obfuscating the important bits that start about half-way down the page, you end up putting people in a position of either taking a loss on the time that they spent in their initial reading, or giving up information that they otherwise wouldn’t (and really shouldn’t if it’s still write access). That’s crappy thing number two.
Crappy thing number three is that again, most of the article’s in clear-text, and you can get the same search traffic as actual complete content. This, again, tricks users into visiting you.
The reason that I bothered to write this isn’t because I think that AirPair is a terrible company. It seems like their core business is a great idea, and something that would be very useful. I hope that their company does well. The reason that I’m writing this is to make sure that people know that when they see ‘airpair’ in their search results, that that is a junk link, and they should skip that result and move on.
AirPair, if you see this, please stop the shenanigans and gimmicks, and be straight with people. It’s really too bad too, since there are plenty of other ways of getting what you want (like newsletters with collections of useful posts on topics that people care about), without doing this sort of thing. Also, if you didn’t obfuscate your content, you might start becoming more of a popular resource for this content, which would potentially increase your traffic, and probably help your branding quite a bit. As it stands, I’ll remember AirPair only as something to avoid.