Health Connect Video Series
Introduction
Control and manage health and fitness data from a central location, without losing the unique functionality that different apps offer. Health Connect brings deeper insights to users by sharing meaningful data on Android!
Reading and Writing
In this video, John talks to you about reading, writing, updating, and deleting records in Health Connect.
Managing Permissions
In this video, John discusses how you can manage permissions in Health Connect with examples provided.
Tips for a great Health Connect integration
Easily read and write data to Health Connect without the need to write a separate implementation for testing.
Resources:
- Health Connect at Google → https://goo.gle/3tiie3J
- Health Connect landing → https://goo.gle/3Tparfd
- Developer documentation → https://goo.gle/3A4gi2E
- Health Connect Developer Toolbox → https://goo.gle/health-connect-toolbox
- Testing Wear OS fitness apps without breaking a sweat → https://goo.gle/3TN8OIr
- Creating helpful fitness experiences with Health Services and Health Connect → https://goo.gle/3TPLx8X
- Syncing data with Health Connect → https://goo.gle/3TXdprO
Smart Home tools and updates (Google Smart Home Summit 2021)
Learn about new developer tools and updates for Google Home and Device Access. Learn about Google’s quality efforts, updates to WebRTC, the Test Suite, Analytics, as well as get a preview of the Smart Home Playground — a new tool for prototyping devices.
Resources:
- Test Suite → https://goo.gle/test-suite
- Monitoring and logging → https://goo.gle/3FBNuzD
- Google Home Playground → https://goo.gle/google-home-playground
- Building a device access web application → https://goo.gle/3BtaTkq
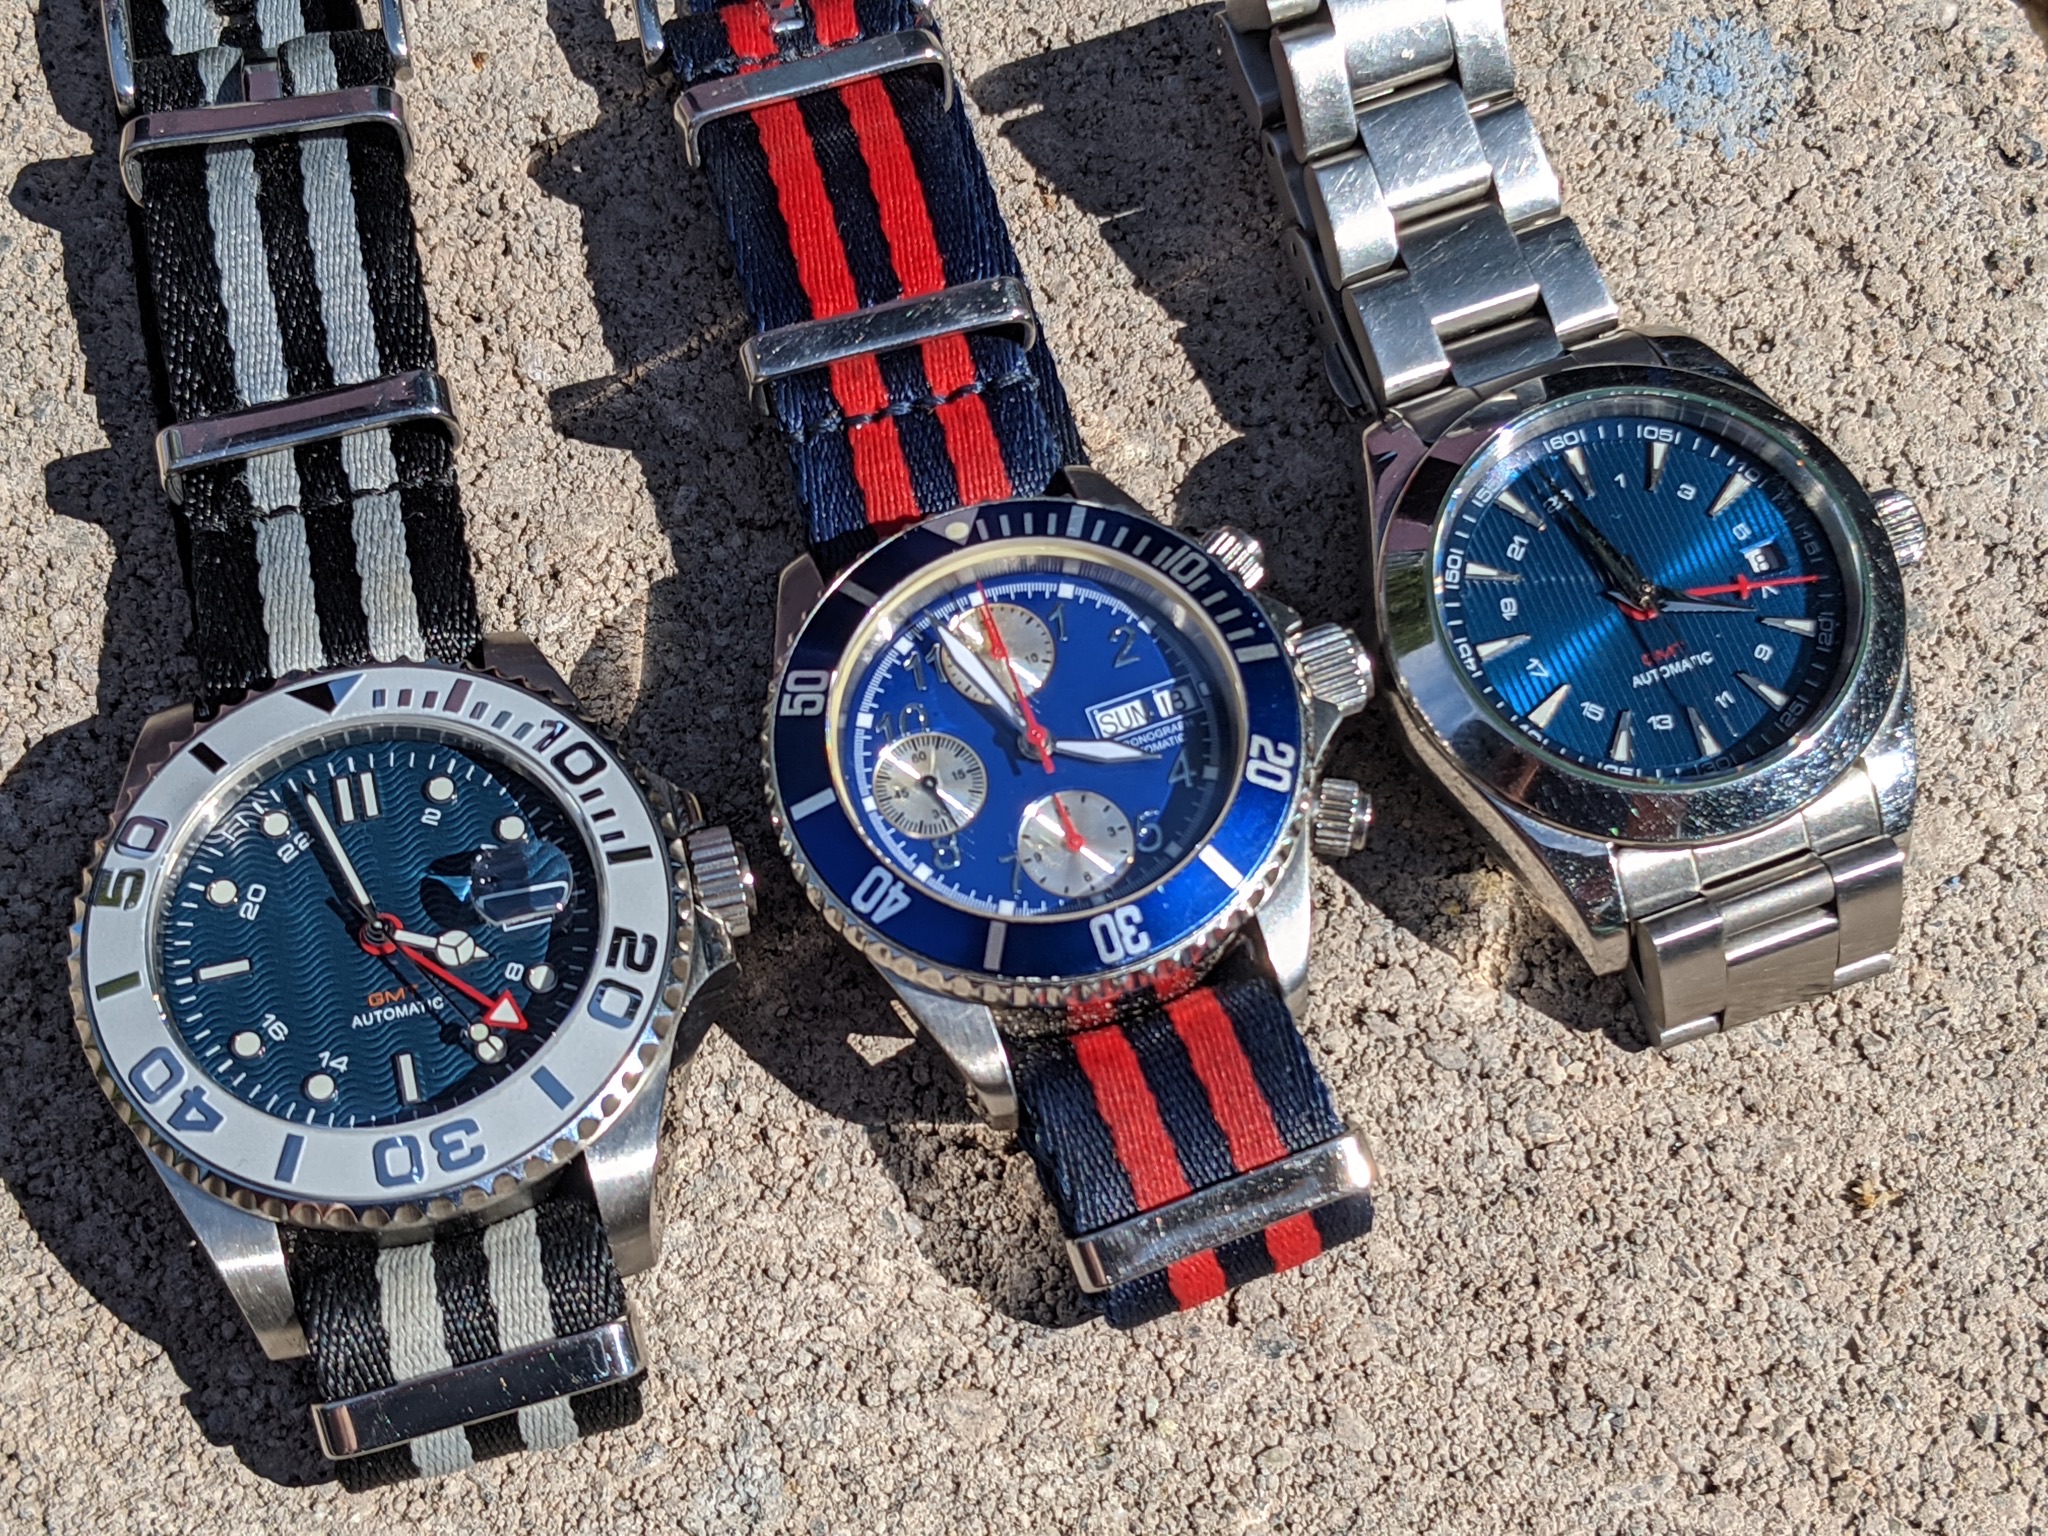
More Custom Watches
I built two more watches! At this point, I think I’m done with this hobby. While it was fun, it gave me a headache sitting trying to place the pieces correctly. I’m happy with the results though!
Pizza Oven Build
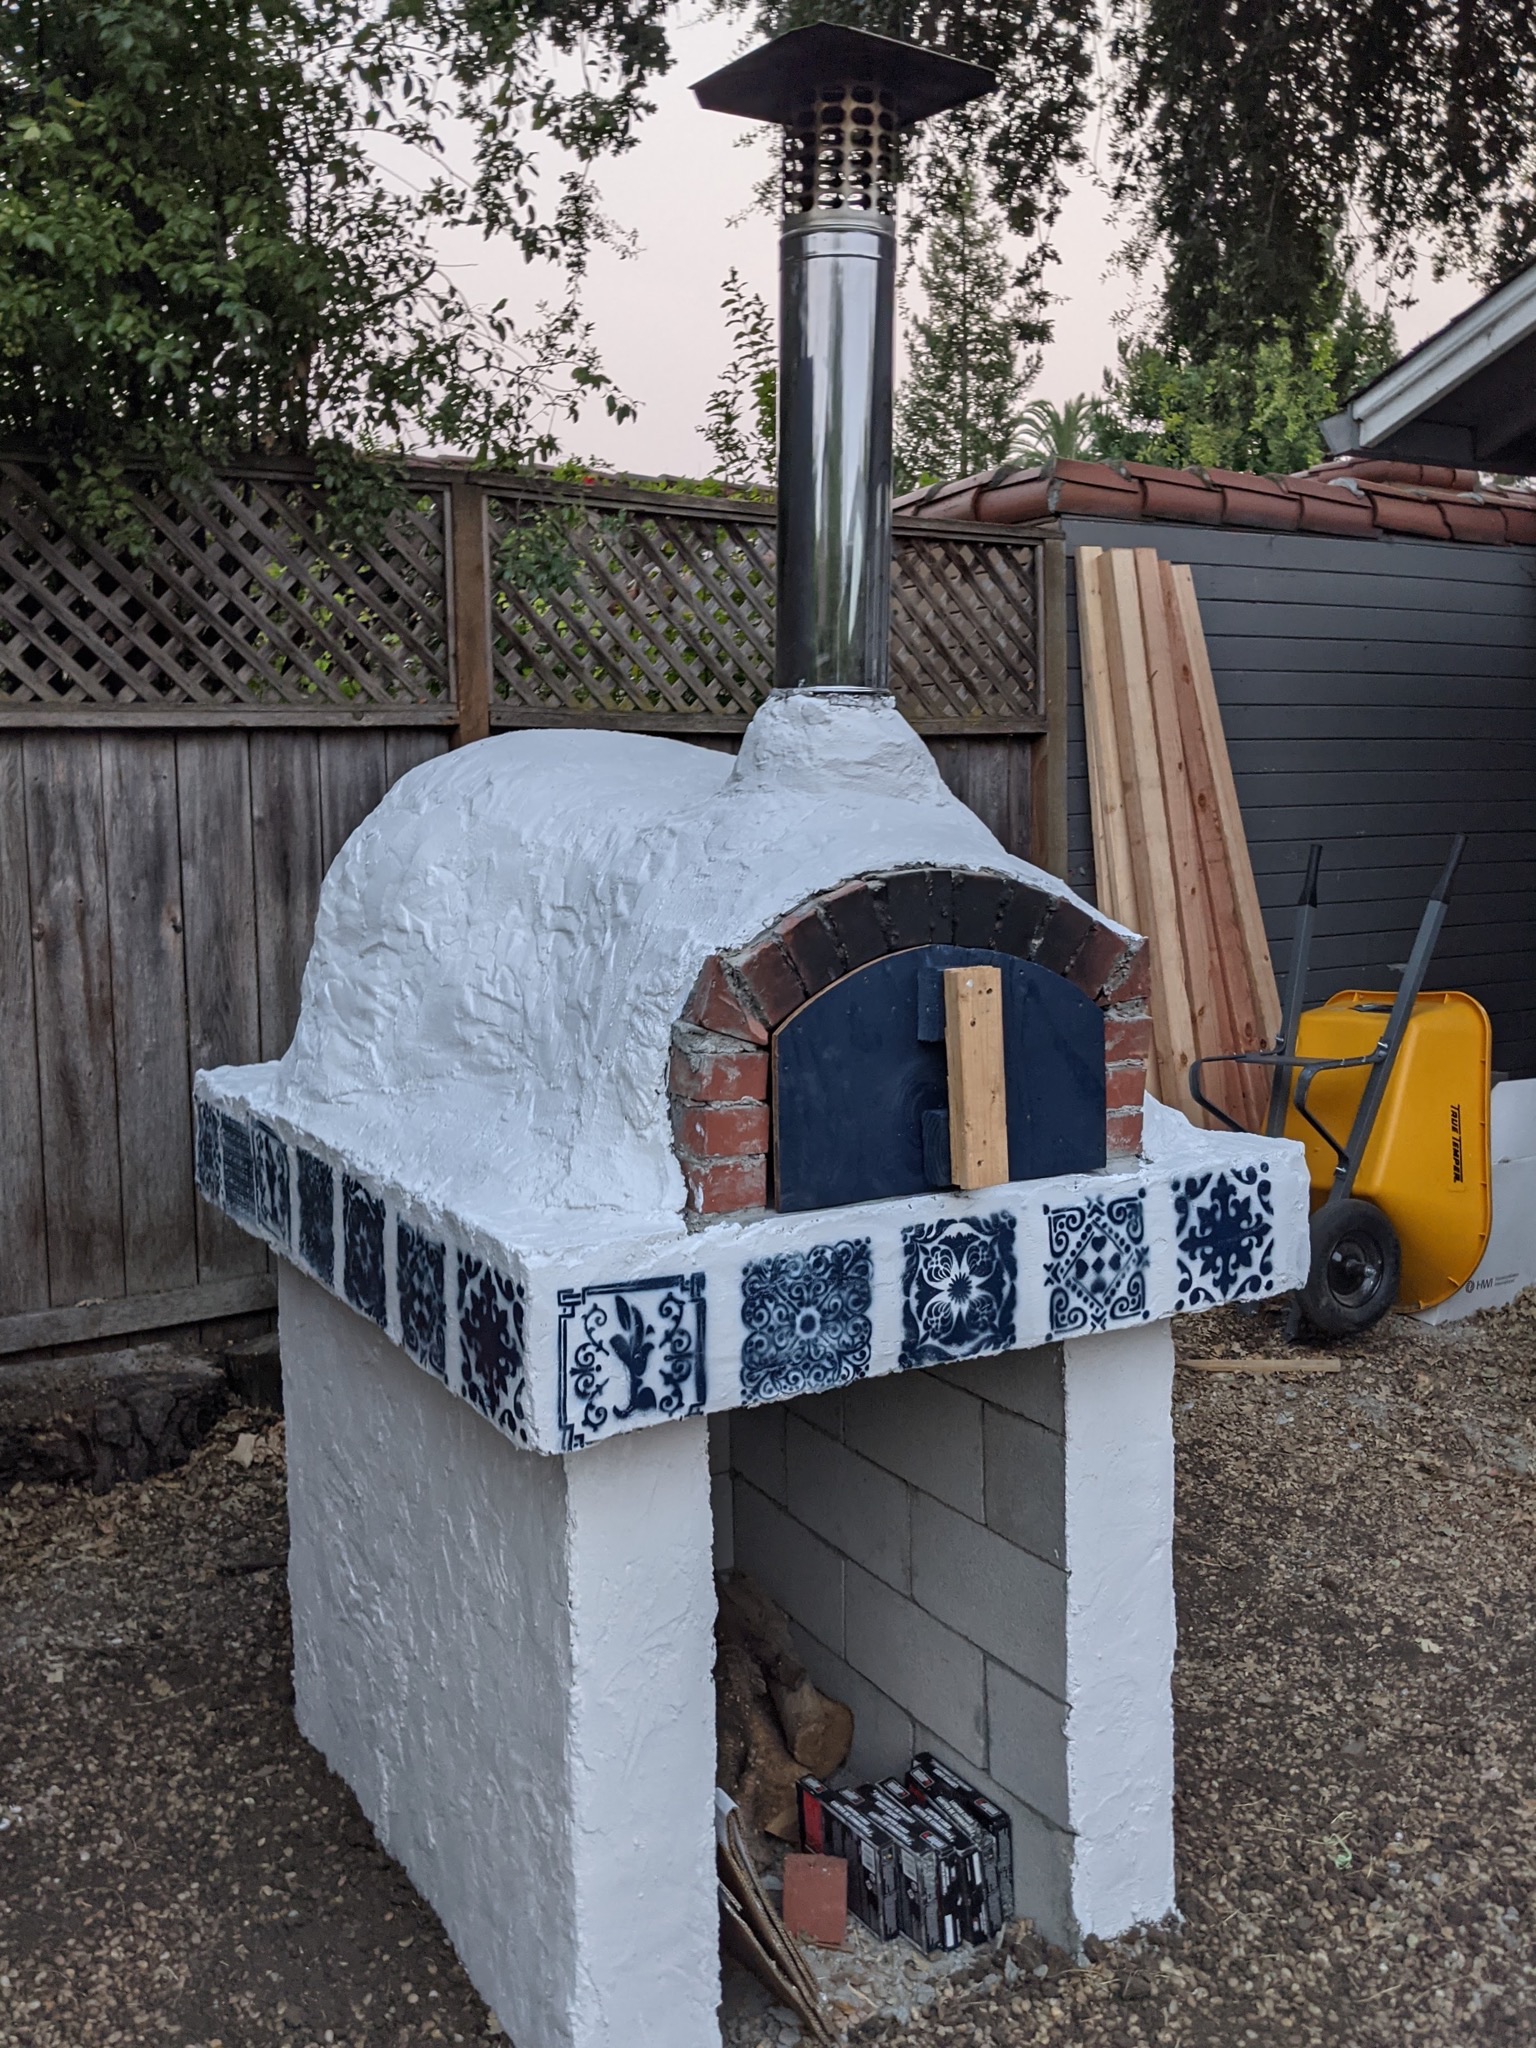
After three and a half months of work, we finally finished our pizza oven! Elizabeth has been painting over the last couple weeks, and put the finishing touches on yesterday. This was a fun, but difficult project, and I’m really happy with the pizza it makes!
I’ve wanted a pizza oven since I visited Pollywogg Holler, when I was attending Alfred University. Pollywogg Holler is a bit hard to describe, but it was a set of hand-built cabins and structures set back a ways in the woods, where you had to follow a path to get there. The path itself was interesting, it was a 5-10 minute walk through the woods, and along the way there were all sorts of art scultures and small structures. The main area had a bar and food area where they served pizza, and they had a wood fired pizza oven. It appeared to have been built by them, and it got me thinking about making my own someday.
15 years later, the pandemic happened, and I found myself with some time on my hands and wanting to find something to do to get outside as a break from the endless video call meetings. I decided to build my own pizza oven.
I started by researching a few different sets of plans and YouTube series on it, and came up with a bunch of ideas. From there, I put together a plan that would take me pretty much through completion, which synthesized ideas from several different sources.
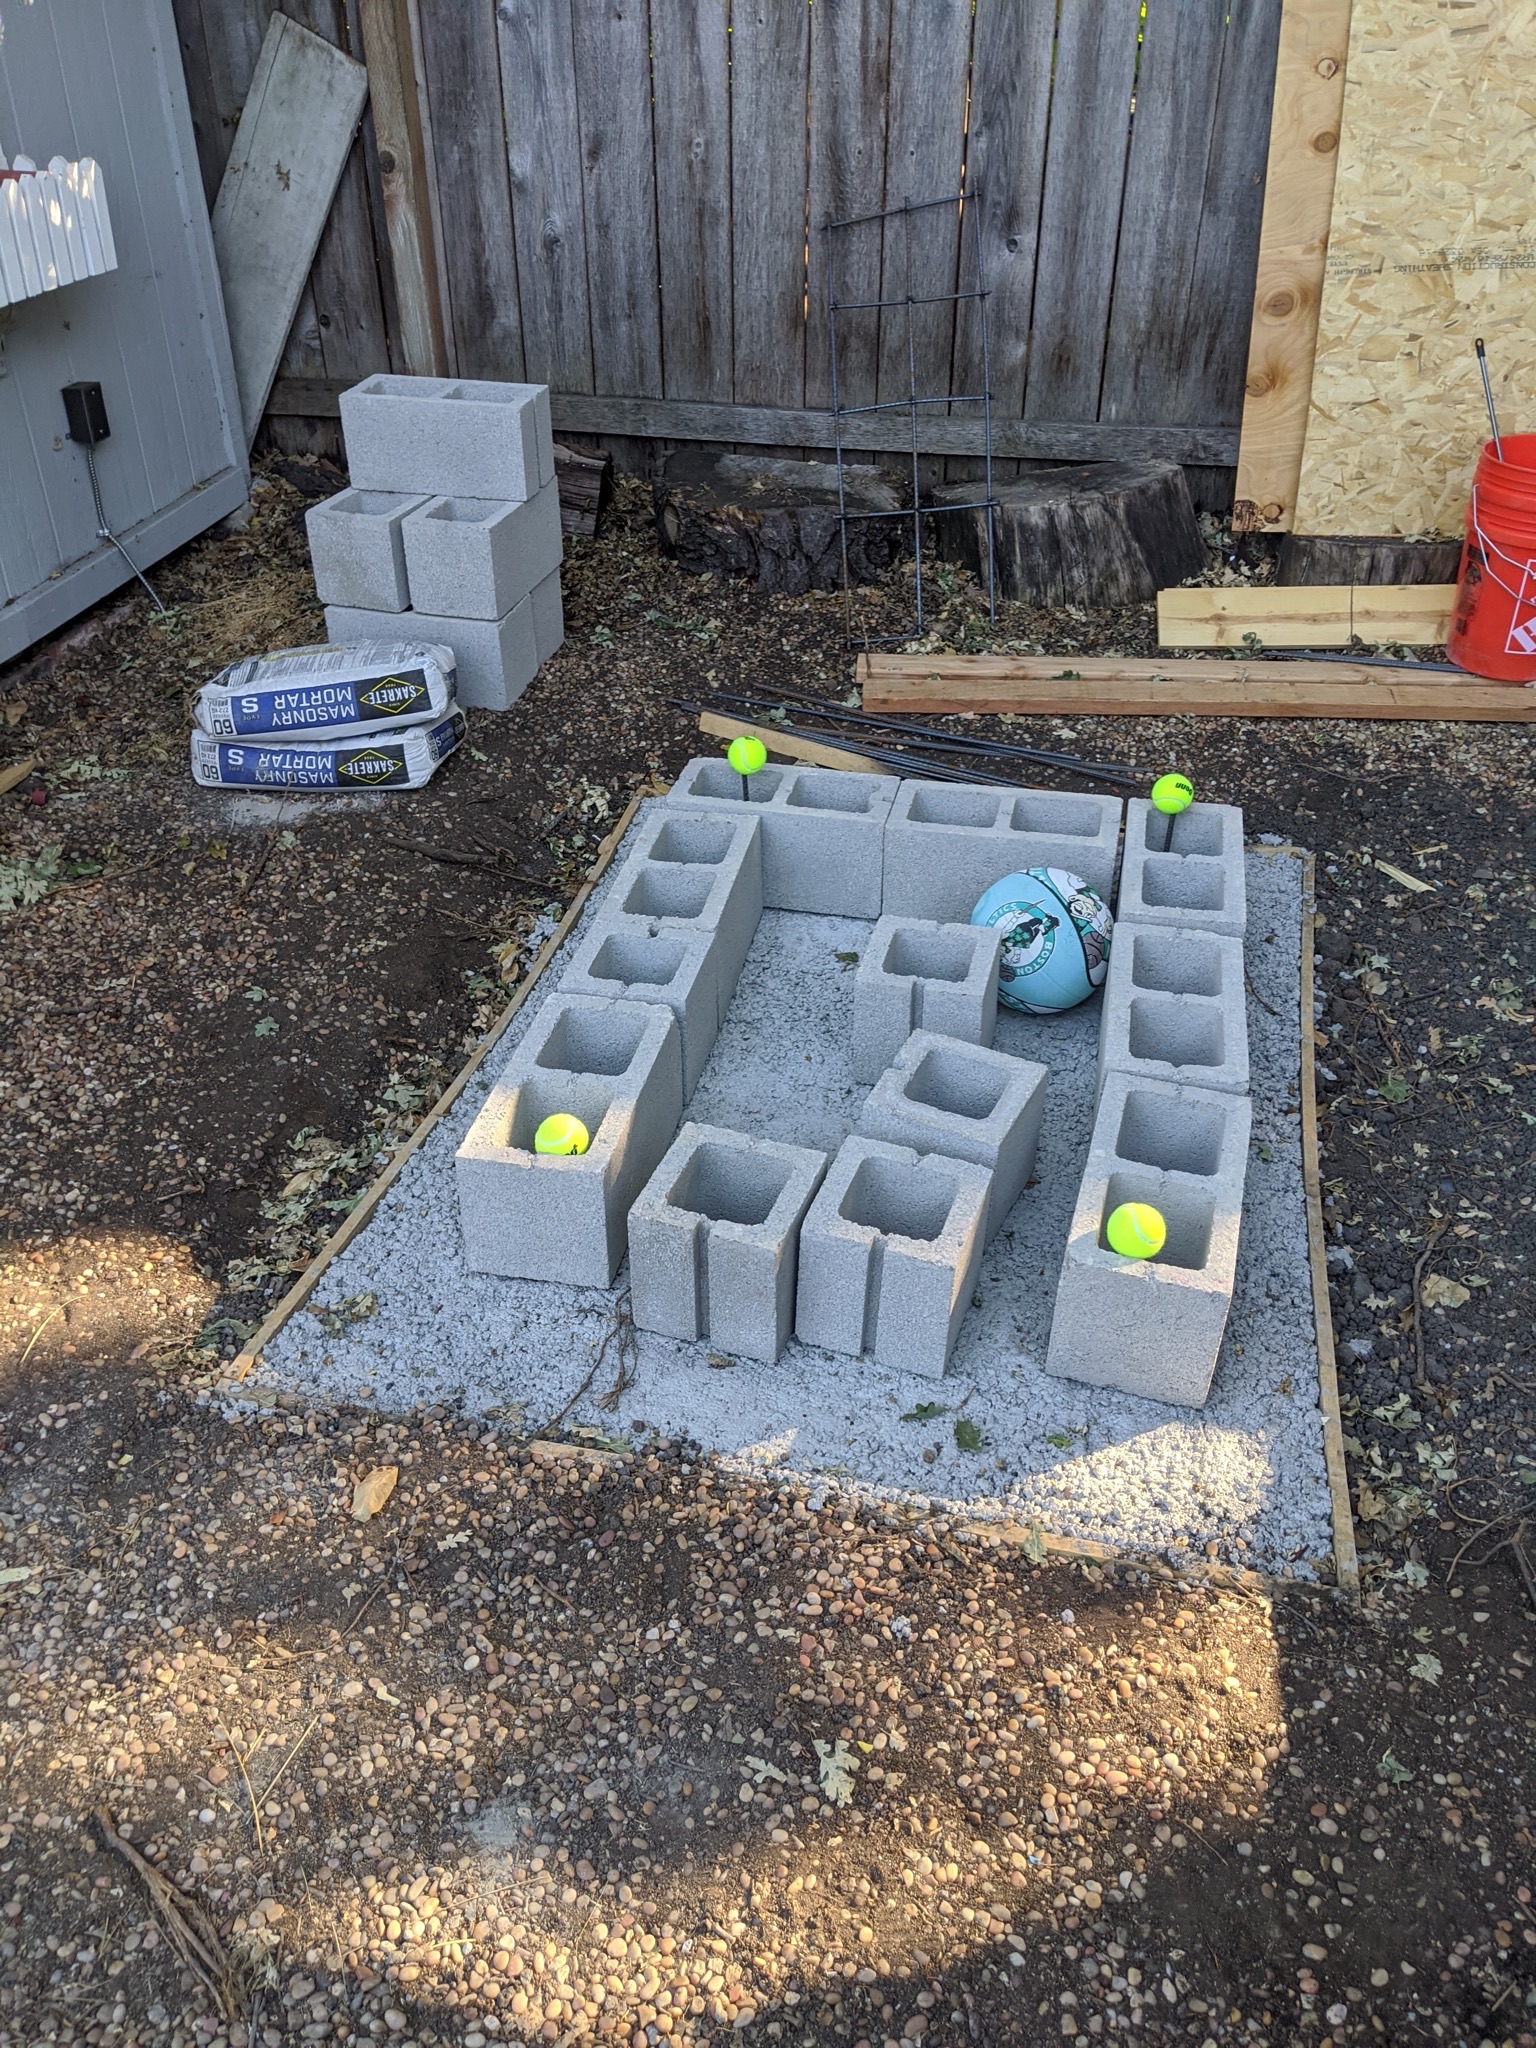
I started by building a base, with a concrete slab reinforced with rebar, and then started building up from there with cinder blocks.
I built some molds for the slab that was going to sit on top of the base. The three pieces were to sit next to each other, and had a carveout for some insulation and the cook surface to sit on top.
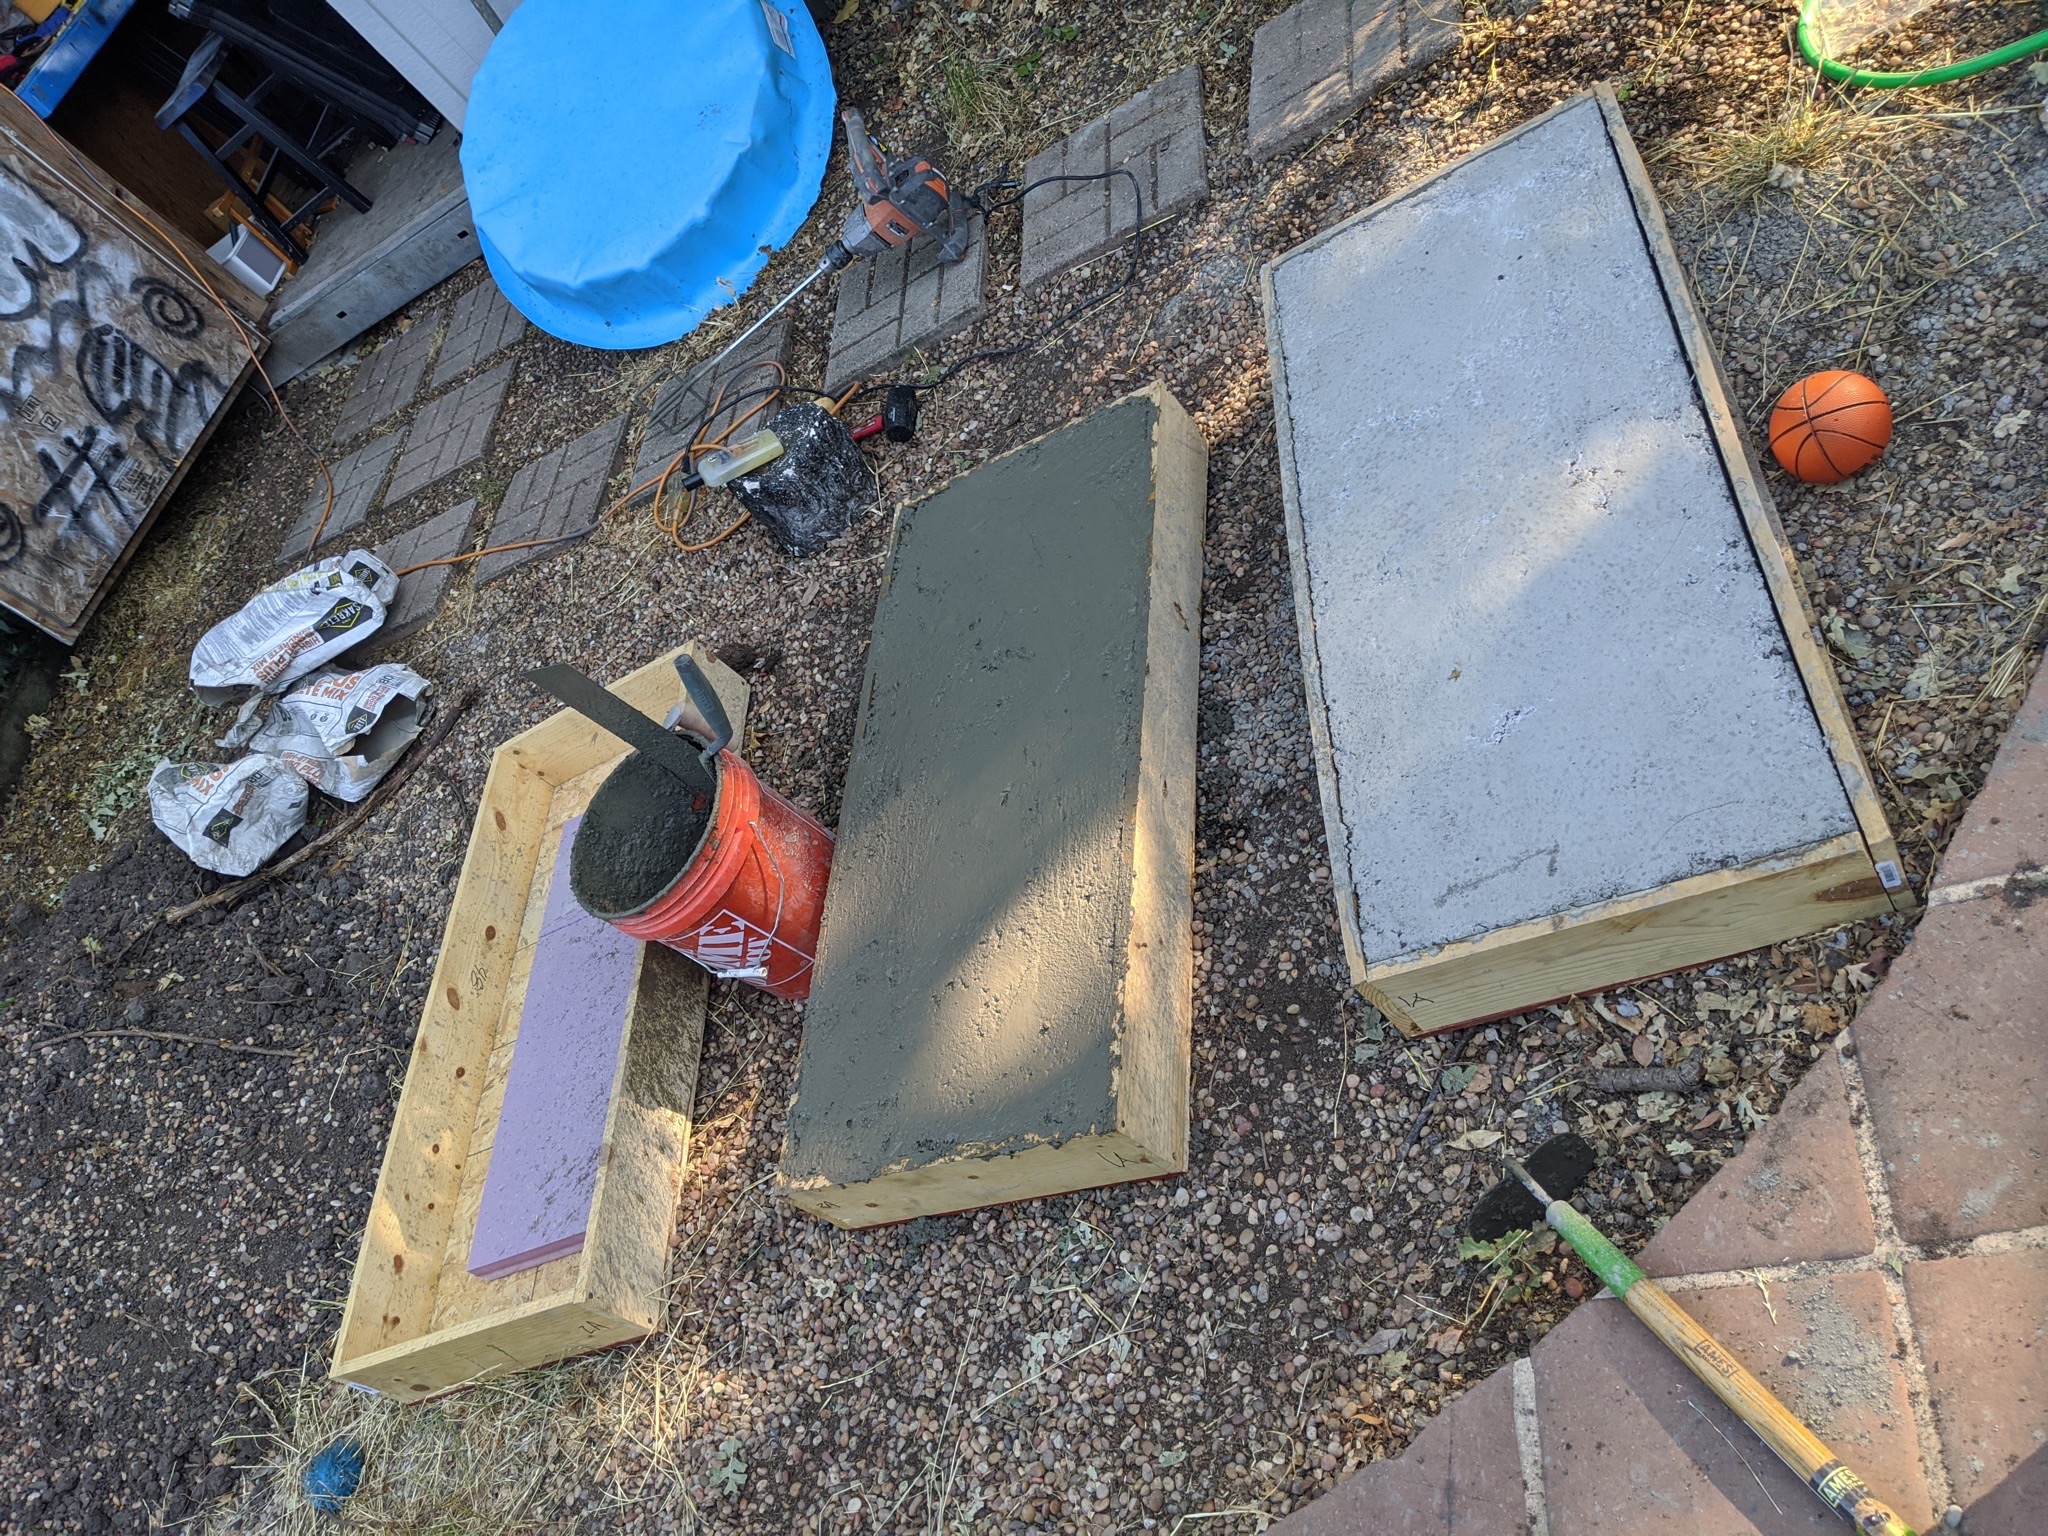
Then I built the dome mold, which was a bit more complicated. I used a piece of plywood as the base, and cut a hole in it to seat an exercise ball in. I fashioned something for the entryway of the oven, then wrapped all of it in several layers of plastic wrap. I then covered it in refractory concrete, reinforced with chicken wire.
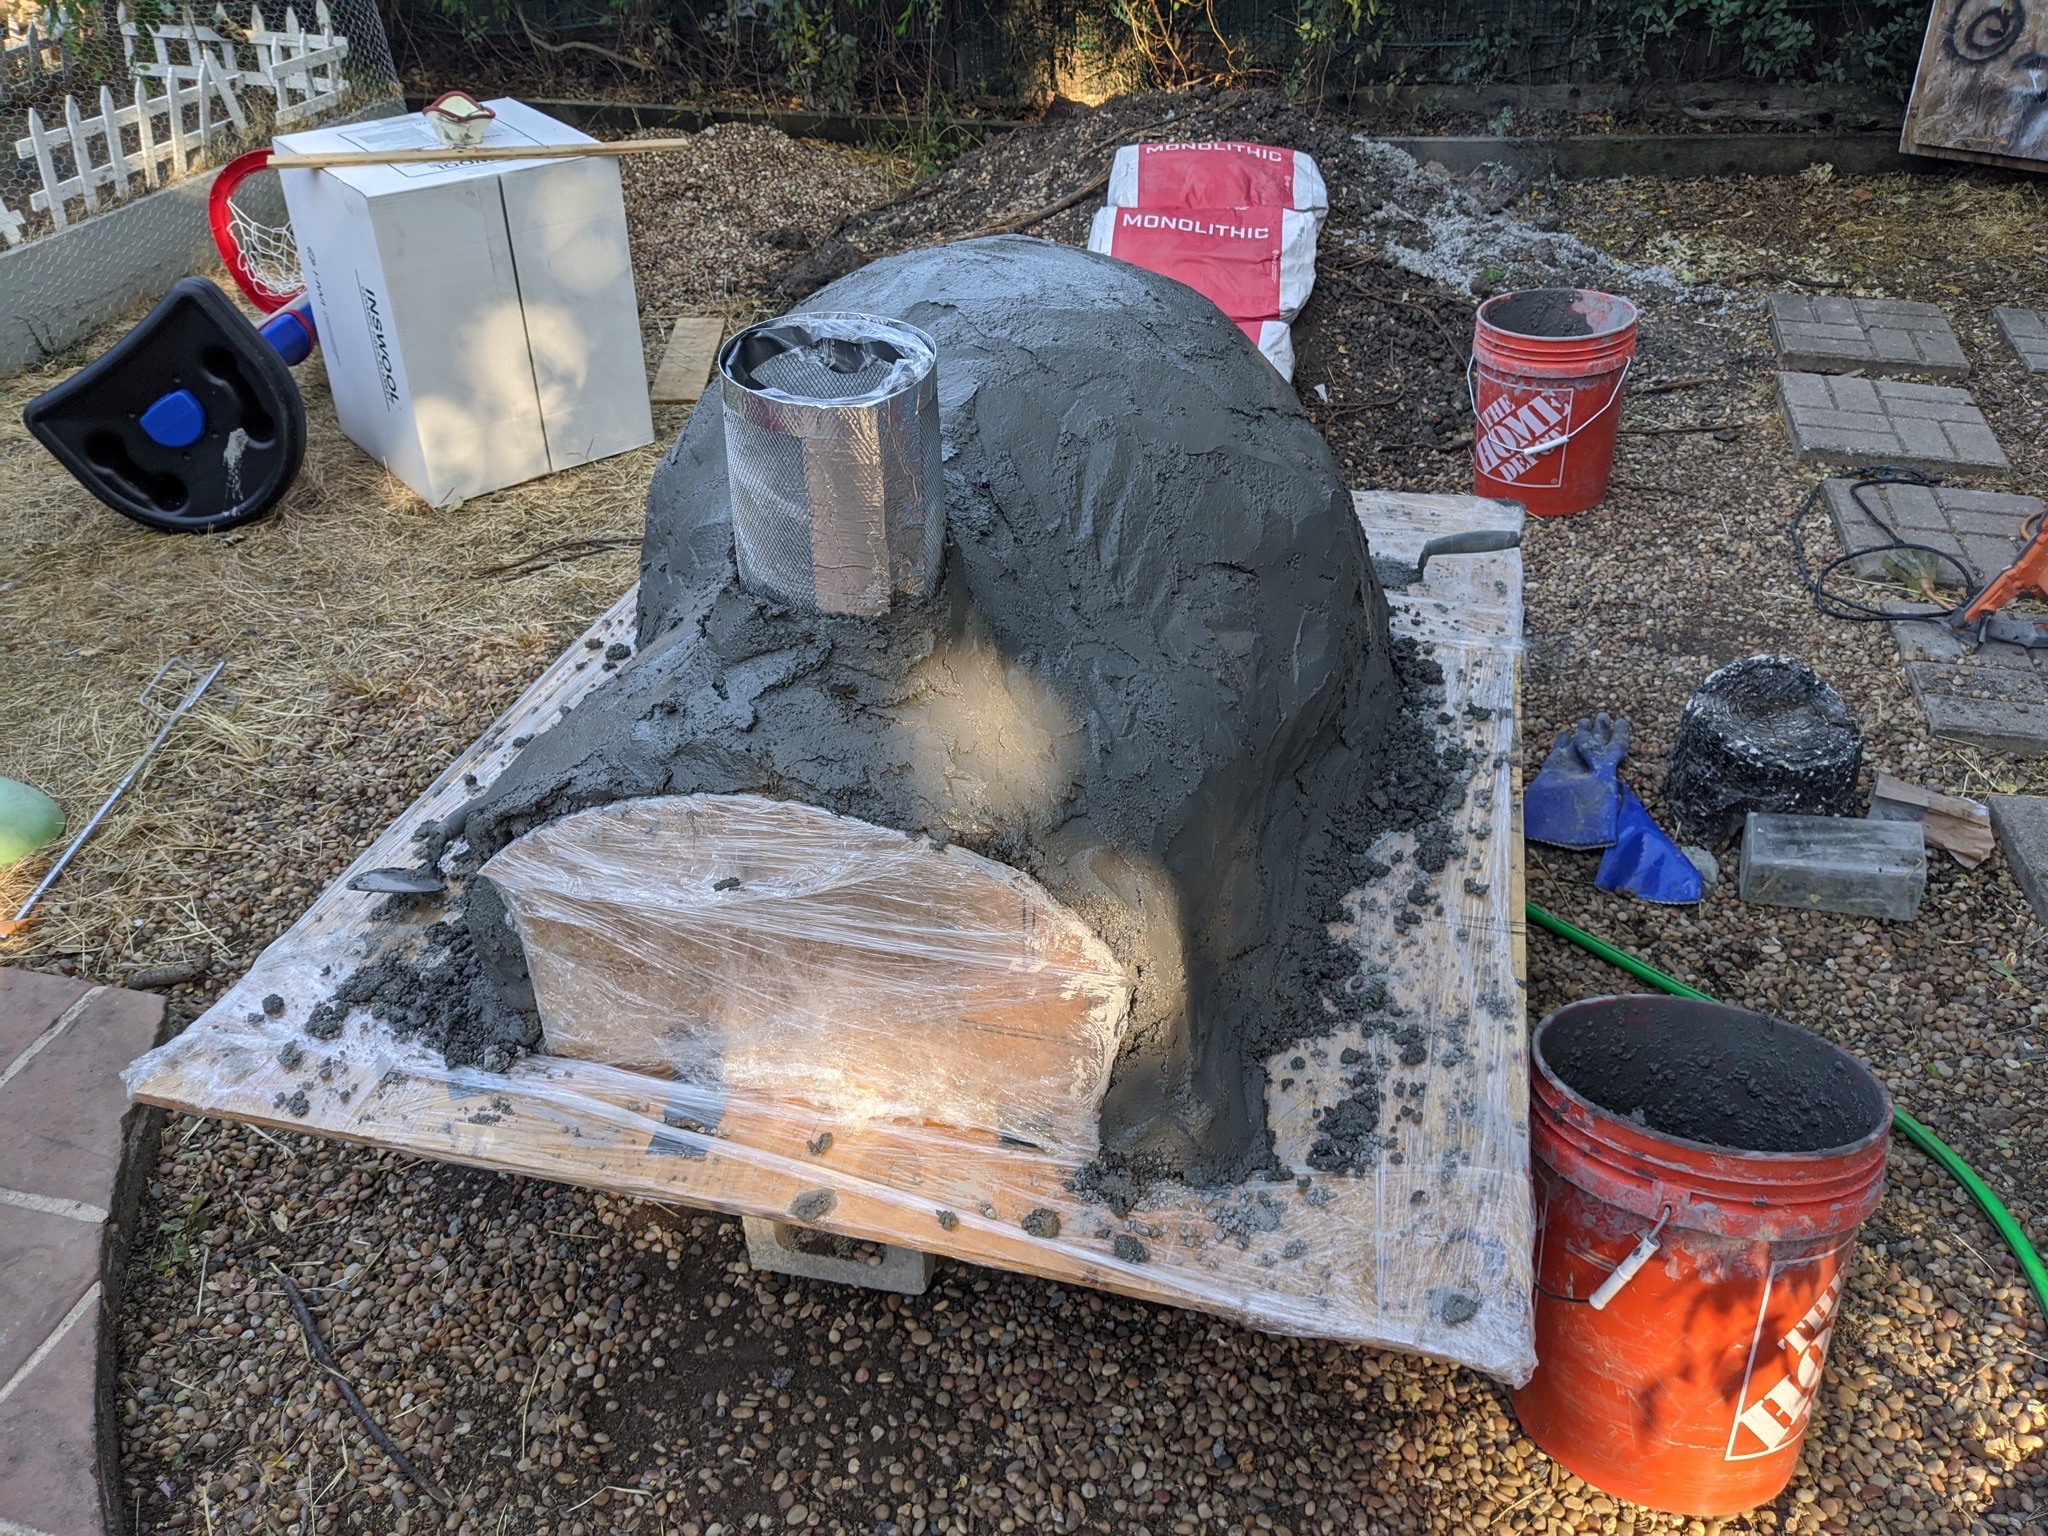
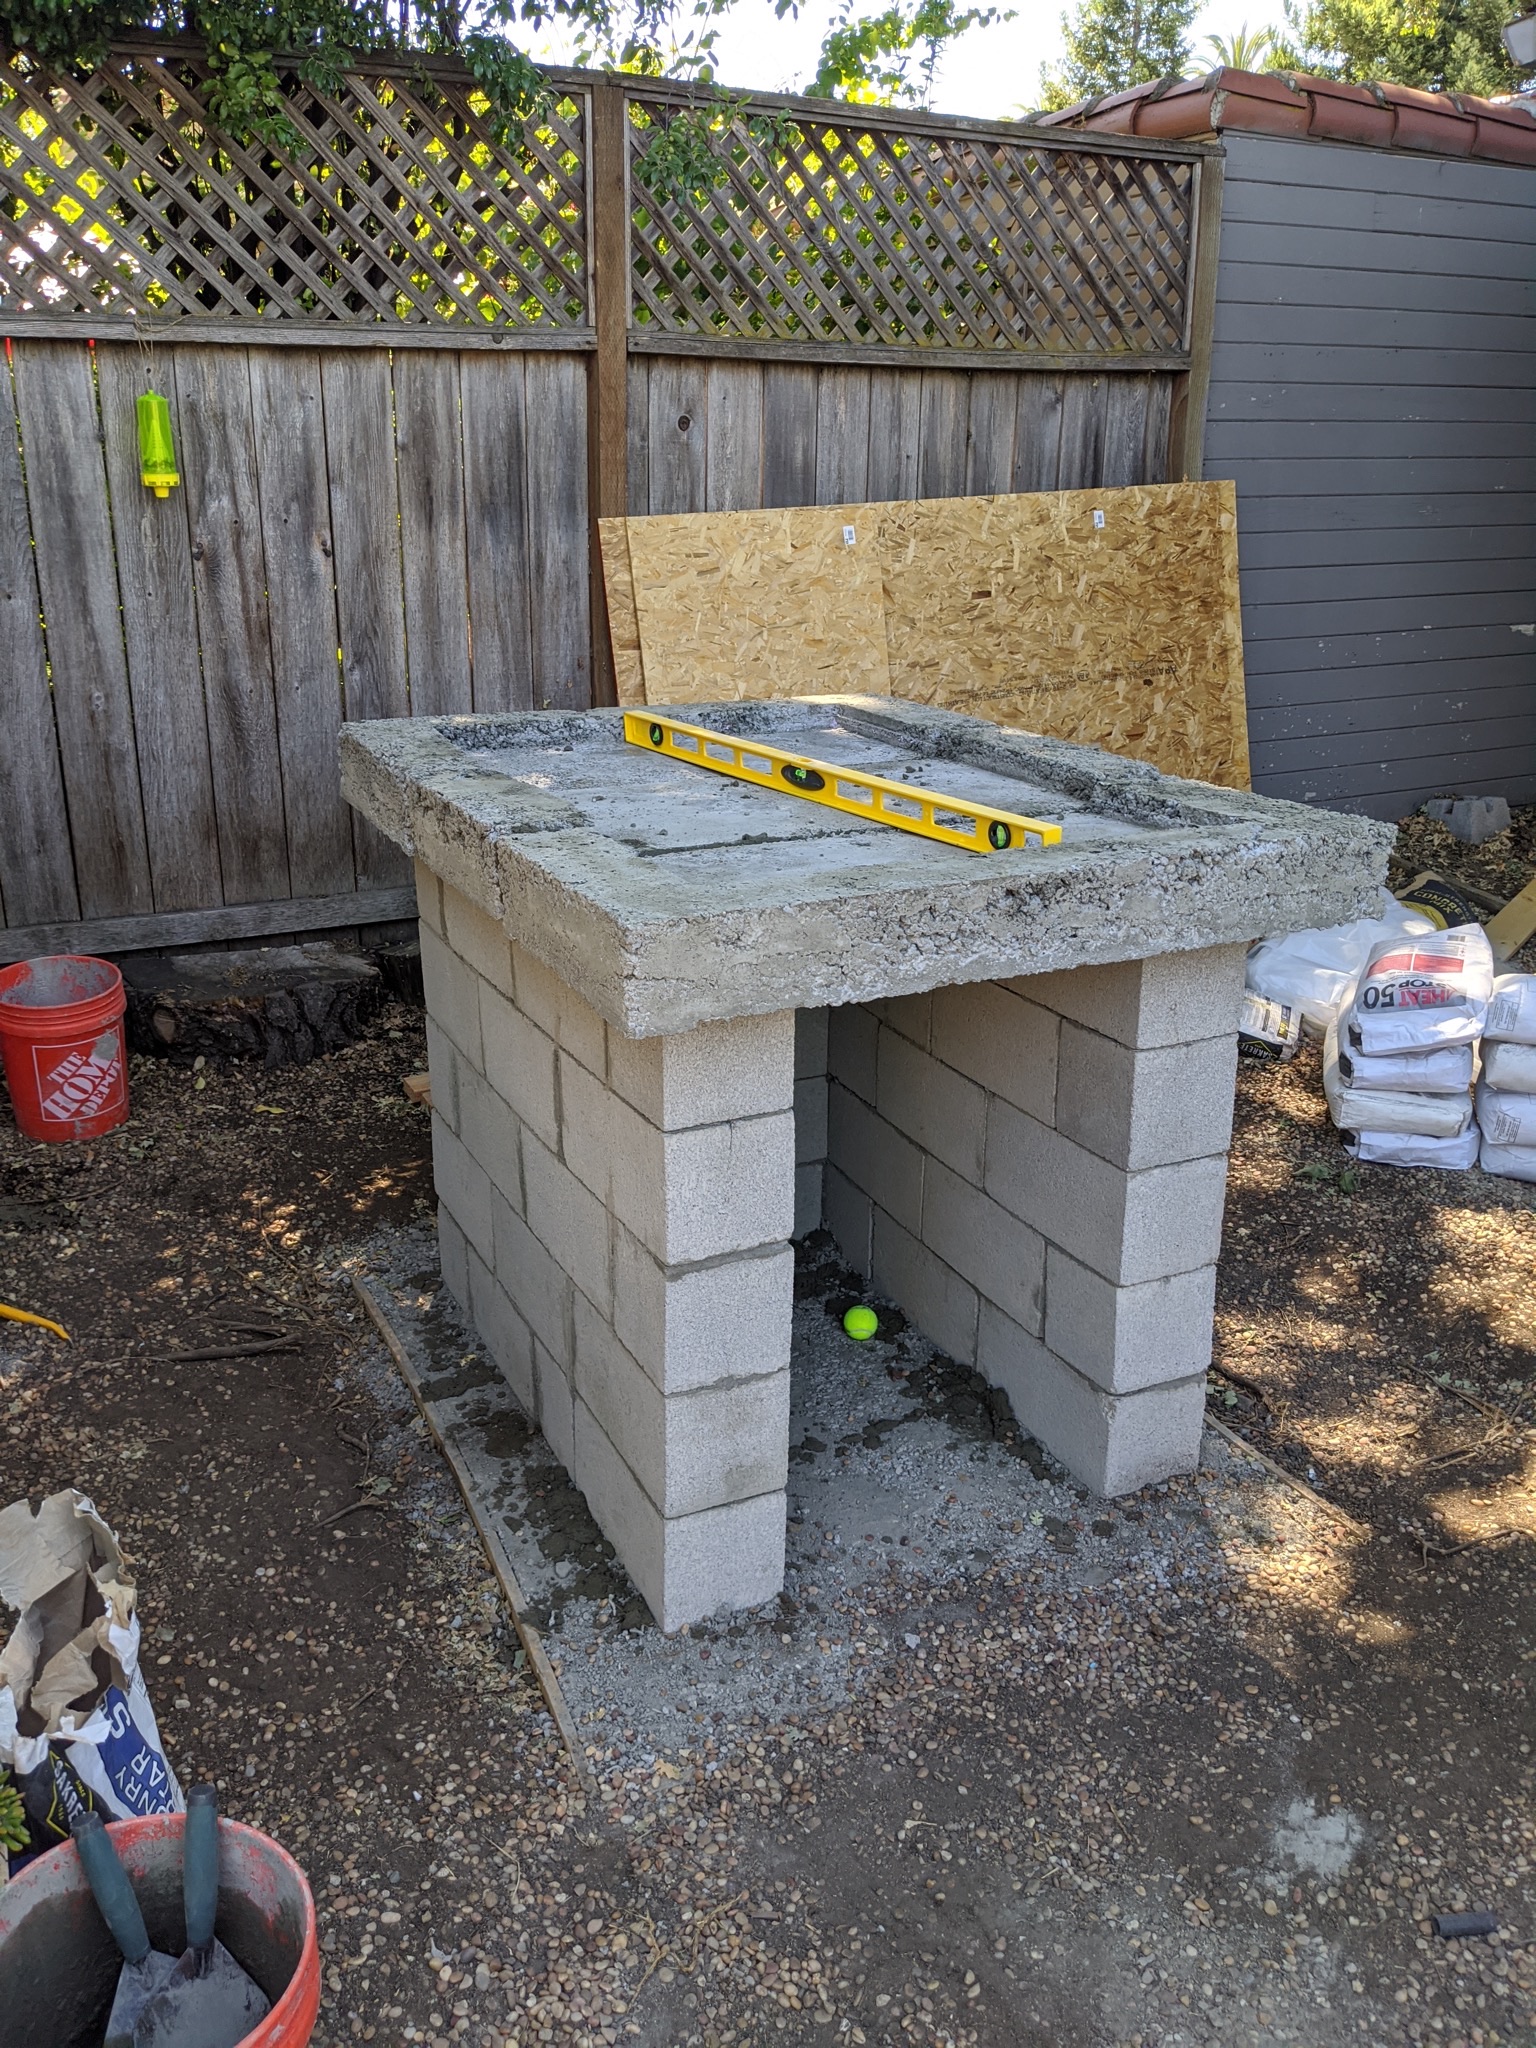
Refractory concrete is what fire brick is made from. I also used that material for the cook surface. Which you can see in the next photo sitting under the dome.
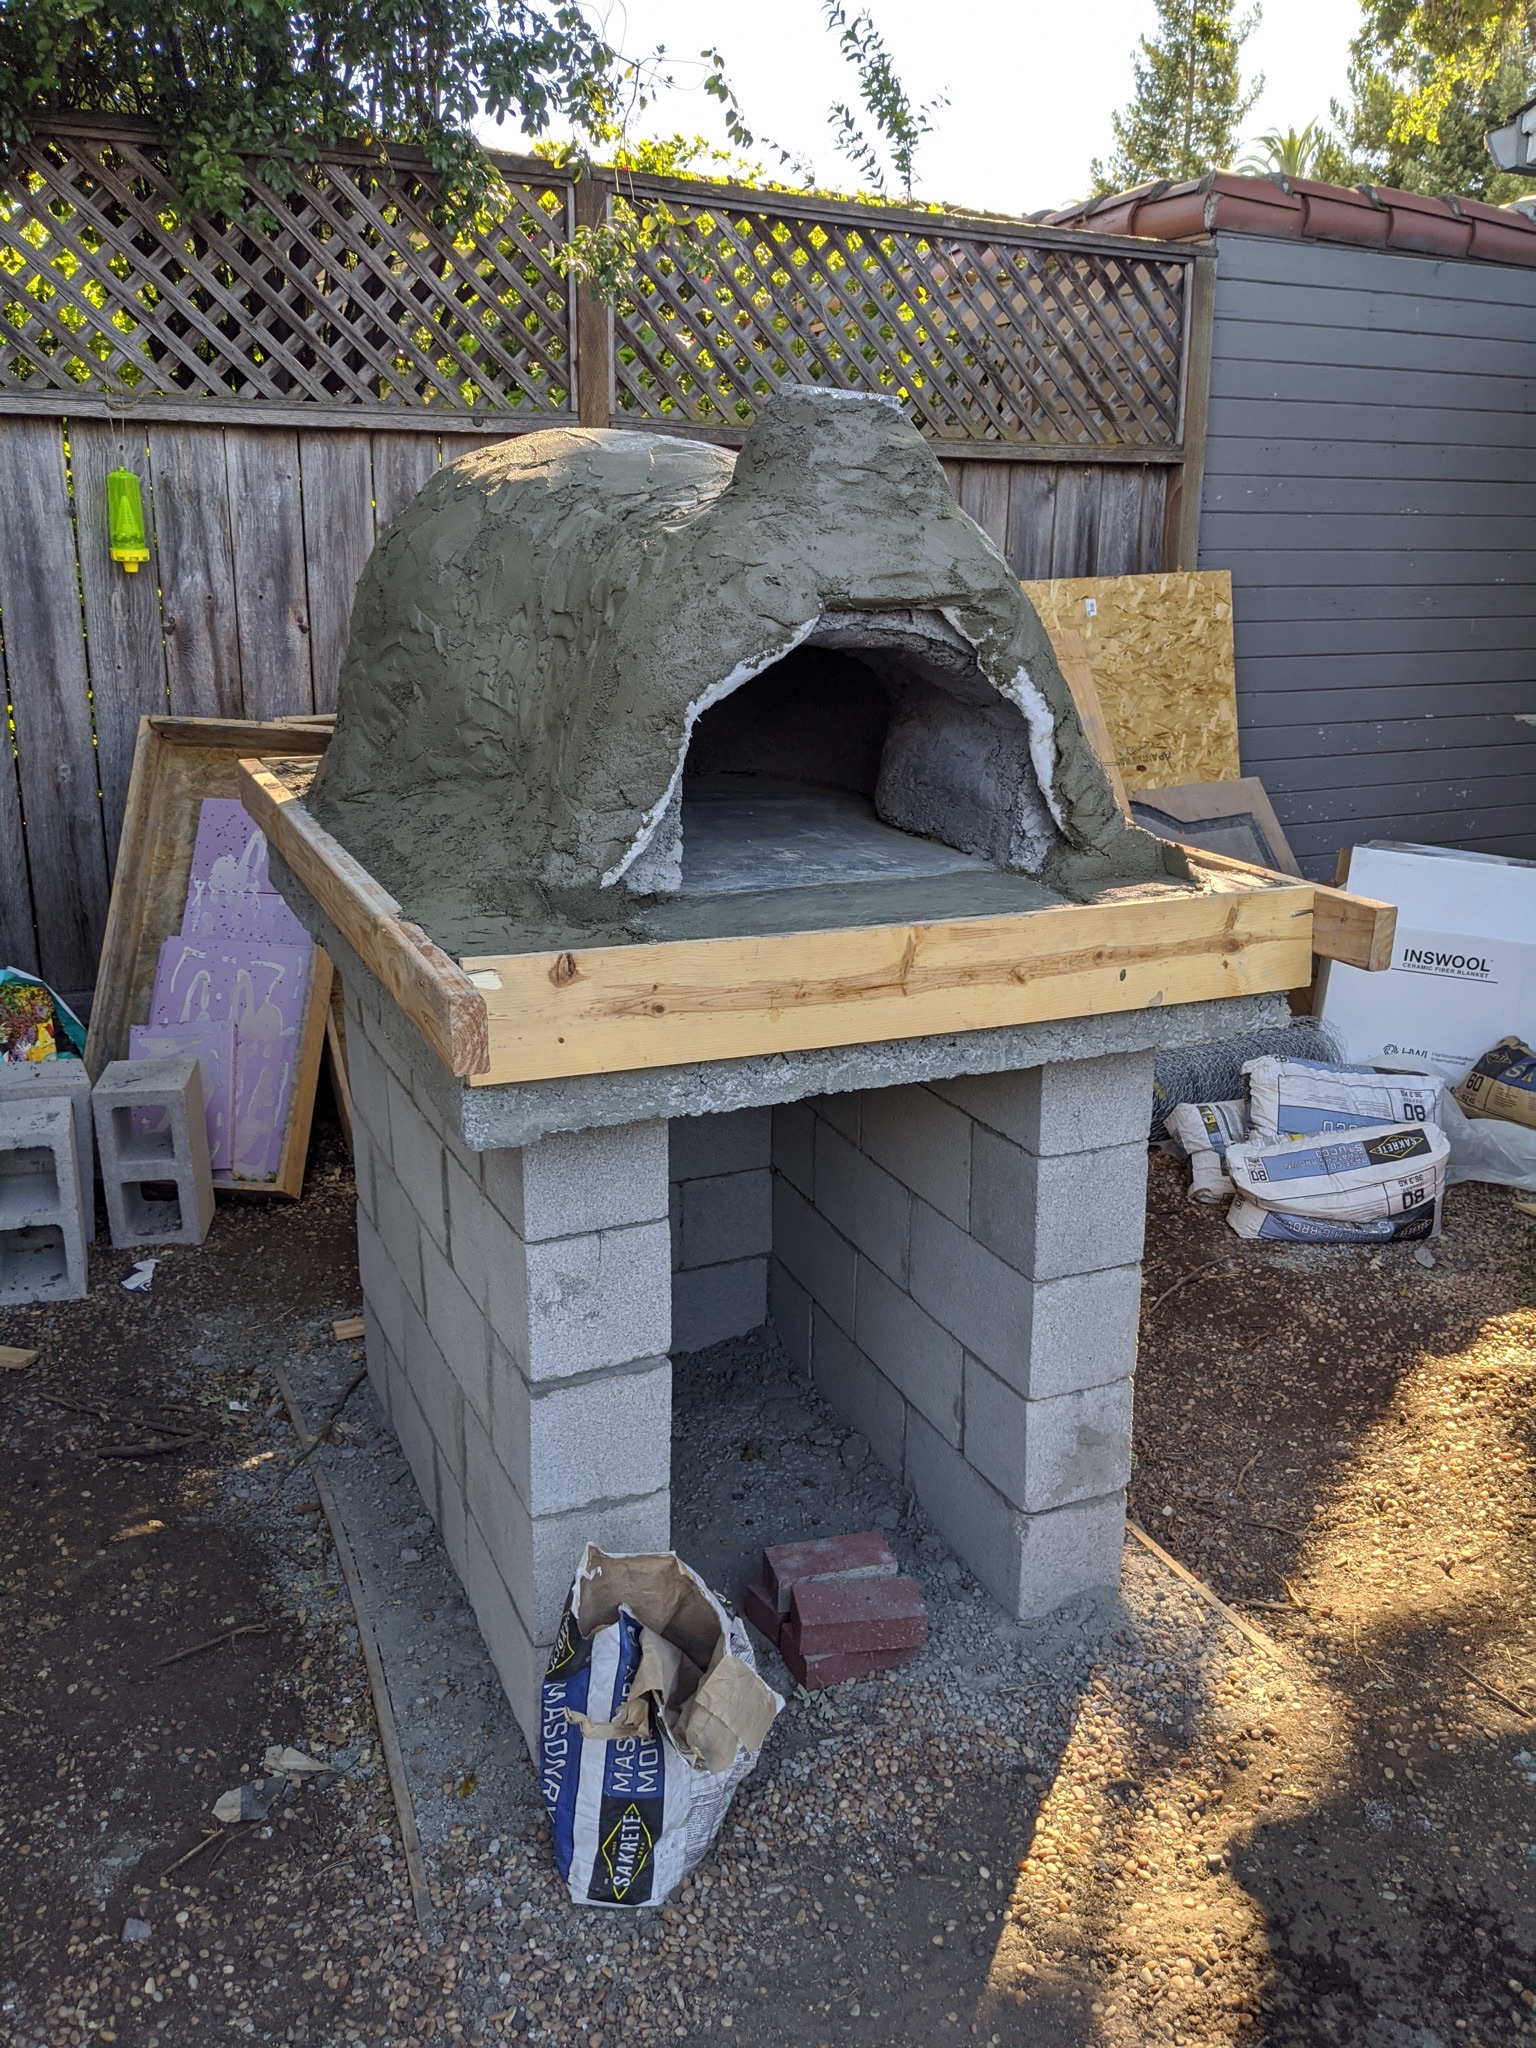
From there it was just cleaning things up and getting the oven running with some small to progressively larger fires to cure it.
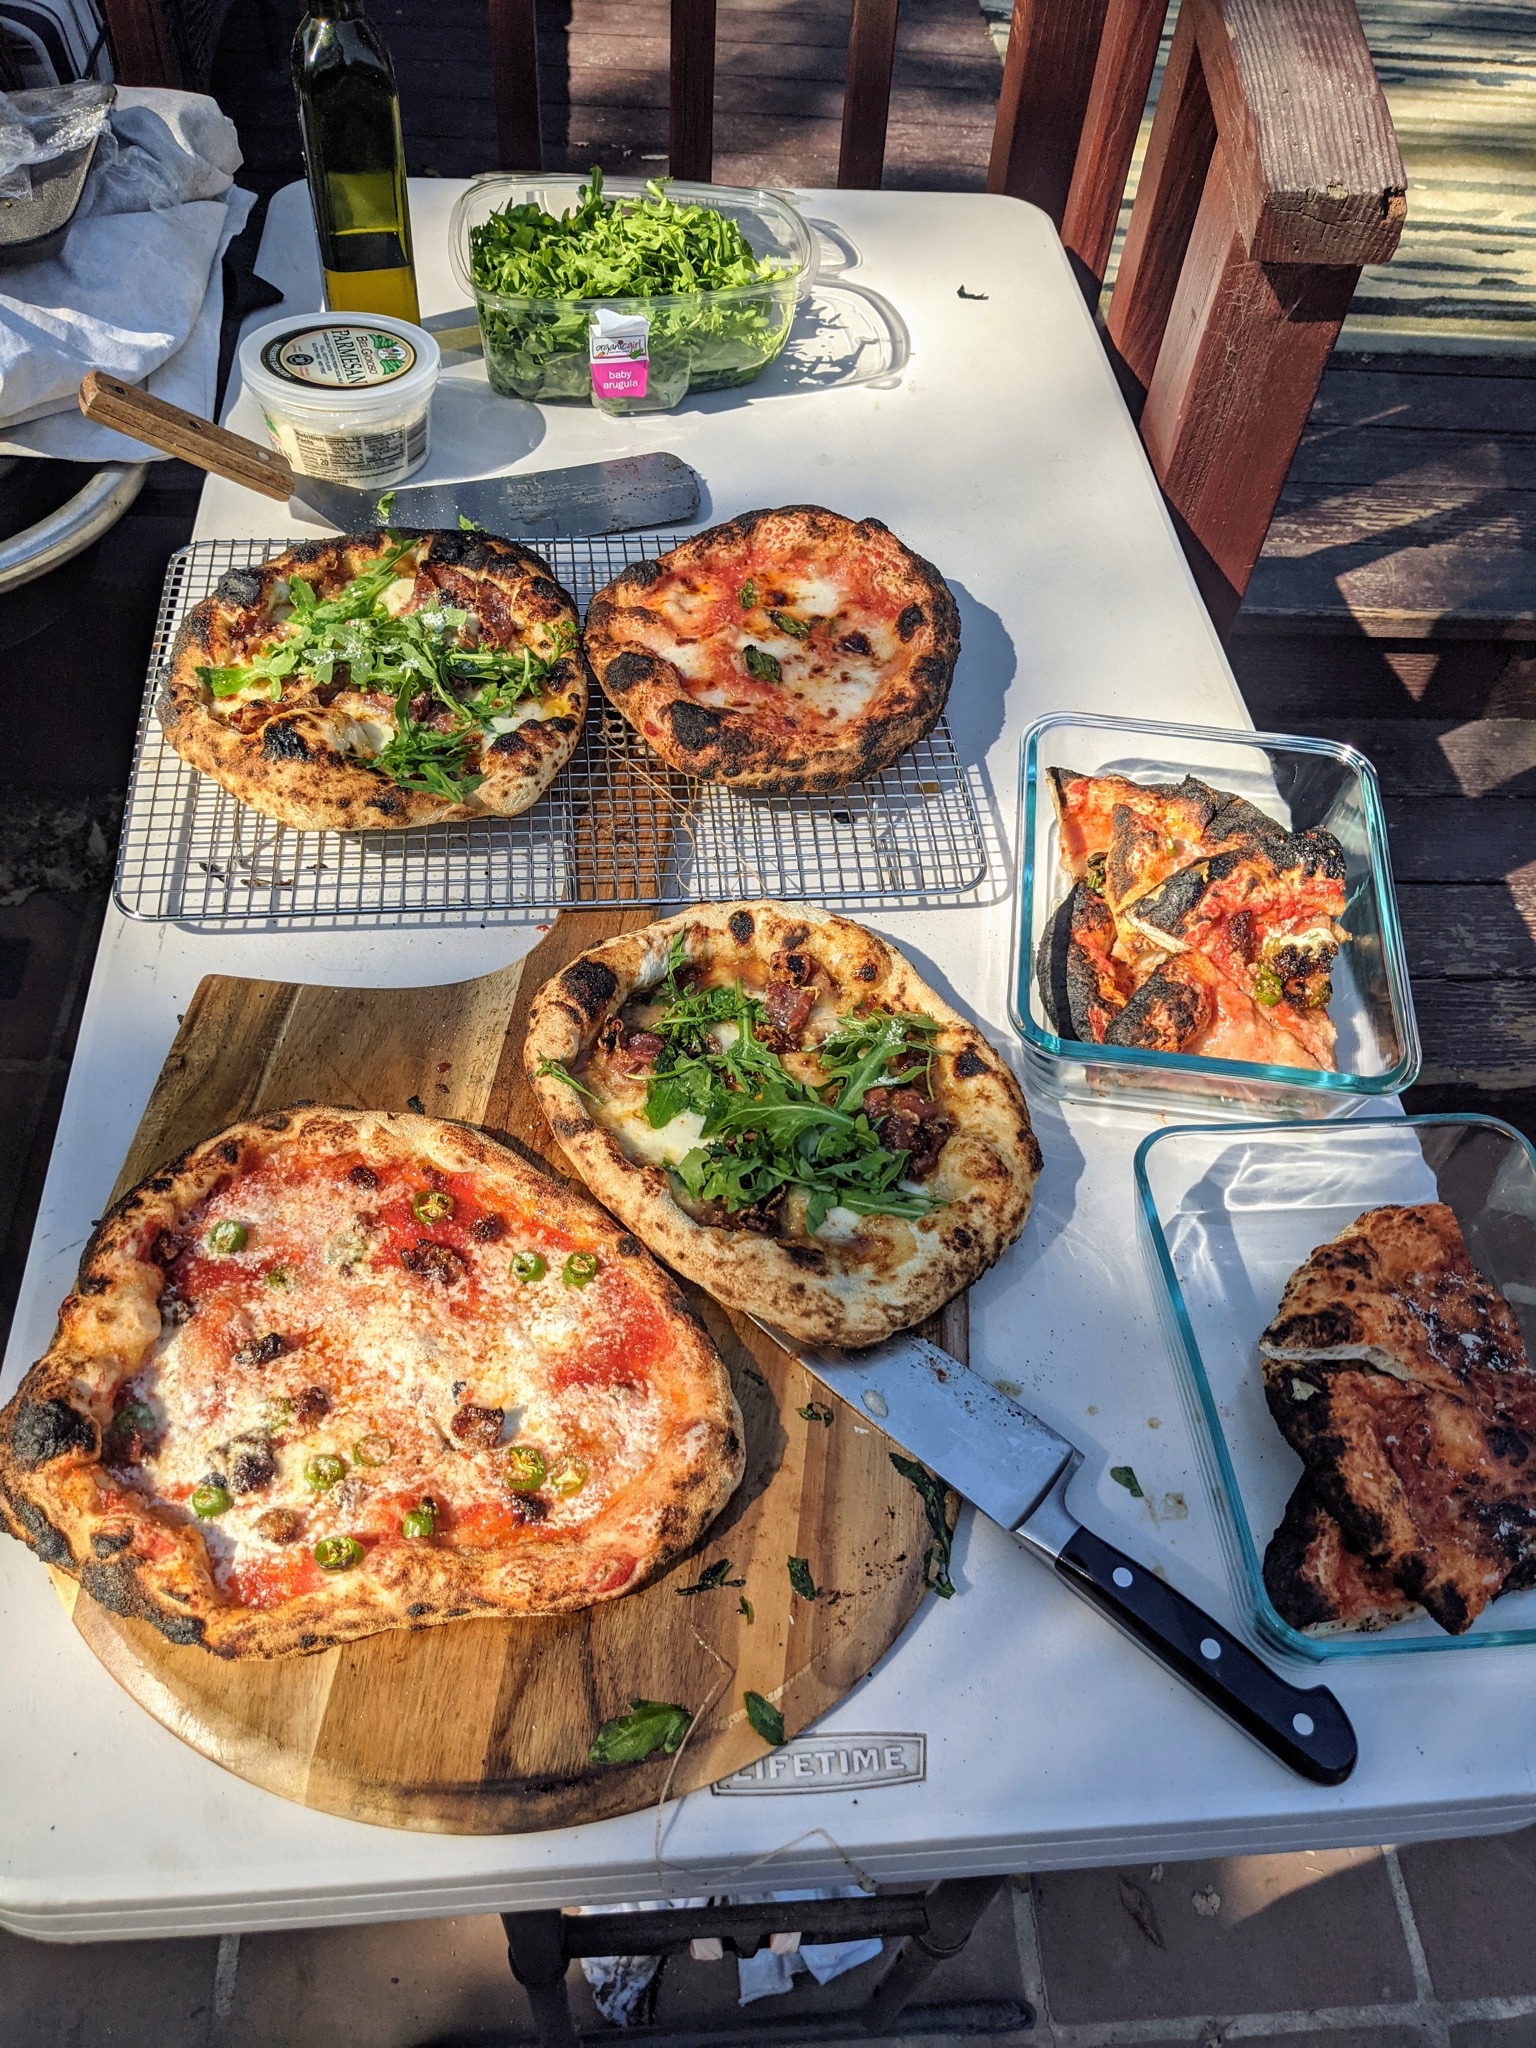
After that, it was off to the races making pizza! I think the first time we used it, I made 14 pizzas in a row.


Tools for Building Better Smart Home Actions (Google I/O'19)
This session will discuss tools to help developers build smart home Actions that make users’ lives easier. Deep dive into developer tools such as the report state tool, StackDriver, codelabs, and a new tool for certifying your Action. Also, learn about a new method of account linking that makes it easier for users to connect to your Actions.
Assembling a watch from parts
I recently started getting into watches. I guess that I’ve been interested in them for a long time, but the difference I guess is that I’ve started focusing on mechanical watches. Something that wormed its way into my brain was the thought of buying a bunch of parts and assembling a watch from scratch.
A couple months ago, I looked around at watch parts, and really had no idea what I was looking at and gave up quickly. Mainly, I didn’t really understand how to find a movement, and then match a dial, case, and hands to it. Then, I saw a post on Massdrop that had a couple shops to go to for parts, as well as a chronograph movement (Valjoux ETA 7750). I checked out Ofrei, and they had everything that I would need with a base Valjoux 7750 movement.
I built a list of parts:
- Valjoux ETA 7750 $450
- Dial Blue with Silver Markers $15 30.5mm
- Hands Swiss White Newlite Luminous Silver 120/200 HAN-7145 $8
- Case Sapphire Glass Top, Low Profile Crown Solid Stainless Steel Back Case With Blue Bezel For VAL ETA 7750 $91
- 2x New Red Chronograph Register Hand, Length 4.0 mm Hole 0.20 mm HAN-6502 $3
- Chronograph Register Hand, Length 4.0 mm Hole 0.20 mm HAN-6505 $3
- Second timer hand HAN-6710 $3
- Strap 20mm BAND-SKR-18-20R $13
Total - ~$589 - not too bad, around the same price as the cheapest automatic chronograph I could find. However, the cheapest chronograph with a Valjoux 7750 movement was over $1000 (most were between $1500-4000), so I figure I’m a ahead here.
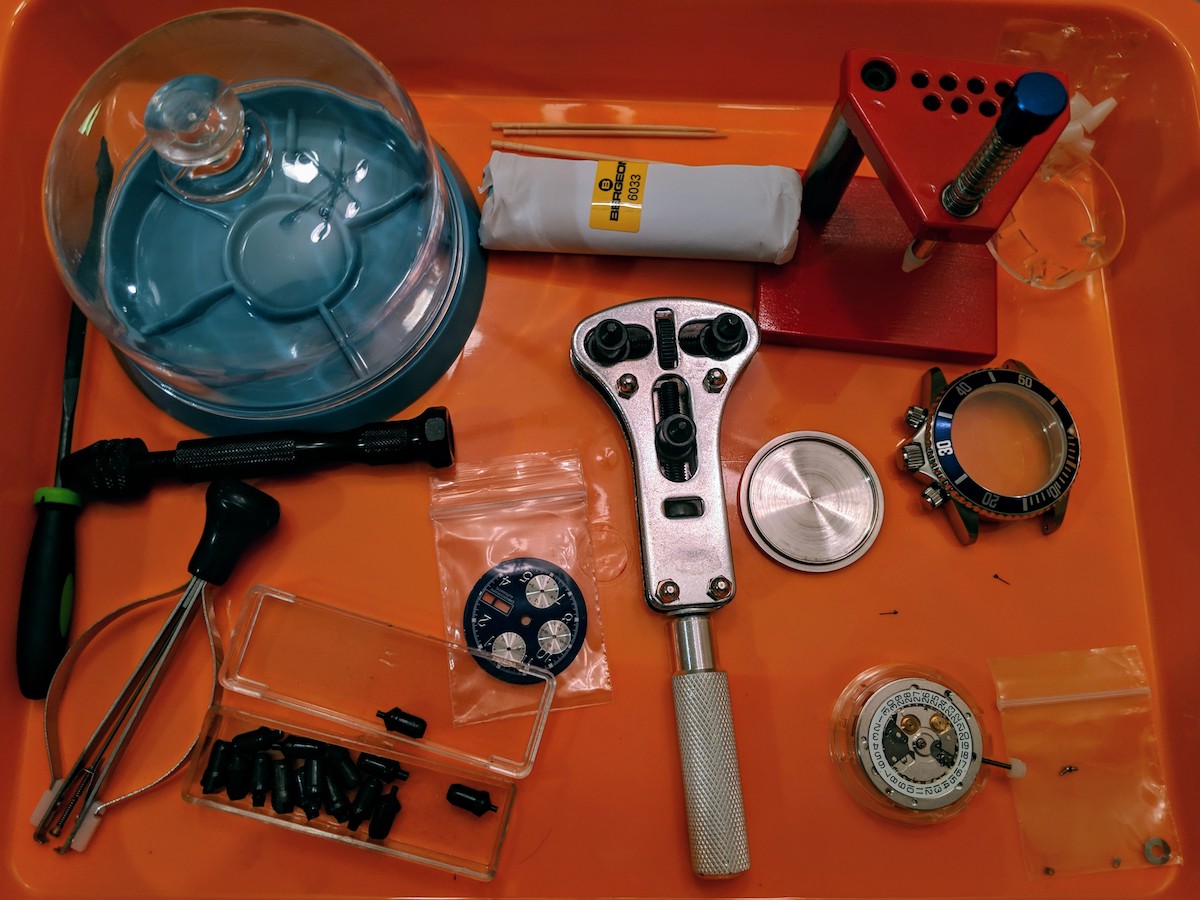
I had some of the required tools, but did need a few others, like a hand press, and some other odds and ends.
I had done a fair amount of research on all the different parts of assembling a watch from parts, and felt that overall I had a pretty good handle on everything. Once I actually started trying to place the chrono hands on the movement, my theory quickly fell apart, and I turned to r/WatchHorology for help. There were a few suggestions that were useful, but this one, by u/hal0eight I thought was the most helpful:
Magnification, HOROTEC hand press set and Rodico will solve your problems.
The trick here is the hands haven’t been fitted before, so they are quite tight. When you put it on the shaft it will want to move around rather than slightly go on.
You’ll need to line it up best you can on the shaft, then put the flat hand press end on top of the hand, move it around so you are applying a little pressure down, but also moving the hand around so it’s reasonably straight on the tip of the shaft.
When you’ve got it, gently push down.
If you need to reseat the hand it should be much easier.
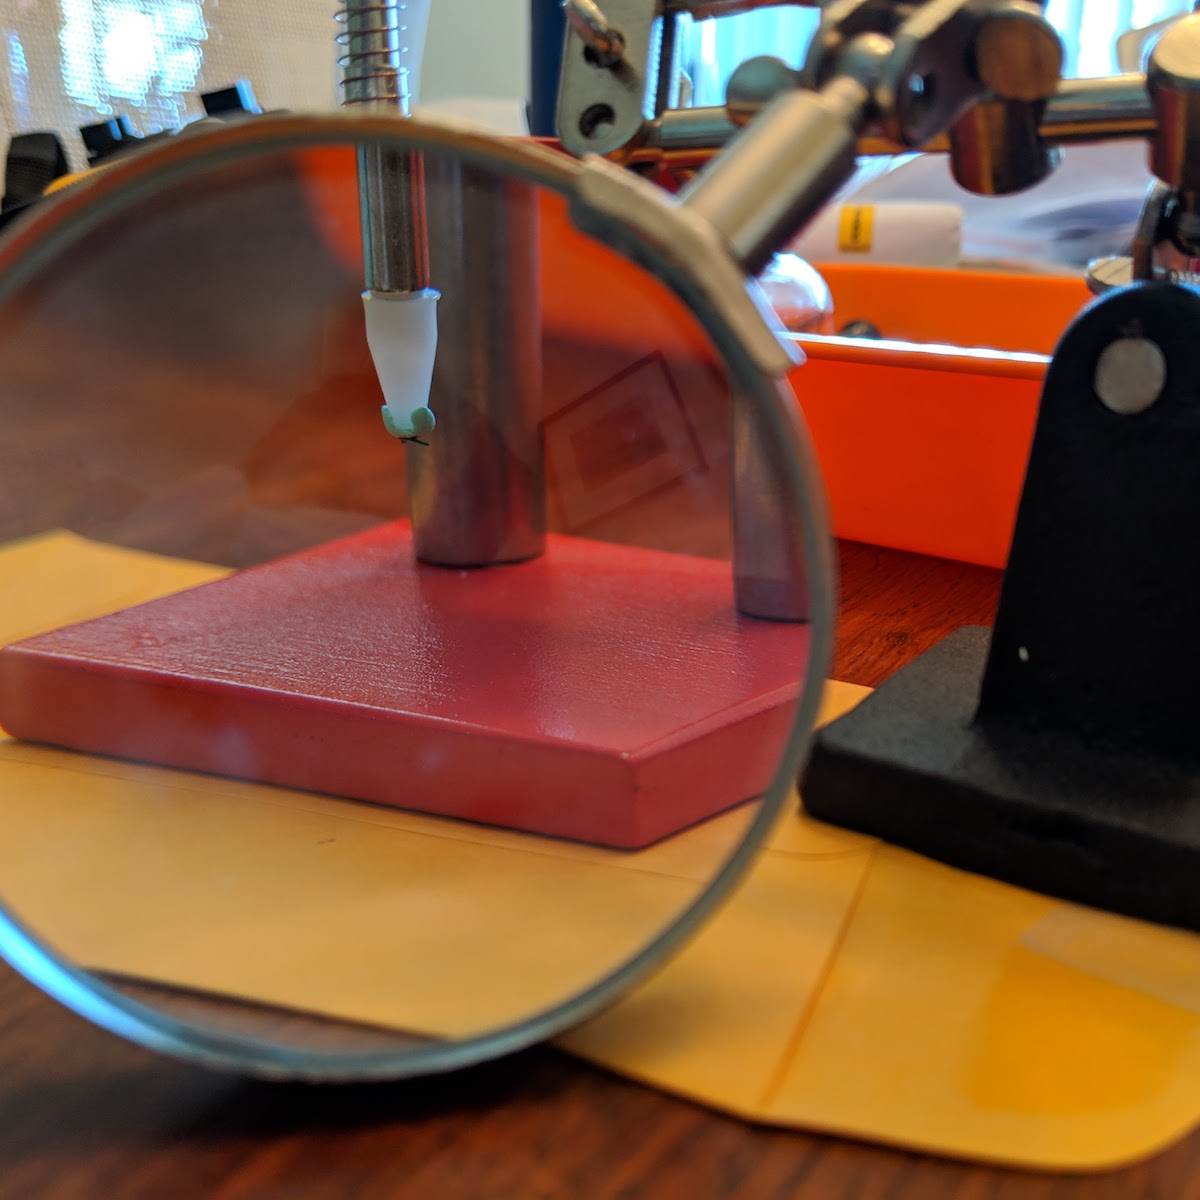
As you can see, I used the Rodico sticky putty to hold the hand onto the hand press, and then was able to simply move the movement into place underneath it. That was a lot easier than trying to place the thing on there with tweezers.

After figuring that out, I was able to move on to place the other small chrono hand and the sub-second hand without issue.
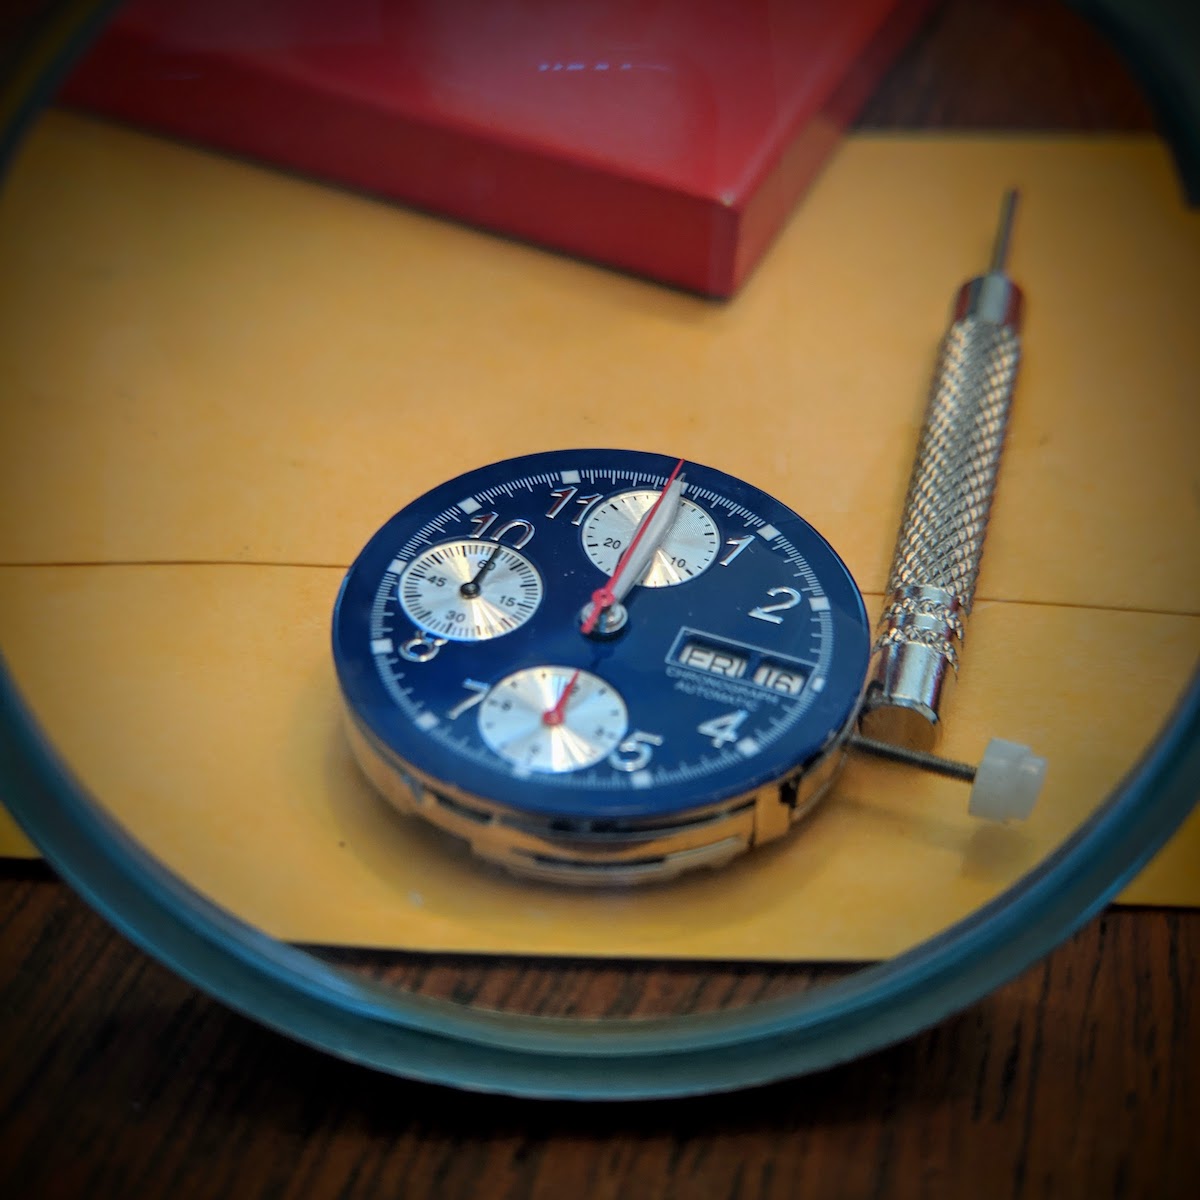
Placing the larger hands was much easier, so they went on quickly. At this point, I started playing around with winding the movement to see if the thing worked, and was a bit concerned to find that the sub-second hand was not turning, and nothing on the movement seemed to be moving. I was able to manipulate it a bit to move for a few seconds at a time, but not much beyond that. I’m not sure, but I have a feeling that it was because I had removed the rotor. I think that without the rotor, something is allowed to spin freely that should have resistance on it. Something for me to read up on anyways.
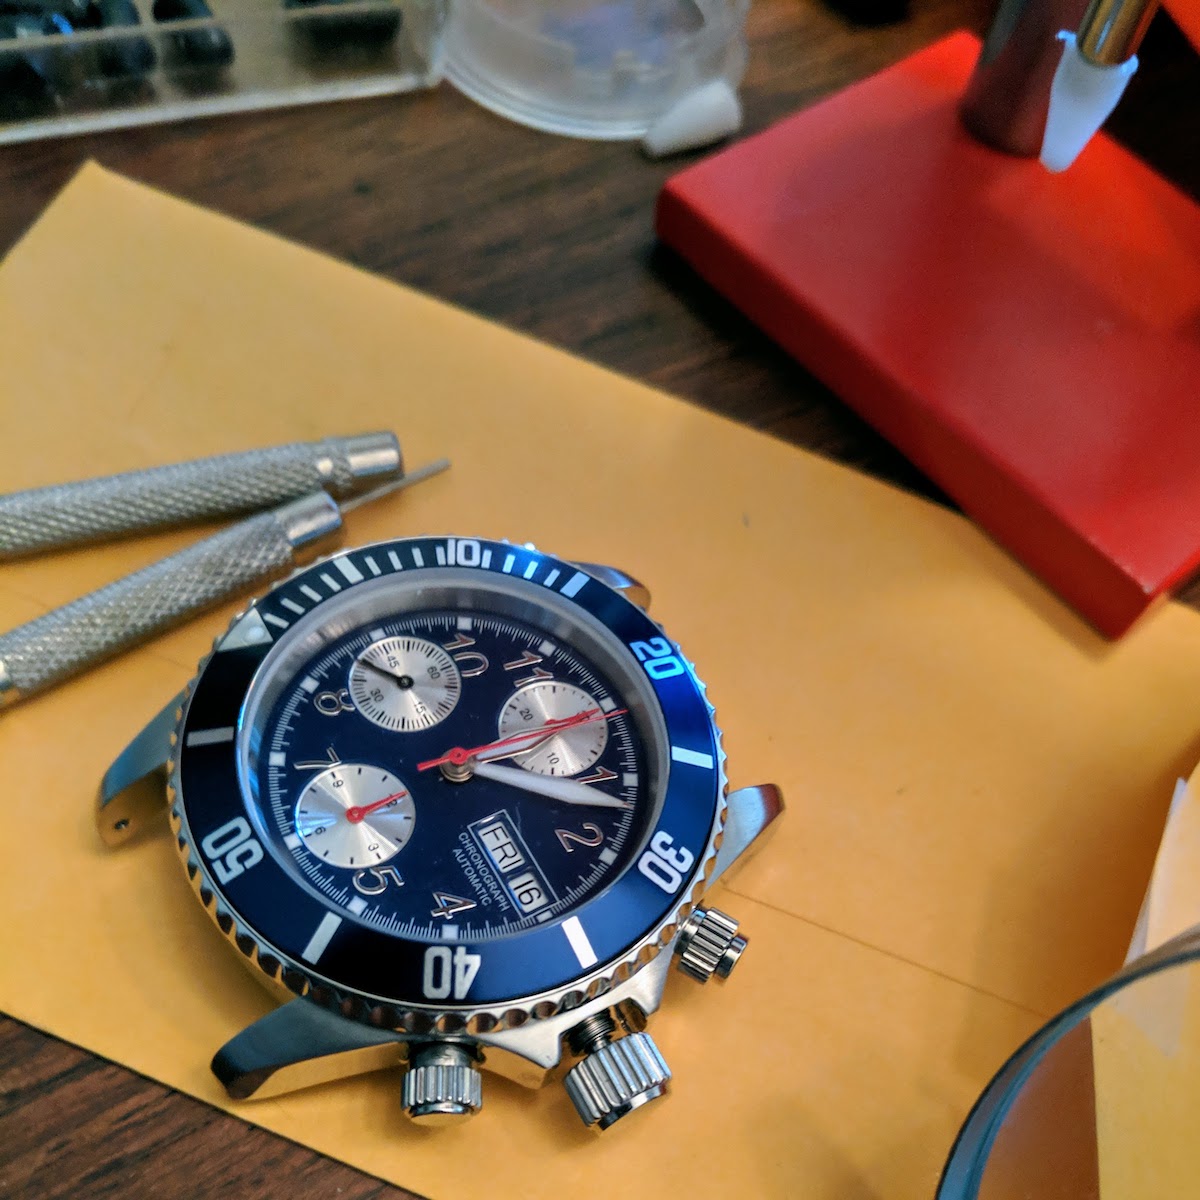
I put the movement in the case, and figured out how to cut down the stem to size. This was particularly tricky with a screw-down crown. I ended up making several cuts, and now I think it’s perfect.
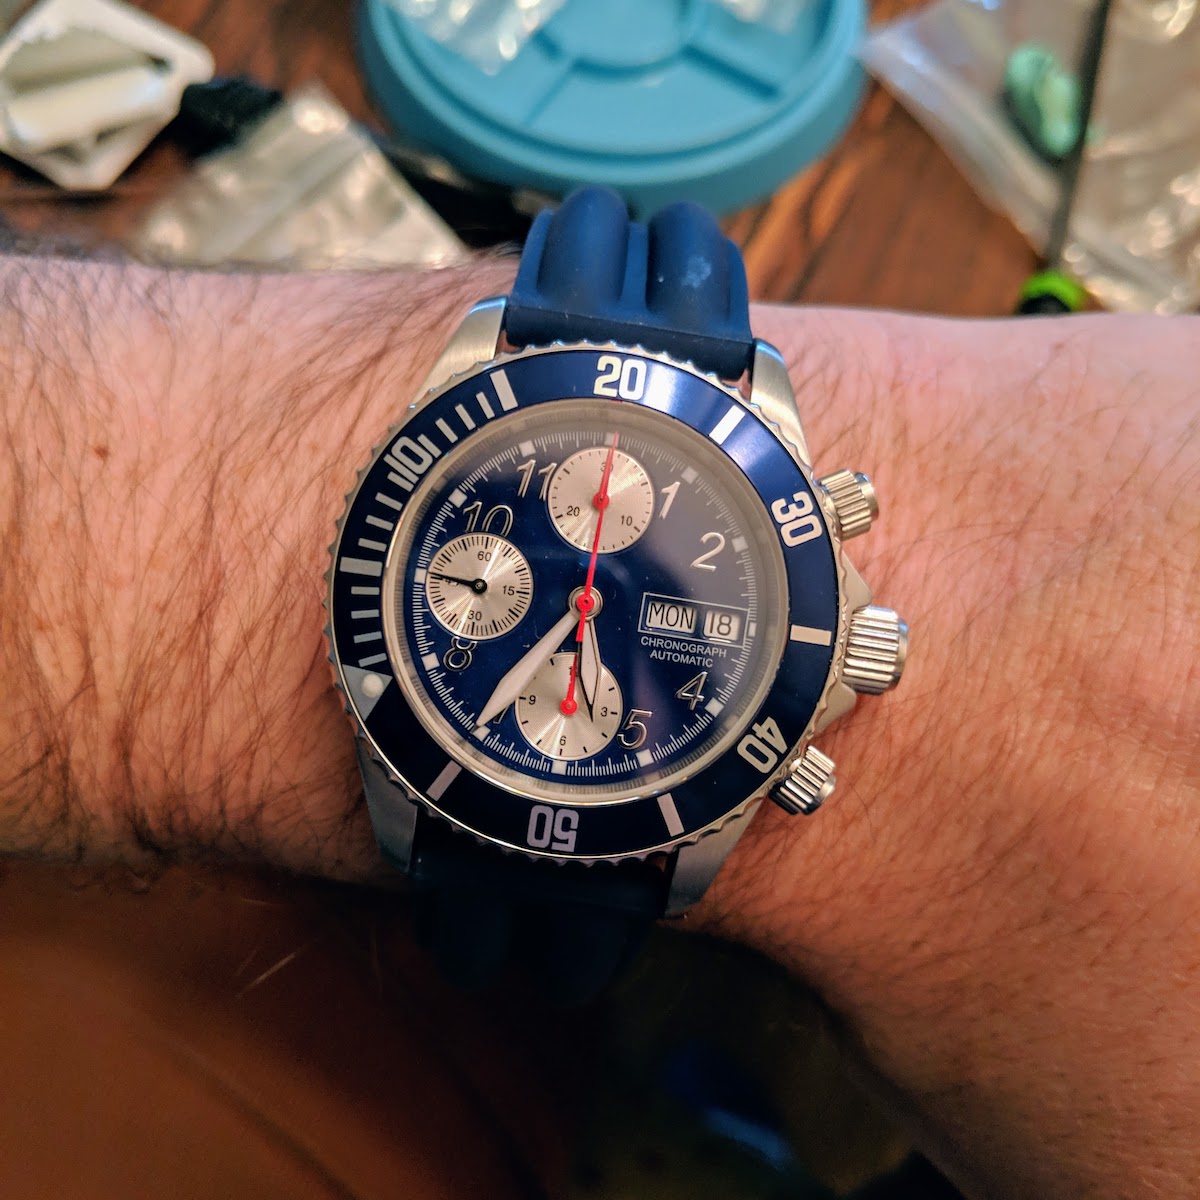
After that, I put the rotor back on the movement, put the case together, and did verify that the watch works correctly, and is able to keep time. The only thing that does not work right now is the minute chrono hand. I’m thinking there may be some residual Rodico in there, so when I’m feeling up to it, I’ll take the thing apart, and try to find out. If it’s not that, then I’ll be doing a much deeper dive on the Valjoux 7750 to try to diagnose it (asking reddit for help).
My Coffee Roasting Template and Notes
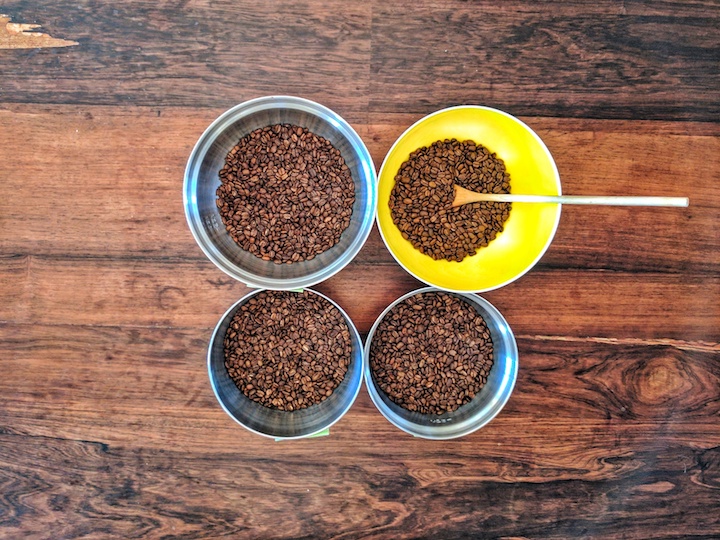
Photo stolen from Red City Roasters, my coffee roasting company!
Here’s a template doc that I use for my one of my roast profiles. (This is a lighter roast in terms of flavor profile, tuned to espresso. You may want to go lighter, shorter time, more acidic, for pour-over.)
Times are all relative, I have a timer that I restart at the beginning of each phase of the roast, as outlined in the doc. E.g., if I overshoot one phase, the overall roast time is lengthened. Temperatures are from my thermocouples that I’ve adjusted based on understanding the typical FC temp to be 392ºF. I use artisan in addition to this for tracking, but these notes tend to be much more useful for me to dial in my roasts. If you’re going to make adjustments to timing, I would suggest changing one phase by no more than 30s, and comparing. (+/- 10s in any given phase is a change that you may be able to taste.)
I based my template on the book “Modulating the Flavor Profile of Coffee”, which is short, concise and has lots of great info. I’d strongly recommend giving it a read if you’re into coffee roasting.
Doing My Best

Photo by Ashley St. John
Sixteen months ago, my daughter was born. After a difficult first week, the first month was great, challenging, but overall things were really good. Then the depression crept back in.
I’ve been dealing with depression for almost as long as I can remember. It comes in waves for me, where sometimes I’ll be generally feeling good, or ok for weeks, then seemingly out of nowhere, the depression knocks me down, and would stick around for one or a few weeks. Life was this cycle of feeling good for a while, getting depressed for a while, then fighting my way out of it and starting the cycle over.
I was generally happy when I would get home from work, but I’d spend the days being miserable, and wanting to quit my job. I don’t have a bad job, and in a lot of ways, it’s a really great job, but this was what was really bothering me at the time.
After Lydia was born, I decided that being depressed was a real hinderance to my ability to be the sort of father that I wanted to be. I wanted to be able to set a good example, and not act irrationally or impulsively because I couldn’t think of an alternative. I wanted to be able to pass on some tools for dealing with life better. So, after years of dealing with this, I made an appointment with a therapist.
I ended up only going to two sessions, because that’s all that I felt like I needed. Those two sessions were so useful, and illuminating, that it has taken me a little over a year to get to a point where I might need to go back for a refresher. The therapist that I met with introduced me to a version of therapy called Cognitive Behavioral Therapy (or CBT). CBT’s model is that our thoughts are what cause our feelings, and if we change the way that we think about things, then we can change the way that we feel. It can be broken down into a few parts: cognitions, goals, and behaviors. (As a note, there’s a great book called “Feeling Good” that goes through all the basics of CBT.)
One of the really basic CBT tools is a chart that helps you to identify specifically the thoughts that are triggering your negative emotions, and then asks you to come up with alternate ways to think about the triggering event or that idea that might be more balanced. This requires paying close attention to how you’re feeling, and working backwards from there, which is tricky initially, but you get the hang of it.
Using this technique, I was able to begin to see what was bothering me so much, and it turned out that if I forced myself to restate what was happening, in a way that might be more balanced and not as distorted, I felt better about the situation. After going through this exercise a number of times, I started to internalize the process and could run through this exercise in my head, faster and faster as things happened. I also was becoming more conscious of how I felt, and why I felt that way.
It has also highlighted to me a basic thought pattern that I had of taking a negative default view of things, which I then was able to shift to start take a more positive view. I’ve also started figuring out different strategies for handling difficult situations better, a big part of which is simply setting expectations differently, revising expectations as needed, and changing my approach.
Things aren’t perfect, and probably will never be, but overall, I have been happier in the last year than any other time that I can remember. That’s mostly a result of focusing on the best parts of my life, instead of the few not so great details. At this point, I certainly feel like I have more to give Lydia that will hopefully help her to avoid the trap of depression that I fell into. As a bonus, I can enjoy my time with my family to a much greater extent than before.
Let's Encrypt - setting up automated certificate renewals
Not too long ago, Let’s Encrypt launched a free CA to enable website owners to easily generate their own signed certificates from the command line on their server. It integrates with popular web servers like Apache and NGINX to make the validation step easier. However, the certificates are only valid for 3 months, as opposed to the 1 year that is more typical. They’ll send an email when your certificate is close to expiring, but that’s not always idea. The good news is that since this is a command line tool, it can be easily written into a cron job to run periodically.
The current release, 0.4.2, seems to work reasonably well for scripted renewals. There are a couple notes for issues that I ran into, at least with this version. First, here’s the general command that I use for renewals:
./letsencrypt/letsencrypt-auto certonly --no-self-upgrade --apache --force-renew --renew-by-default --agree-tos -nvv --email admin@example.com -d example.com,www.example.com >> /var/log/letsencrypt/renew.log
That’s great when you have a simple site, with sub-domains that all point to one set of content, and one vhost entry (per port). If you have a couple of different subdomains that relate to different sets of content, something like this:
./letsencrypt/letsencrypt-auto certonly --no-self-upgrade --apache --force-renew --renew-by-default --agree-tos -nvv --email admin@example.com -d example.com,www.example.com,app.example.com >> /var/log/letsencrypt/renew.log
Where app.example.com in the above example relates to a different vhost. In this case, you’ll need to break the vhosts into separate files. See the below examples.
Vhost for example.com and www.example.com:
<VirtualHost *:80>
    ServerAdmin admin@example.com
    ServerName example.com
    ServerAlias www.example.com
    DocumentRoot "/var/www/example/"
    <Directory "/var/www/example/">
        DirectoryIndex index.html
        RewriteEngine On
        RewriteOptions Inherit
        AllowOverride All
        Order Deny,Allow
        Allow from all
        Require all granted
    </Directory>
</VirtualHost>

<VirtualHost *:443>
    ServerAdmin admin@example.com
    ServerName example.com
    ServerAlias www.example.com
    DocumentRoot "/var/www/example/"
    <Directory "/var/www/example/">
        AllowOverride all
        Options -MultiViews +Indexes +FollowSymLinks
        DirectoryIndex index.html index.htm
        Order Deny,Allow
        Allow from all
        AllowOverride All
        Require all granted
        DirectoryIndex index.html index.php index.phtml index.htm
    </Directory>

    ErrorLog "/var/log/httpd/example.com-error_log"
    CustomLog "/var/log/httpd/example.com-access_log" common

    SSLEngine on

    SSLCertificateFile /etc/letsencrypt/live/example.com/fullchain.pem
    SSLCertificateKeyFile /etc/letsencrypt/live/example.com/privkey.pem
</VirtualHost>
Vhost for app.example.com:
<VirtualHost *:80>
    ServerAdmin admin@example.com
    ServerName app.example.com
    DocumentRoot "/var/www/example-app/"
    <Directory "/var/www/example-app/">
        DirectoryIndex index.html
        RewriteEngine On
        RewriteOptions Inherit
        AllowOverride All
        Order Deny,Allow
        Allow from all
        Require all granted
    </Directory>
</VirtualHost>

<VirtualHost *:443>
    ServerAdmin admin@example.com
    ServerName app.example.com
    DocumentRoot "/var/www/example-app/"
    <Directory "/var/www/example-app/">
        AllowOverride all
        Options -MultiViews +Indexes +FollowSymLinks
        DirectoryIndex index.html index.htm
        Order Deny,Allow
        Allow from all
        AllowOverride All
        Require all granted
        DirectoryIndex index.html index.php index.phtml index.htm
    </Directory>

    ErrorLog "/var/log/httpd/example-app.com-error_log"
    CustomLog "/var/log/httpd/example-app.com-access_log" common

    SSLEngine on

    SSLCertificateFile /etc/letsencrypt/live/example.com/fullchain.pem
    SSLCertificateKeyFile /etc/letsencrypt/live/example.com/privkey.pem
</VirtualHost>
Then, I created a script that handles a couple of different renewals, and at the end, a command to reload apache configs, called updateCerts.sh:
#!/bin/bash

./letsencrypt/letsencrypt-auto certonly --no-self-upgrade --apache --force-renew --renew-by-default --agree-tos -nvv --email admin@example.com -d example.com,www.example.com,app.example.com >> /var/log/letsencrypt/renew.log
./letsencrypt/letsencrypt-auto certonly --no-self-upgrade --apache --force-renew --renew-by-default --agree-tos -nvv --email admin@thing.com -d thing.com,www.thing.com,files.thing.com >> /var/log/letsencrypt/renew.log

apachectl graceful
Then, I added this to the root user’s crontab:
# m h  dom mon dow   command
0 4  *   *   1     /home/user/updateCerts.sh
Cron is supposed to run this script once a week, and we’ll have logs at /var/log/letsencrypt/renew.log.
Container Tomcat Graph - part 1
Note: I wrote this post 3 years ago, and somehow forgot to publish it. It may contain incomplete sentences, and may be complete nonsense, I am not going to re-read it. Proceed at your own risk.
For years, I’ve had this problem around cooking at home, which is sort of two-fold. First, I really don’t like finding recipes and coming up with meals to cook. It’s time-consuming, and when I’m digging through recipes, I get indecisive and overwhelmed with the number of choices, wasting hours a week. The other problem I have is that there are meals that I cook that call for me to buy some ingredient that the meal itself doesn’t completely use and that I probably won’t use again.
I decided to build a tool to help me solve these problems. The tool will allow me to enter in recipes, it will store them in a graph database, and then it will traverse the graph to build a menu for the week for me. If there are recipes that call for uncommon ingredients that are somewhat expensive that won’t be fully used, it should try to find other recipes that also use that ingredient, and prioritize surfacing those recipes.
I wanted to write up my process, as I have had a lot of difficulty, just getting the basics off the ground. Especially with how many moving parts there are in this. Hopefully, if I decide to build another app with a similar stack, it’ll be a little quicker with this guide.
This blog post is going to take us through the very basics of building a Docker image that runs Tomcat. The next post will cover getting that image up to the cloud. From there, future posts will cover using AngularJS as a frontend, and adding in the Titan graph.
Here are the technologies that I’m going to use to build this app:
- Google Container Engine
- Gradle
- Docker
- Kubernetes
- Tomcat
- Titan DB (graph database)
- AngularJS 1.x (frontend)
As a prerequisite, to this, you’ll need to have Docker set up locally. I haven’t written a thing on this, so you’re on your own here. It’s not that hard, the installer does most of the work for you. You’ll also need to have the Google Cloud tools set up.
Create the project
You’ll need to start with your basic directory structure, with a handful of basic files. You can find the full source for this blog post here. I’ll be using the following structure:
Tomcat
The very first thing that we’ll do, is give a rough outline of our Tomcat app in build.gradle:
This uses a gradle plugin that helps us out with building for tomcat, as well as grabbing tomcat dependencies.
Now, let’s define our web.xml file:
All we’re really doing with that is defining the jsp that we’ll use as a place-holder. Speaking of, here’s the index.jsp:
Just a simple ‘hello world’, so that we can see that things are working.
Docker
Now that that’s done, we need to be able to run that in some sort of environment. I grabbed a Dockerfile from jeanblanchard/docker-tomcat, and modified it to copy my app in.
As you can see, I’m building an entire new Tomcat image every time I build this. I will probably refactor this into two separate Docker images, one for generic Tomcat stuff, and one that depends on the generic Tomcat one, and pulls my war in.
You’ll note that if you try to build now, it’s going to fail, that’s because you need a tomcat-users.xml file. Here is the one from the jeanblanchard/docker-tomcat repository:
Running Locally
Now that you’ve got that done, I like to create a script to build and run things locally, just to test it all out. Here’s my buildrun.sh script:
Try running that with:
./buildrun.sh
Once again, you’ll need to have your environment set up for the above command to work correctly. If it does run correctly, you should be able to visit the app in your browser, at an address that looks something like this: http://192.168.99.100:8080/container-tomcat-graph-0.1/index.jsp (the app name might be different if you used something different than I did).
To be continued
Check out Part 2 (coming soon) for getting your Docker container deployed.