GlassGif - Notes for a Live Coding Session Using the GDK
GlassGif - Notes for a live coding session using the GDK
This post is intended to serve as a guide to building a GDK app, and I will be using it as I build one live on stage. The code that will be discussed here is mostly UI, building the Activity and Fragments, as opposed to dealing with lower level stuff, or actually building GIFs. If you’re interested, the code for building GIFs is included in the library project that I’ll be using throughout, ReusableAndroidUtils. The finished, complete, working code for this project can be found here.
Video
Project setup (GDK, library projects)
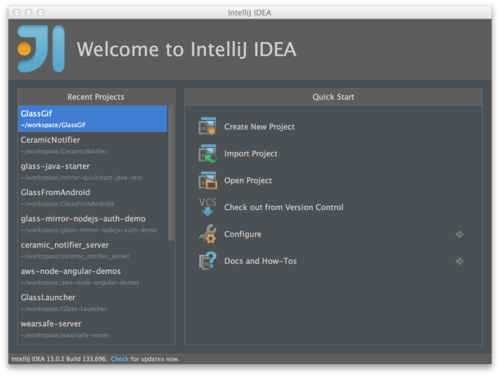
Create a new project.
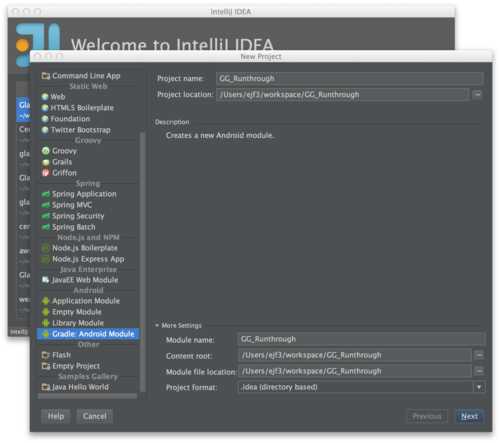
Select Gradle: Android Module, then give your project a name.
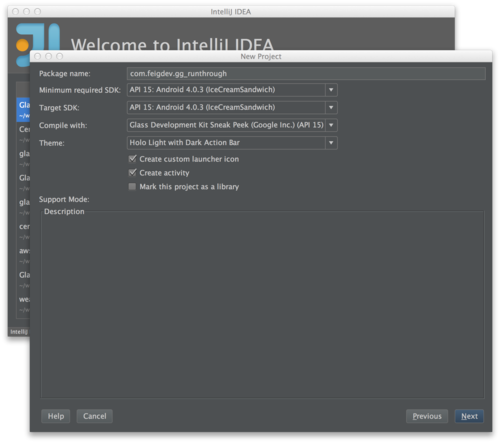
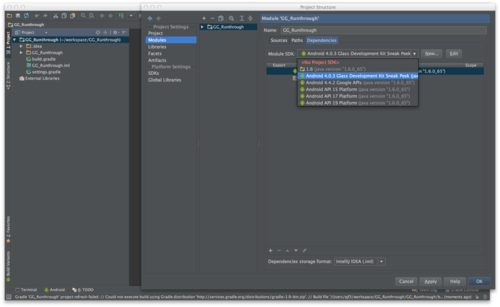
Create a package, then set the API levels to 15, and the ‘compile with’ section to GDK, API 15.
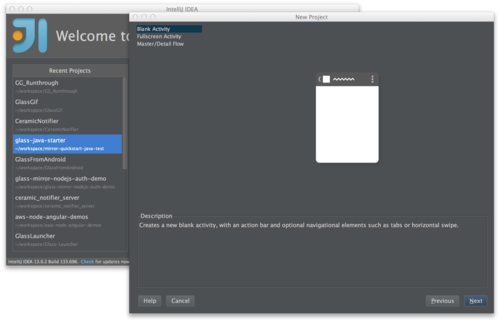
Let’s do a Blank Activity.
If gradle is yelling at you about local.properties, create local.properties file with the following:
sdk.dir=/Applications/IntelliJ IDEA 13.app/sdk/
Or, whatever location your Android SDK is installed at, then refresh Gradle.
You might need to re-select GDK. If your project is broken and not compiling. Highlight the module, and hit 'F4’ in Intellij/Android Studio.
Now the project should be building.
Hello world & run
Let’s start out by just running 'hello world’. I’m adding this as a module, instead of creating a new project. As such, the manifest is not set up correctly, and needs to be modified:
Make sure it runs.
Fullscreen & run
Update the manifest to change the app’s theme to be NoActionBar.Fullscreen:
Make sure it runs.
Voice launch & demo
Turn the activity into an immersion:
I found this great blog post on adding voice actions. Add the voice_launch.xml:
And the string to strings.xml:
Run, and test saying OK Glass, launch the app.
Image capture & demo
Refactor structure to make the fragment its own file, ImageGrabFrag. Now, we are going to add some code to deal with the camera. The Android documentation on the Camera APIs is quite useful.
Here are a couple of StackOverflow discussions that might be helpful for common Camera problems.
Next, we need to add a SurfaceView to main fragment.
Now, we need to add a dependency on my library project, ReusableAndroidUtils, which contains a lot of helper code. To do this, clone the repo and import it as a module into your project. After you’ve imported it, update your build.gradle file to reflect the addition:
Next, I’m going to pull in a bunch of code for ImageGrabFrag. Here’s what we have at this stage for that file:
Finally, let’s update the manifest with the required permissions.
Copy that in, make sure it all compiles, and try running. At this point, you should get a garbled preview that looks all funky:

What’s happening here? Well, Glass requires some special parameters to initialize the camera properly. Take a look at the updated initCamera method:
Ok, almost there. Now, we just need to capture an image. Take note of the added takePicture() call at the end of initCamera(). When we initialize the camera now, we’re going to try taking a picture immediately. Now we are running into an odd issue.
Try launching the app from the IDE, then try launching it with a voice command. When you launch from your IDE or the command line, it should work. If you launch from a voice command, it will crash! There are a couple things that we need to change. First, there’s a race condition going on right now. We are currently initializing the camera after the SurfaceHolder has been initialized, which is good, because if that wasn’t initialized, the camera would fail to come up. However, when we launch with a voice command, the microphone is locked by the system, listening to our voice command. The Camera needs the mic to be unlocked, because we might be trying to record a video. Thus, we get a crash.
The error, specifically, is the following:
Camera﹕ Unknown message type 8192
There are several discussions about this issue floating around:
The thing to do is to delay initializing the camera a bit:
Try running again, and it should work this time.
Multi-Image capture
This part’s simple. We just modify our image captured callback, and add a counter.
We’re also going to add a static list of files to the main activity, to keep track of them. We’ll need that later.
Combine to gif
Now we need another fragment. We’re going to do a really simple fragment transaction, and we’ll add an interface to help keep things clean. Here’s the interface:
We need a reference to it in the ImageGrabFrag:
Then we need to change what happens when we finish capturing our last photo:
Here’s the final version of the ImageGrabFrag, before we leave it:
Alright, time to add a new fragment. This one needs a layout, so here’s that:
And here’s the fragment that uses that layout:
While there is a fair bit of code here, what’s going on is pretty simple. We are kicking off an AsyncTask that iterates through the files, builds Bitmaps and adds those bitmaps to an ArrayList of Bitmaps. When that’s done, we can move on. Here’s a link to a StackOverflow discussion that explains how to build gifs.
For any of this to work, we need to actually do the fragment transactions. So, here is the updated Activity code:
Now we can run, and it will do stuff, but on Glass, it’s not going to be a very good experience. For one thing, you won’t have any idea what’s going on, as the user, while the gif is being built. For that, let’s do two things. First, we should keep the screen on. Update the Activity’s onCreate method:
Let’s also add a bit of eye candy to the fragment. I want to flip through the images as they’re being worked on. I also want a ProgressBar to be updated until the builder is finished.
Run it again, that’s a little better, right?
Static Card
First thing that I’d like to do is to insert a Card into the timeline with the image. Now, this works, but it’s not great. Currently, StaticCards are very simple. They do not offer much functionality at the moment, as the API is still being fleshed out. Hopefully soon it will be updated. For now though, let’s do what we can:
As a note, if you have not already, make sure that Gradle is set to build with the GDK:
Viewer
The StaticCard is OK, but not great for a viewer. We made a gif, not a single image. Let’s build a viewer. First thing is that we’ll add our last Fragment transaction method to the Activity.
The viewer itself is very simple. It’s just a WebView that is included in the library project. We don’t even need a layout for it!
There’s a bit of an issue with not being able to see the whole thing. I didn’t dig into figuring out how to fix that issue. There are other ways of getting gifs to display, but I couldn’t get them to work in a reasonable amount of time.
Getting the gif off Glass
This section almost warrants its own discussion, but basically the issue is this, without writing a bunch of code, and uploading the gif to your own server, there’s not really a nice, official way of sharing the gif. Ideally, that StaticCard that we created would support MenuItems, which would allow us to share out to other Glassware with a Share menu.
Luckily, I found this great blog post that provided a nice work-around. It describes how to share to Google Drive, and with only a few lines of code. Here’s the code:
It’s not the sort of thing that I’d feel comfortable releasing, however, it is enough to finish up here.
Wrap-up
