29 Jan 2014, 18:51

Hacking Crappy Customer Support

Hacking Crappy Customer Support

The Situation

We had an issue at work the other week. Basically, we were running into some pretty serious problems with one of the SAAS services that we use (I will leave which one to the reader’s imagination). This is a mission critical service for a couple of our offerings, and it’s not particularly cheap, at $200/month for the pro service (which is what we have). This is a service that is structured in such a way that for anybody that uses it, it’s likely to be a mission critical service. This is all well and good, except that they don’t seem to bother answering support emails. We’ve had emails to them go totally unanswered before. However, until last week, we hadn’t run into an issue important enough that we really, really needed a response.

We found ourselves in a situation where we had taken a dependency on a third-party service, ran into an issue, and were getting no help from the provider. We had guessed at a work-around that turned out to be the right answer for an immediate fix, but we still needed a proper fix for this, else we would need to make larger changes to our apps to better work-around the problem. The vendor was not answering the urgent emails, and provided no phone number for the company at all.

The Hack

I had an idea. The provider has an Enterprise tier, we could contact the sales team, and say that we’re looking to possibly upgrade to Enterprise, but that we had some questions that needed to get answered first. We structured our questions in a way that first asked what we needed to know, and then asked if the Enterprise tier might solve the issue, or if they were working on a fix. This tactic worked. A couple of us separately sent emails to the Enterprise sales team (they, too, do not have a phone number listed) and received responses fairly quickly. We got our questions answered after a couple rounds of emails.

Concessions

It’s true, they didn’t promise any support, even at the pro level; we had mistakenly assumed that we’d at least be able to get questions answered via email. We should have probably done a bit more research before choosing a provider. The provider may not have been set up to handle that much in terms of support. However, they are not a small company, and could at least offer paid support as needed.

Conclusions

As far as whether or not we stick with them, we’ll see. I’m not too thrilled about paying a company $200/mo and getting the finger from them whenever something of theirs is broken. But, there are other constraints, and you can’t always get everything you want. Sometimes there simply isn’t the time to go back and fix everything that you’d like to.

31 Oct 2013, 23:59

talkray:

talkray:

Special Delivery!

We got a special delivery here at the TiKL office today, a brand new Nexus 5. As soon as we opened it, we booted it up, and installed Talkray on it. It is a fantastic device.

Fun day at work!

26 Oct 2013, 16:42

python sweetness: How to lose $172,222 a second for 45 minutes

python sweetness: How to lose $172,222 a second for 45 minutes

http://pythonsweetness.tumblr.com/post/64740079543/how-to-lose-172-222-a-second-for-45-minutes

The actual loss was $465M, as opposed to $172,222. Regardless, it’s a good read.

pythonsweetness:

This is probably the most painful bug report I’ve ever read, describing in glorious technicolor the steps leading to Knight Capital’s $465m trading loss due to a software bug that struck late last year, effectively bankrupting the company.

The tale has all the hallmarks of technical debt in a…

20 Sep 2013, 14:50

A different kind of app

A different kind of app

The Play Store is an interesting thing, it’s incredibly cheap to have a developer’s account (or two, whoops), there’s no review process to get your app approved in the store, so you could literally get something written, published and delivered within a few hours, if you were motivated to do so. Well, I’ve had this idea for a couple of months now, that I wanted to try out, sort of an experiment, I wanted to make an app for my wife that would take the place of a greeting card. So, I did!

I fell 4 u screenshot

It would be much more personal than a greeting card, since I’d be writing it for her, but it also felt a bit different. One thing about us is that we live across the country from our families. Whenever we’re together and there’s a birthday, or celebration where greeting cards are exchanged, they are usually passed around for everyone to look at. That’s much harder to do when you live ~2,500 miles away. We tend to do our sharing with family on Facebook, greeting cards don’t usually make the cut.

us 10 years ago screenshot

A couple of times, for anniversaries or birthdays, I’ve made greeting cards for her by hand, but this feels a bit different from that too. There’s a lot you can do with the tools that you have at your disposal these days. Sometimes, using them to put a smile on your wife’s face is the best thing that you can spend a couple of hours doing.

I wonder if, in the coming years, we’ll start seeing more of these types of apps pop up. I don’t think that I’ve seen any previously, though I’m sure that this is not a unique idea. I’m curious to know who else has done a project like this, published something that was more experimental than most other apps, or doesn’t really fit into the typical notions of what an app should be.

Here’s the app itself.

20 Aug 2013, 07:57

Chromebook Pixel woes

Chromebook Pixel woes

I need to take a minute to complain a bit about my Chromebook Pixel. In order to understand where I’m coming from a bit, I think that I should explain a bit about the Pixel, and about my impressions prior to buying it. Several months ago, when the Pixel was announced, it was certainly an interesting looking machine. I was in the market for a new laptop at the time that the Pixel was announced, but I was looking mainly at the MacBook Retinas. The Pixel’s specs were OK, excellent display, but a mid-range processor, not a lot of RAM, little local storage, but more than sufficient for delivering a great Chrome OS experience. This was not terribly compelling to me, as a developer who spends most of his time building Android apps.

Then, soon after the Pixel was announced, I started seeing posts on Google+ about crouton, a chroot Linux environment that would allow you to switch between Ubuntu and Chrome OS nearly instantly. The project was maintained by Google, and there were several Google developers who were saying good things about it, and about how they had been mainly using the Pixel for development for some time. I’ve never been really crazy about Mac OS, I really like Linux a lot, but finding a machine with great Linux support is tough. The Pixel was looking like it might be that mythical machine. That was really all the convincing that I needed, and it was much less than the MacBook that I was looking at, so I took the leap. As far as the specs, I figured that a chrooted Linux might be alright on 4GB - even though I need an IDE sometimes.

Right off the bat, I put the Pixel into dev mode, got crouton up and running and then proceeded to fix as many of the niggling issues that the experience presented as I could tolerate fixing. I’ve got plenty of Gists devoted to fixes for crouton on the Pixel, and I have no idea why the crouton setup scripts couldn’t have done these things by default. Eventually, I arrived at something that I thought I could live with. Then I tried to use it.

Don’t get me wrong, when all I want to do is browse the web, Chrome OS is great, and I love using it. It’s perfect, and fast, and is, for the most part, a great experience. It’s also got really good battery life, and it’s great being able to ride on CalTrain from Santa Clara to SF with LTE on the whole way, getting work done, both directions and get home with around 50% battery.

However, when I want to get some work done, I get presented with a bunch of little painful things that I need to deal with on the crouton side. First are the fonts and icon sizes of everything. You can tweak those a lot in XFCE, which is light on memory usage, but you can’t tweak everything. Chrome, itself, has a hard-coded size for its window elements, making the tab labels difficult to read, and the extension icons tough to distinguish - thank science for muscle memory! Worse, is if you want to learn any new interface within crouton, and the icons and assets within the interface are not resize-able, as is the case with Intellij, it makes things really tough. I actually tried switching to Intellij a couple of times before finally getting it, and the biggest issue was that I simply couldn’t read the UI. The key bindings are also not set up properly by default, meaning that you either need to map your own, or deal with some strangeness. The touchpad is particularly bad in crouton, as it’s over-sensitive to the point where you need to basically set it to disable itself while you’re typing, otherwise strange things can happen on the UI. Now, my cursor has given to resetting itself to some random position on the screen as soon as I take my finger off of the touchpad. It is infuriating to the point where I’m starting to consider what my options are.

Again, my complaints are mostly with crouton, and I can deal with those things, for the most part - except the touchpad issues, those kind of drive me crazy. There is one complaint that I do have with the Chrome OS side, and that is that I am experiencing a bug on the dev channel where I get a blank screen for about 90 seconds after I log in. Initially, the team jumped on this and was very responsive, but the last comment was something to the effect of, ‘it’s a dev mode device with crouton installed’, and there was an indication that they should probably bump down the priority since it was somehow my fault.

I would say 'fair enough’ to all of this, except for one thing, this was billed as a developer’s tool. This was the big thing that was given out at Google I/O this year (yes, I have two, and, to be clear, the one that I’m having issues with is the one that I paid for), where the keynote was focused on developers, and developer tools, and when discussing the Pixel giveaway at I/O, Sundar said the following:

The goal behind the Pixel, was literally to design the best laptop out there possible. … Our goal with the Pixel was to get it in the hands of developers, so that they can build the next generation of web experiences.

The goal was to design the best laptop, and get developers using that machine. If they just wanted developers to have access to the platform, well, their lower-end Chromebooks were actually doing a better job of that, since they are incredibly inexpensive. No, the goal was to have developers actually use the thing, and, presumably, develop on it. And, they gave it away at their developer conference, to developers, where there were probably as many Android developers as there were web developers. Given that Chrome OS has no other way of doing real development, to me, this is sort of giving implicit support to projects like crouton, and especially saying that Google is standing behind developers. They should know that we’re going to put it into dev mode (it’s in the freakin’ name!), and install a usable environment on it. As an aside, yes, I’ve tried all of the different web IDEs, and they all suck. Some more than others, but none of them aren’t a hindrance to my workflow.

Where does this leave me with my Chromebook Pixel? Well, I’ve got to do something, I’ve got too many projects that I want to work on not to have a workable development environment. The current setup isn’t working for me, all of those little niggling issues combined together result in a poor experience at best, and quite frustrating at worst. What I’m thinking right now, is that I’m probably going to try dual-booting Ubuntu and Chrome OS. On the Chrome OS side, I’ll probably roll back to the beta channel, and might install a console-only crouton instance. On the Linux side, it will probably be Ubuntu, or maybe Arch. However, I’m at the point where I really don’t want to waste a ton of time playing with my configuration, so if after a couple weeks it still isn’t working out, it’s probably going to land on eBay, and I’ll be looking for Apple to announce a Haswell MacBook Retina.

EDIT

1

The status of the blank screen bug that I reported has been updated to 'started’. That’s somewhat re-assuring. Now I just need to get crouton in shape.

2

Also, to be clear, yes, I realize that a lot of my issues stem from using crouton, and are issues with either Ubuntu or crouton. The main reason for this post was to act as a bit of a catharsis, and to see if others were having similar issues, or if people solved it. Another reason was because I’m frustrated. Finally, I do think that Google should be providing an officially supported development environment on the Pixel - that’s local development on the Pixel, not CRD. Instead, Google seems to be pushing the web IDE angle, which I just don’t think is production-ready.

But who knows, I’ll certainly be trying some different things (including checking out the web IDEs again) over the next few weeks to try to really figure out how to make my workflow sane on the Pixel. If I can’t figure it out, I’ll have to move on.

3

I have noticed that sometimes when I launch crouton when I am resting my hands on the keyboard, where my palms are likely touching the trackpad, is when I have the most issues with the cursor resetting itself. I had this happen this morning, where I logged out, and logged in again with my hands totally off the machine, and it seemed to work. Hopefully that’s all I need to do going forward to not see this bug ever, ever again.

Also, someone else commented on my bug report that they were also seeing the blank screen, but they are not in dev mode. Good news for me, in terms of hopefully getting a fix.

24 Jun 2013, 17:02

AngularJS with IndexedDB using a helper library

AngularJS with IndexedDB using a helper library

In working on my podcast app, podrad.io, I wanted to be able to persist data, so that users could keep their subscriptions between visits, without losing anything, and without my needing to do anything server-side. When I was writing podrad.io, however, my goal was to get something written as quickly as I could, get it out, and then iterate on it as I have time. With those goals in mind, I used LocalStorage for persistence, it was simple, and did the job. Now, I’m going back and looking at what needs to be added or fixed, and the data persistence is top on my list.

HTML5 client-side data persistence

While I’m sure most of you know this already, there are three competing APIs for doing data persistence client-side in HTML5, LocalStorage, IndexedDB and WebSQL. LocalStorage is supported everywhere, but it only allows the mapping of strings, which means that you are serializing and de-serializing data whenever you want to touch the disk. That’s fine for really small amounts of data, but it won’t scale, unless you want to design around this odd constraint. WebSQL and IndexedDB both have support in various browsers, however neither of them are supported everywhere, and WebSQL is being deprecated in favor of IndexedDB. WebSQL is a limited SQL implementation that uses sqlite3 (again, it’s not part of the HTML5 spec, so it’s a non-starter). IndexedDB is an indexed NoSQL object store, meaning that you create a data-store and put your objects there. As I mentioned, IndexedDB isn’t fully supported yet, however there is a polyfill lib that helps here.

IndexedDB

If you look at some code that uses IndexedDB, one of your first reactions will likely be, ‘gee, that’s an unnecessarily verbose API!’ That was my first reaction too. My second reaction was that the code linked above doesn’t work, fantastic. As I was googling around for a fix, I stumbled upon IDBWrapper, a wrapper class for IndexedDB. The API for the wrapper is quite simple, and easy to understand; to me, it’s what the IndexedDB API should have looked like - or at least closer to that.

Sample app

I wrote a sample todo list app (in AngularJS) that uses some of IDBWrapper’s functionality.

Generic bits, index.html and app.js

Starting with the index file:

I cut out all of the redundant, and auto-generated bits, and just left this with the bare-bones for us to look at. There are a couple of interesting pieces here. First, I used Font Awesome for the icon font, I’ve found that to be easier to deal with that Bootstrap’s font, and it scales better. Next, you’ll see that I included the IndexedDBShim, and according to the documentation there, that’s all that I should need to do to use it. However, I’m not sure if IDBWrapper will use it or not, I need to look into that. Finally, I installed IDBWrapper with Bower, so it’s in my components directory.

App routing in app.js:

No surprises here, just your standard app.js file.

Main view and controller

We’ve got two basic parts the input and the display for our todo list. The input is a basic form that populates $scope.itemname in our controller, and calls $scope.addItem() when submitted. The view part simply iterates over the items array and displays the contents of each object, using ng-repeat. We also have a delete button that calls $scope.deleteItem(id) on the list item that we want to remove. Pretty standard stuff.

The controller handles those calls for addItem and deleteItem, as well as does our querying of the data store. Very simply, we start out by initializing the data store, then getting any existing objects within it, and update the view with those. We need to call $scope.$apply() in the getItemsSuccess callback because otherwise, our view does not get updated. Here’s a write-up on why that is. As you can see, the IDBWrapper API is quite straight-forward, and easy to use.

Conclusion

That was all pretty simple stuff, I liked the wrapper, and will probably use it in the future. One thing that I’m not sure on is whether or not it will use the shim if it’s available, and I’ll be looking into that shortly. Full code available on GitHub.

15 Jun 2013, 23:25

Code walk-through of podrad.io

Code walk-through of podrad.io

Over the last couple of weeks, I’ve been learning about AngularJS, and I’ve had this idea of building out a podcast client web-app that I could use to consume podcasts while on my Chromebook Pixel. For those who don’t know, AngularJS is a client-side JavaScript framework that intends to simplify Ajax style web-apps. If you haven’t taken a look at it before, you might want to head over to their site and click through the tutorial or at least look at the getting started page. In this post, I’m going to walk through how I did this, with a focus on the code. I’m not going to post a step-by-step, but I’ll attempt to give you enough code to be able to figure out what’s going on.

Why?

I listen to a lot of podcasts, and have been disappointed that there wasn’t something in the Chrome web store for this already. While I know that there are a couple of web-app clients out there, I haven’t found one so far that I’ve really liked. So, I decided to build my own.

After about 24 hours of work, I got to a point where I thought that I could push it up to my server without getting hate-mail. I deployed it and it’s going ok so far. I’ve been able to use it a little bit to listen to a couple of episodes, and it seems to be working for me.

Prerequisites

You’ll need to have a few things installed before getting started:

  • NodeJS (and NPM)
  • Yeoman
  • Grunt
  • Bower
  • Compass (requires Ruby and Gems)

Follow the instructions on the Yeoman project site for getting the prerequisites installed.

Generating the project

Again, check out the Yeoman project site, but basically, all you need to do is yo angular:app inside a directory to have it generate a new project for you. However, for the purposes of this post, just go ahead and clone the podrad.io github repo. (At the time of this writing, the current commit is 10f18e9.)

Onto the code!

At a very high level, there will be a couple of files that lend the most structure to the project, those are the index.html and app.js files.

index.html

The index.html file is just what you’d expect it to be, it’s the starting point of the app. Here’s the index.html file from podrad.io with all of the auto-generated code stripped out, and just the important changes left in:

The first thing that you’ll notice is that I added a CDN source for Bootstrap and Font Awesome. I did this for a couple of reasons. First, you sort of get Bootstrap by default when you generate an AngularJS project with Yeoman and accept all the defaults. It’s also quite useful for providing some basic styling, especially if you’re like me and are allergic to CSS (not that I dislike it, I’m just bad at it). Font Awesome is used because it provides vector images, and I have a really high res screen. CDNs are used for a couple reasons, first, it’s better for client caching. Second, because I couldn’t figure out how to properly compile my scss files, and just wanted to get things moving along.

Next in the index file are a couple of AngularJS directives, ng-app and ng-view. These tell AngularJS about the scope, and what it’s supposed to control, ng-view is controlled by the routing in app.js.

You can also see that I added a few extra libraries to help me along. One for angular-bootstrap, which provides the accordion effect on the single pod view. Another called X2JS, which parses XML into JSON format. And, finally, an MD5 library, so that I can easily make hashes of things. That’s basically it for the index.

app.js

Moving on to app.js, mine is very simple, there’s very little routing that needs to happen here (as of now). Basically, we just want to use the main view for everything, and while it’s defining a controller, that controller doesn’t actually get used. That’s an error, and I’ll probably refactor that out.

Main view

The main.html file simply pulls in additional views and defines controllers for those views. It also declares that the second view, onepod.html is not visible if there is not a podId in the scope.

Pods

In pods.html, we can see a couple of input fields being defined and bound to models in the scope. When the button is pressed, the addPod function in the controller is called, defined by ng-submit. Then, in the next chunk, we display all of the podcasts that the user has subscribed to, and provide a couple of simple actions that the user can take (either select or delete).

To generate the list of podcasts, use ng-repeat="item in Array". Filtering the list is easy too, I’m filtering based on the contents of the search box, and also sorting the list on the fly.

In the controller, all of the work is done to populate those models with content, or handle the content coming in from the view when the user wants to add a new podcast. We also provide a few default podcasts for casual viewers, just so that they have something to look at if they find the site and are utterly confused.

One more thing to note here is that I’m using the LocalStorage HTML5 API to persist data. I reviewed and implemented about a half dozen different solutions before choosing this one. I found issues with nearly all of the other solutions that I had tried, most of them being either lack of documentation, lack of development or poor browser support. While it may not scale well, LocalStorage was what I needed to get me up and running.

OnePod

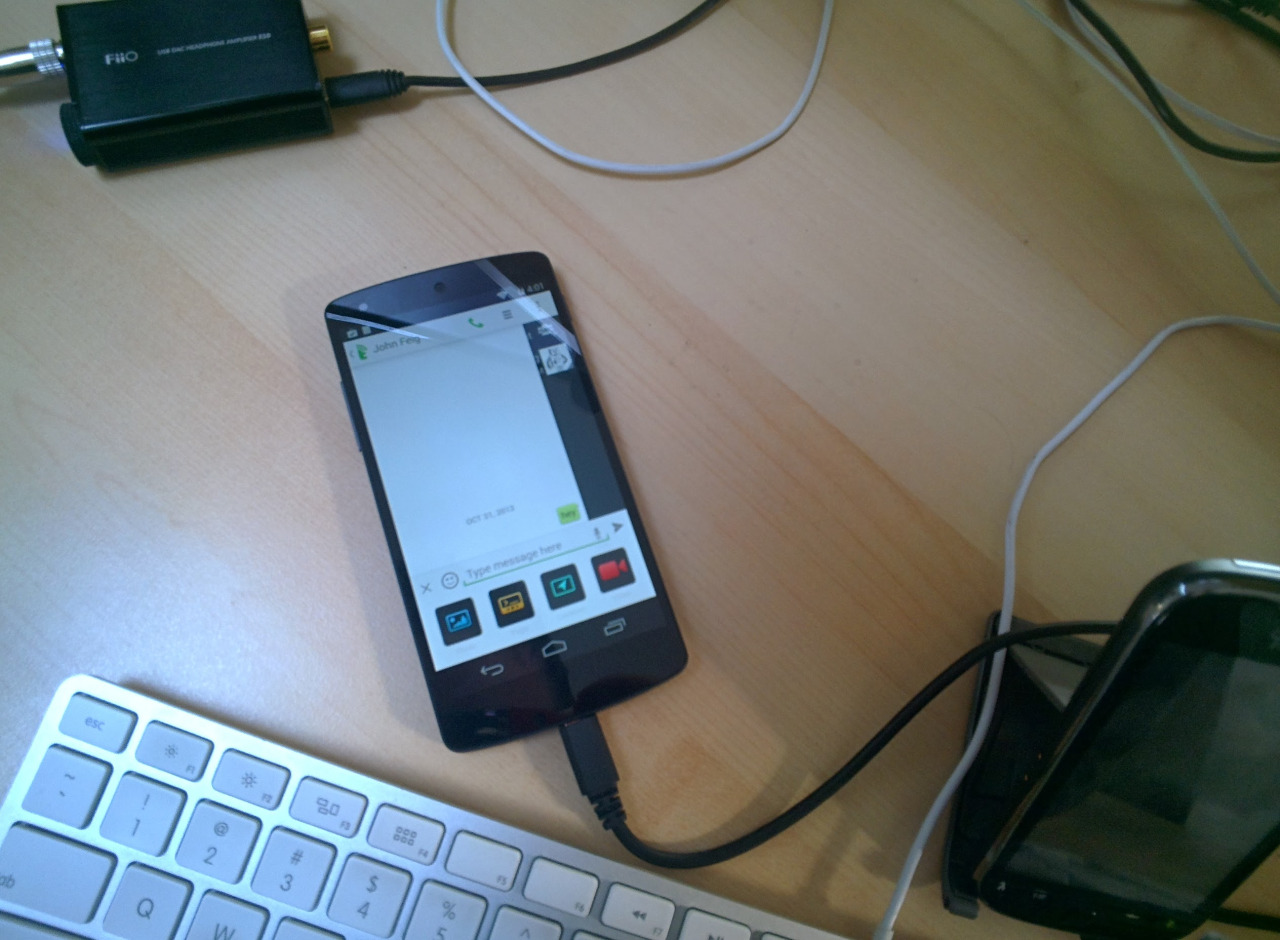
When the user selects a podcast in the pods view, the onepod view comes alive and displays some basic information about the podcast, along with a handful of the most recent episodes. Users can change the number of episodes they see by entering a number in the input box and clicking the reload button.

I mentioned that I was using the accordion element from angular-bootstrap, and you can see that here. What’s also done here is the parsing of the podcast feed data. Since I’m able to iterate over an array, it is easy to simply pull out the bits that need to be displayed from the JSON provided. This means that I don’t need to write a separate parser, I can do that straight in the view.

This script is a bit more interesting, and uses a couple of libraries, and has an interesting work-around to a problem I ran into. First, X2JS, podcasts are defined as an XML standard, related to RSS. JSON is a bit easier to manipulate than XML using JavaScript, so I decided to use X2JS to do the conversion for me.

When I started out trying to parse the feeds, I was making the request straight to the podcast feed url, and parsing it from there. This worked fine for the first feed that I tried, since the HTTP response headers were set properly, allowing cross-site requests. Another provider, however, had failed to set that header, and my requests were failing. After searching for a bit, I landed on a service that Google offers to make this sort of request easy, and AngularJS provides some hooks to make it even easier. The strategy is that you call the Google service with your feed location as an encoded uri argument, and also provide a standard callback to Google. In AngularJS, you can use the JSONP HTTP request, and everything works well.

One cool feature about the Google service is that it can translate the XML response into JSON for you. However, podcasts contain certain elements that the Google service didn’t handle, namely their media. So, I had to get the results as XML and then do the conversion with X2JS.

Gotchas

I was having an issue trying to compile this app for deployment, something about .jshintrc getting an end of file error. The problem was that Yeoman does not to auto-generate a .jshintrc, even though Grunt requires that file for compilation. I eventually got a working .jshintrc built, however it doesn’t seem to be correct, or it might be ok, and my Grunt config file is screwed up. The issue that I’m seeing is that my scss stylesheets are not being compiled into CSS for deployment.

Conclusion

I think that about covers it, at least for the code aspect. I’m planning to continue building out this project, hopefully as I discover issues as I use it. Overall, I really enjoyed building this, and while there were some pain points along the way, I’ll be using AngularJS again in the future.

14 Jun 2013, 06:44

podRad.io

podRad.io

Last weekend, I decided to try an experiment. I wanted to see how long it would take me to write an MVP podcast client web-app, using AngularJS. Now, I had never written anything with AngularJS before, and had only done some basic reading on the subject. It took me 20-24 hours to write what I’ve got now. PodRad.io is a very simple podcast client, which allows you to subscribe to various podcasts and consume them. Here’s the source on github.

For the most part, working with AngularJS was a good experience, very easy to learn, and within a few hours of starting, I was already parsing xml feeds and playing audio. I spent a few hours on mucking with tools, wasted some time trying to use Intellij (went back to vim after about four or five hours), and spent a decent chunk of time on layout and styling.

Most of the functional stuff was very straight-forward, with a few exceptions. Documentation is ok, but not the best, and there’s clearly a lot to be desired in the current state of data persistence on the web (I ended up simply serializing my data). The suggested tooling was also a bit frustrating, since some critical components lack basic documentation. Overall, however, it moved along much faster than I could have done without the framework.

20 May 2013, 01:10

When IDEs change, I give up and use vim

When IDEs change, I give up and use vim

As you may have read, Android is switching its main IDE from Eclipse (ADT Bundle) to Intellij (Android Studio). While I was at Google I/O this past week, I decided to stop by the JetBrains booth and talk to a couple of the reps about what Intellij offers, as I’ll probably be switching, at least for Android development.

Android Studio is Intellij 13

From what they said, Android Studio is basically Intellij 13 (which is currently in preview mode), with some features removed or turned off. If all you want to do is Android development, Android Studio will be a good fit. If you want to also work on some server-side Java stuff, you might want Intellij Community Edition. If you also want things like JavaScript support, and other languages, you may want to opt for the $199 Ultimate.

My workflow

I like to play around with a lot of different languages and frameworks. I like trying new things, but I don’t necessarily want to build large projects with them. I also don’t want a dozen different IDEs to learn and to need to do big context switches between projects. Currently, for any non-java stuff, I spend most of my time in the command line, using vim, and managing workspaces with tmux. For Android and other Java projects, I do use Eclipse, and will probably switch over to Intellij. I have recently played around with IDEs for Clojure (LightTable) and Go (LiteIDE).

I’m really not sure that I want to spend $199 (likely annually) for a tool that may or may not end up helping me more than the free version. I also don’t want to have a dozen different IDEs to manage.

Vim

I decided that instead of leaning on a large IDE, I could probably get most of what I need from vim. I started googling around and found that there are plenty of plugins that will allow me to do code-completion in vim for most languages. There are a few other things that an IDE might buy me, but this is the biggest one. Since all I need is command line access, and this is already a major part of my workflow, this seems like a winner. I’m hoping that by really learning vim, that I can escape the pull of most IDEs, and be more productive in the command line.

My new setup

Here’s what I’m installing:

You might notice a comment in there above the YouCompleteMe bundle line, which says that you’re going to need to likely compile and install vim from source to get this working. So, that’s what I did.

Compiling and installing vim

This was a bit more difficult than the docs on YouCompleteMe’s github page suggest. Mainly, because you’re compiling against vim’s development repository, you might run into a broken build. Luckily, it is rather simple to update to a different commit in the repo, recompile and try again. If you run into this issue, I suggest going to the repo yourself, and picking out a version to try, as opposed to using the one that I’m supplying. There are no guarantees that the one that I picked is good for anything other than fixing the one issue that I ran into.

Installing vundle

Now, you can get vundle, and all your other bundles installed in one go:

Installing YouCompleteMe

There’s a component of YouCompleteMe that needs to be compiled and added. Here’s how you do that:

Installing ctags

Ctags also need to be compiled and installed:

Conclusion

I know that I didn’t go through all of the plugins that I chose. Maybe I’ll do that in another post. We’ll see. Getting this far on one box took me long enough, first researching, then working around the issues that I ran into with my initial attempts at a compiled vim. Already, the auto-complete provided by YouCompleteMe looks interesting, and I’m excited to try out some of the functionality offered by the other plugins.

One nice thing is that all you need to do to get rid of any of these plugins is to simply delete the directory from ~/.vim/bundle/ and remove the bundle entry from your ~/.vimrc.

03 May 2013, 16:44

Cloud 9 SSH Workspace issues

Cloud 9 SSH Workspace issues

Recently, I decided that it would be a really cool thing to have access to a nice Cloud IDE that I could play around with. I landed on Cloud9 IDE, using an SSH workspace.

I had a bunch of issues trying to set up an SSH workspace on Cloud9 IDE, mainly due to using nvm (nodejs version manager). I started out getting these really strange hash mismatch errors. With some help from Cloud 9’s support and development teams, I was able to get it up and running.

Cloud IDEs

I checked out the options and came back with either Cloud9 IDE or Koding. Koding is pretty cool, there’s some really neat and interesting stuff that they’re doing, and as a web-app it’s very, very responsive, but it’s also very much still beta. There are just certain things that you can’t do with it at this point. Cloud 9, on the other hand, has been around for several years. I’d wanted to use it on my tablet, but due to the text editor, Ace, not working with touch screens, I wasn’t able to use it. Now, with my Chromebook Pixel, the time is right to see if I can get some use out of it.

SSH workspaces in Cloud 9

One thing that really caught my eye about Cloud 9 is that they give you one free private workspace, and they have the option of using an SSH workspace. This is perfect for me, because I have my own, quite powerful, development server that I could use. It’s awesome because I can install whatever runtimes, compilers or environments I want, use C9’s nice interface for editing files, and then use the provided terminal for running the project. You can even use tmux in that terminal, though tmux support is not great. (CTRL + b in the terminal puts you into this strange ‘File Revisions’ mode in the editor. I’m a bit concerned that certain shortcuts in the terminal might do unexpected things in the editor.)

NodeJS and nvm

Before I had started with trying to get Cloud 9 connected to my machine, I had installed nvm, since there are times when you need to have different versions of nodejs installed, as required by certain projects or certain tools. I figured nvm would be an ideal solution, because it manages all that for you, and you can install whatever version of node you feel like.

Attempting to build an SSH workspace

Initially, I when I started out with this, I figured that I could use nvm to have a few different node versions running, without causing a huge headache. There were some problems, where I had to go in and modify the output of nvm to get it to spit out the version number in the proper format for Cloud9 to read it. (I’m not going to include that config, because it ended up not helping.)

First issue - hash mismatch

I had to modify nvm.sh to print out only the version number when setting the version, so that Cloud9 could properly parse the response. Now, I’m on to the next step, of trying to create an ssh workspace, and here’s the error that I get:

I had no idea what this meant, aside from perhaps it checking the node binary or something? Regardless, Google is not being helpful here, so I fired off an email to Cloud9’s support team. They came back and suggested not using nvm, at all, and instead using a regular install of nodejs.

He also said the following:

> We don’t do any checksums over the node binaries but we do checksum the packets we send over the wire. This means two things: > > 1. The ssh connection was established successfully > > 2. Somehow the communication with the node agent running on your VM get corrupted

I think that nvm’s spitting out the 'v0.x.xx’ all the time was perhaps causing some problems.

Next issue - bad gateway

I decided to build node from source, and install it locally, since I still wanted access to nvm. When I did that, I got the following error:

The developer helping me out had suggested using either node v0.6.21 or 0.10.5, and the version that I had built was 0.11-pre. Ok, time to try something different. I belw away the 0.11 that I had built, and modified my bashrc to alias node as the binary provided by nvm:

I also set the path explicitly in Cloud9’s workspace setup as the same path:

This combination did the trick, and I was able to get my workspace set up, and start coding! (Actually, I haven’t started being productive yet, I decided to write this post first.)